

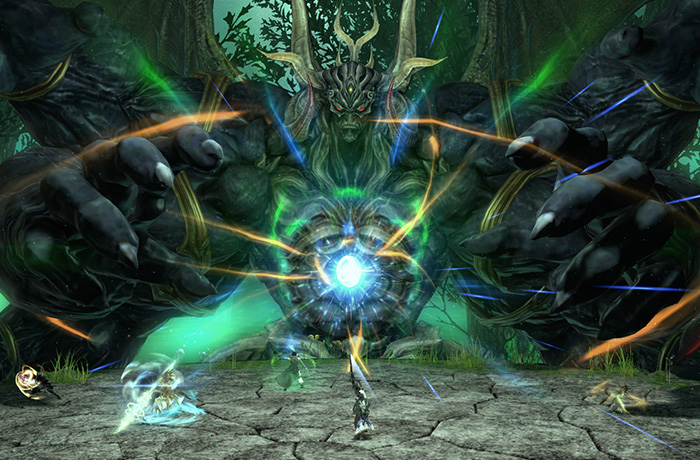
Containment Bay S1T7 is the new version of Unreal Trial encounter, introduced with the 6.2 patch. Unreals are not supposed to be a joke anyway, but this particular Trial may prove challenging if this is your first time progging Sephiroth on Extreme difficulty, not to mention being on a minimum item level which makes it a pretty scary fight. In this guide, I’m going over everything you need to know in order to beat the boss in a quick and easy way!
Before we begin discussing Stage 1, I’d like to address some of the pre-pull prep. If any of these terms seem unfamiliar or confusing to you as you’ve never done the fight before, make sure to come back to this section after reading the rest of the guide, as I promise it will be more clear.
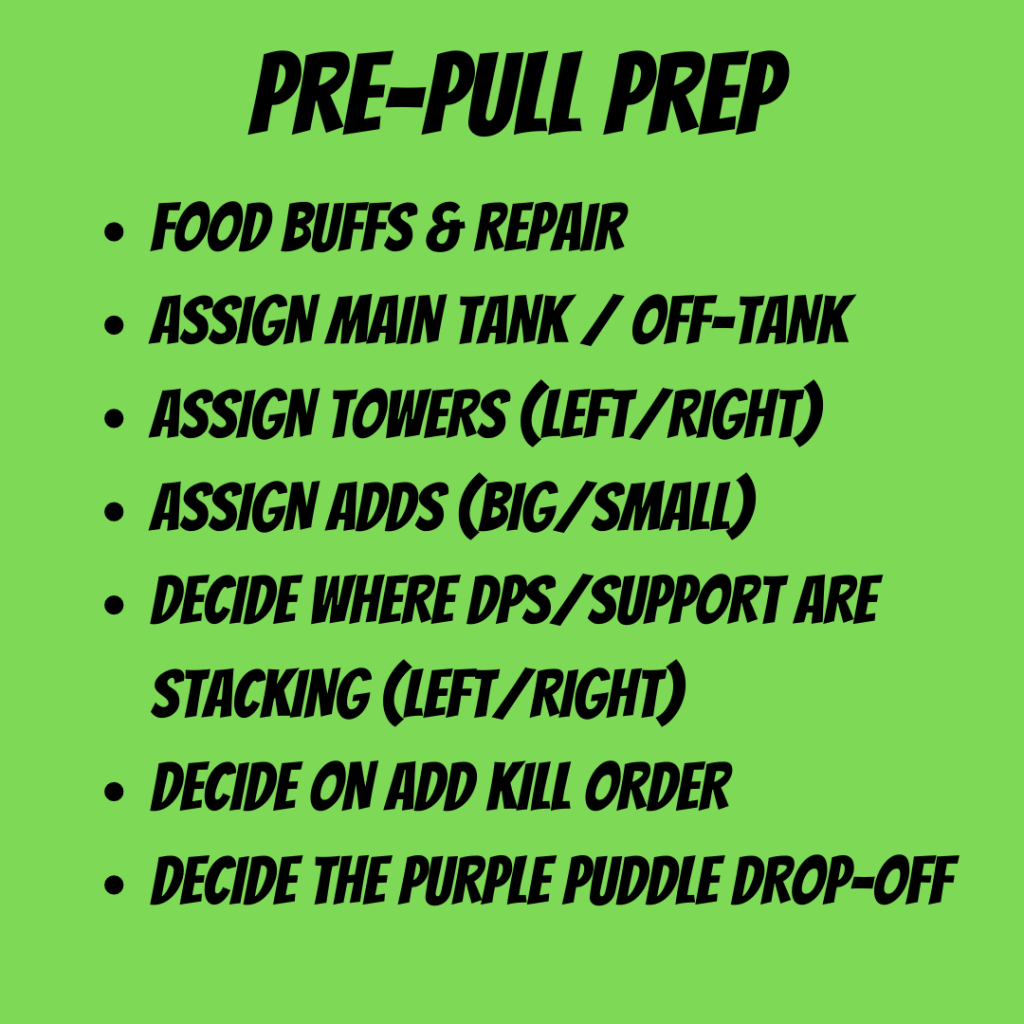
It would be super beneficial to use food buffs for this encounter as you need every bit of help and survivability you can muster, and you should definitely repair before pull and mid-prog. If you’re a tank, talk to your co-tank and decide who’s the main tank and who’s off-tanking. This is important because only the main tank should stand in front of the boss in the first stage, and the main tank is the only person not participating during the Fiendish Rage. Talk to your co-tank about who’s taking the left tower and who’s taking the right one in phase 3, as well as who should take the big ads, and who’s left with the smaller ones. The whole group should agree on where the 4 DPS should stack during Fiendish Rage, and 2 Healers + the off-tank should stack on the opposite side. So, if the DPS are taking the left side looking out of the arena, the support group should take the right side looking out. You also need to agree on an add kill order, as the whole group will likely wipe from the excess of damage if you kill all the ads at once. Finally, it’s a good idea to address where the purple puddle will be left, which is either under the boss, or to the edge of the arena, but more on that later as well.
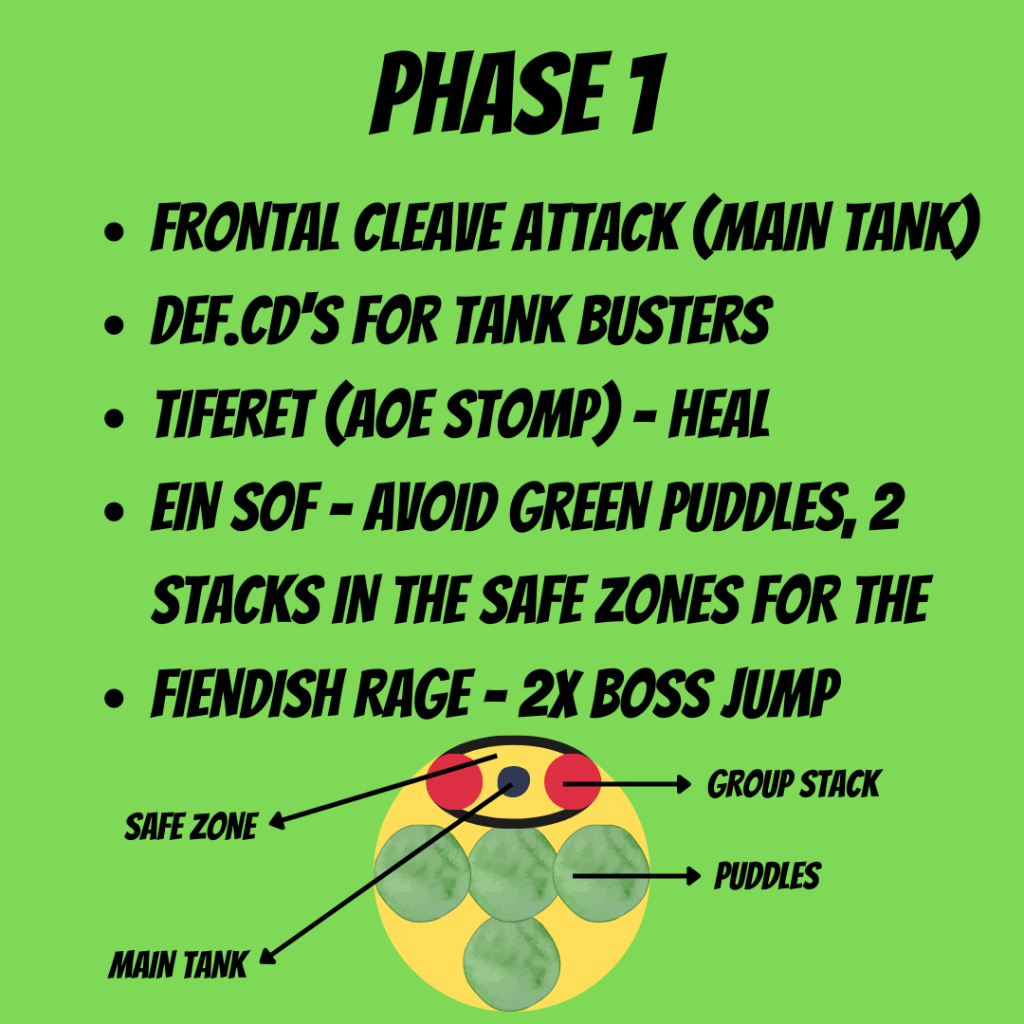
Now, let’s move on to Phase 1. When the encounter starts, the main Tank will pull the boss, turn it away from the party and tank him in the middle of the room. Almost immediately, there will be heavy incoming damage from the frontal cleave attack on the main Tank, which does medium damage, but you should pop your defensive cooldown to make healers’ lives easier. The actual tank buster is Chessed, which does a lot of damage and requires cooldowns and shielding. It doesn’t have a cast bar, but there’s a 5 second animation where the boss is preparing to hit, so you have to pay attention and stay sharp in general. There’s also Tiferet, when the boss stomps the ground and does arena-wide AoE damage. These almost always come two at a time, 5 seconds apart, so healers should be ready for that.
The next ability is Ein Sof. During it, green orbs will spawn on the ground, which turn into slowly-expanding puddles. If you step in one of these puddles, it will do a lot of damage and apply stacks of vulnerability. The first time it happens in phase 1, it will spawn a set of four orbs in a plus or cross pattern with one orb missing. These puddles will grow so the party must move to a safe area where there aren’t any puddles. The main tank needs to pull the boss into the safe area and position themselves between the two stacking groups that I’ll go over next.
This mechanic is called Fiendish Rage. As you’re hopefully in the puddle-free zone, there will be two stacking indicators that go out. One of them will go on a random DPS, and the other will go on a random healer. After 5 seconds, the boss will use Fiendish Rage (which is his jump) on one of the targets, then jump again to the second target. Damage can be split between players, so you need to stack, and already know where each group is going to stack so that there’s no confusion mid-fight. Getting hit by the Fiendish Rage will give you vulnerability, so a player mustn’t get hit by both AoEs or they will instantly die due to the vulnerability from the first one. To deal with this, you’ll need to divide the party into the two groups I mentioned earlier: all 4 DPS in one group, 2 healers and off-tank in the other one. The main tank should not get hit by either stack because the physical vulnerability will be difficult to heal through, so that’s why it’s important to give them enough space between the stack groups to stand on. As soon as the green puddles fade, the main tank needs to reposition the boss in the center of the room.
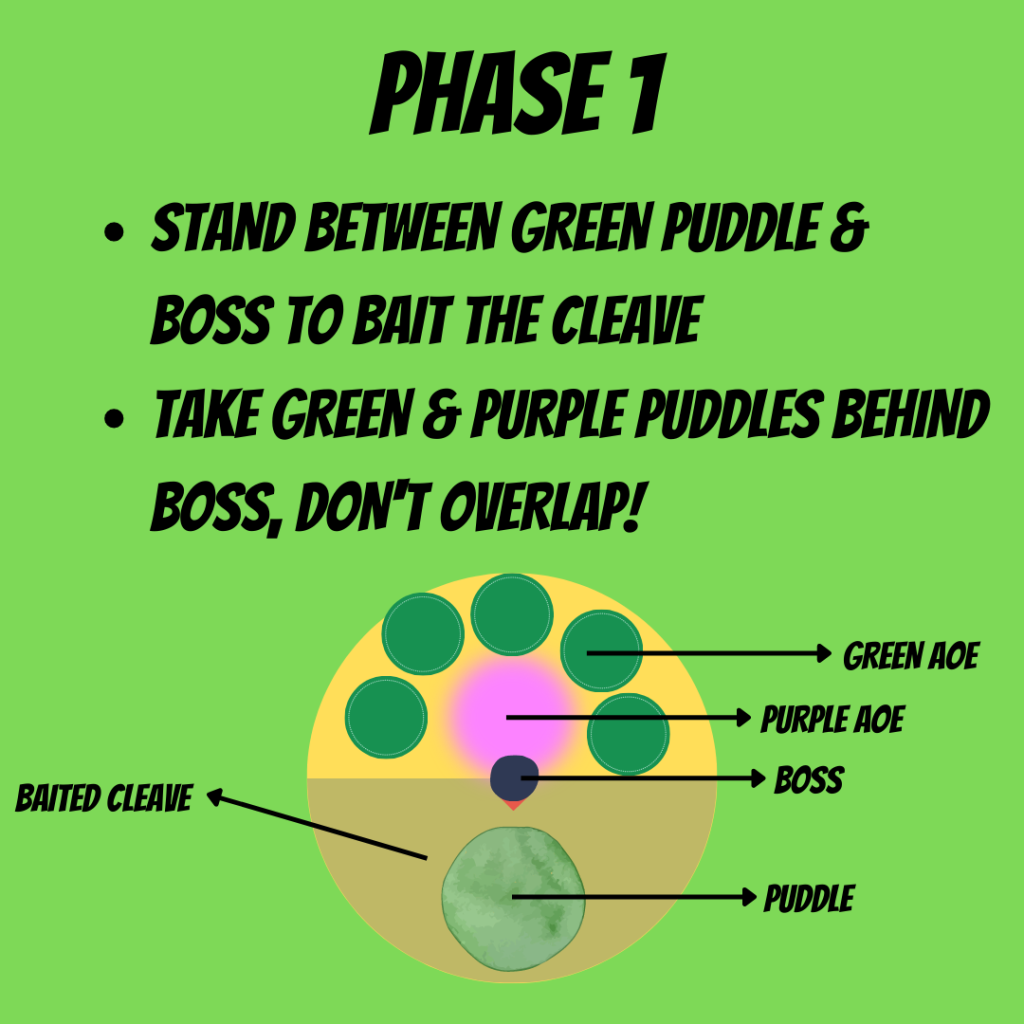
Next, we’ve got two mechanics that go out at the same time, Ain & Ratzon. This time, a single green orb will spawn slightly off-center in the arena. The boss will prepare to do Ain, which is a 180 degree cleave attack focused on a random player – but not the main tank – and then around the same time 6 players will get an AoE indicator over their heads. In order to deal with these mechanics, you must start by baiting the cleave to the half of the arena where the green puddle is growing, standing between the boss and the growing puddle. This leaves you with the other half of the arena to deal with Ratzon. The boss will target six random players in the party, so five players will get a small green AoE. and one of the players will get a larger purple AoE. Everyone needs to spread out for Ratzon, and there’s not a lot of time so hurry up. This is the purple puddle I previously mentioned you should talk about before pulling, as some people like to drop it right under the boss’ but, and sometimes, the purple puddle goes all the way to the edge of the arena, so make sure you know where to go or not to go. All of the Phase 1 mechanics will be repeated until the boss reaches 65% HP, which marks the beginning of Phase 2.
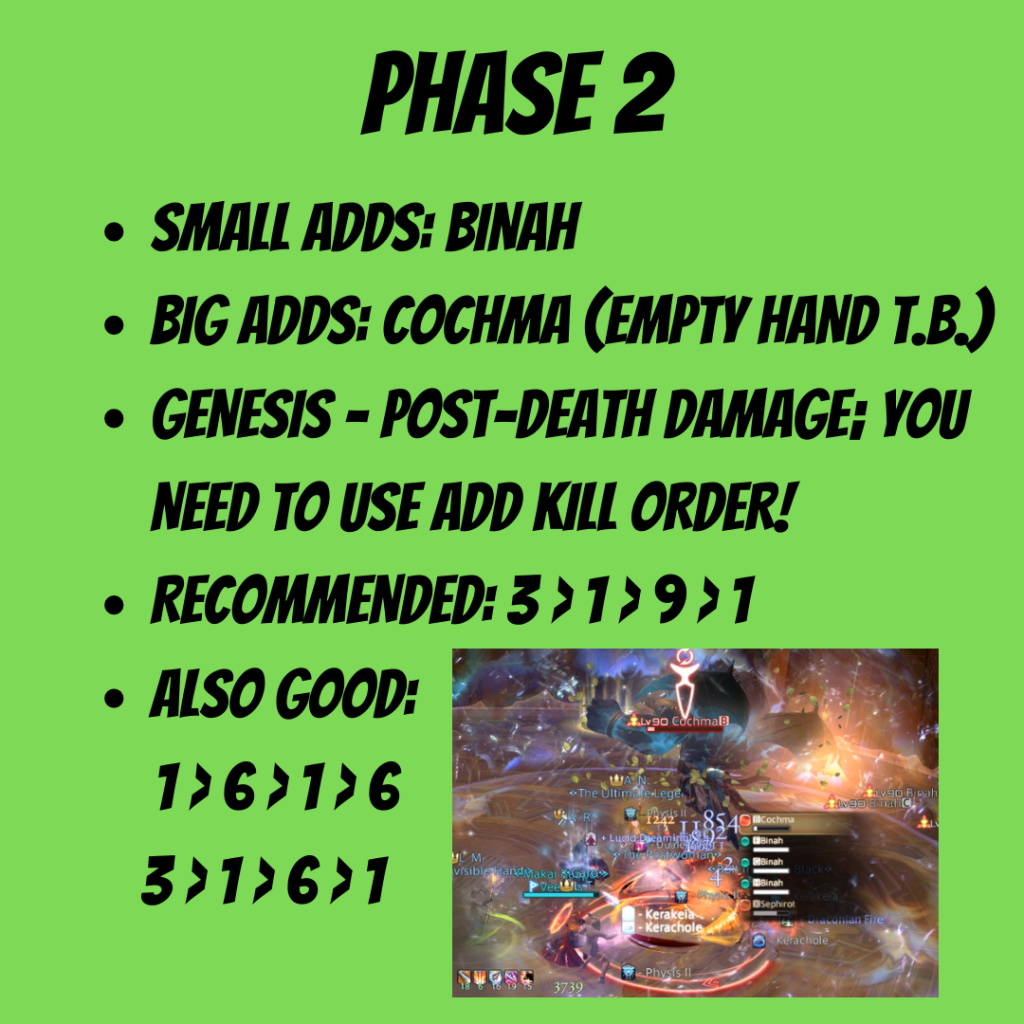
Phase 2 is the add phase on the fight. The boss will become untargetable and will walk to the side, leaving a bunch of adds for you to deal with. The small adds, usually picked up by an off-tank, are called Binah, and the large ones are Cochma. Binah spawn 3 at a time, while there’s only one Cochma at a time. Genesis is the damage that’ll happen as soon as an add dies. Binah’s Genesis only does a bit of damage, but Cochma’s Genesis does a lot more. Also, Cochma will do a mini tank buster called Empty Hand every 10 seconds so you have to be careful with timing the add deaths, as your tank has the potential to drop dead. Because of this, you do not want to kill any Binah at the same time as killing a Cochma. To help with handling the damage, there is usually a kill order that everyone will agree upon at the start of the fight. This will vary from group to group depending on preference. Generally, the safest and easiest method on healers is to do a 3 > 1 > 9 > 1 kill order, meaning 3 Binah, 1 Cochma, 9 Binah, and then the last Cochma. Other common preferences are 1 > 6 > 1 > 6 and also 3 > 1 > 6 > 1, but you can experiment and find the one that suits you best if you’re struggling. Phase 2 will end once all the adds are dead, and we’re entering the infamous Phase 3.
Phase 3 starts with Ein Sof Ohr, which is kind of like the boss’ “limit break”. It doesn’t really do much damage if you shield ahead of time, but if you don’t, oh boy. This is the phase that gets tricky, so while progressing through it, focus on executing one mechanic at a time and you’ll eventually get through it. The fight is not that hard once you understand the last stage, but it takes a while to get the hang of it as you only get to practice after a 7 minute intro into it.
The only mechanic you have to be thinking about all the time is Yesod. It has a 3 second advance animation which shows up as a yellow splash on the entire arena floor. As soon as you see it, all player positions are snapshotted, and stony pillars will rise in those positions. You have to move away from your previous position to avoid being hit, and don’t walk into anyone else’s previous position while at it. It’s easy if the whole party stacks up in one spot before Yesod so that all 8 pillars are baited to a single spot, which you need to do as soon as the Phase 3 starts, but later on, it gets chaotic and you’ve got to pay attention. If you get hit, you’ll have a damage reduction debuff and will take some damage yourself, too. This will be happening throughout the fight, so be aware of it at all times.
Right after the first Yesod, players will be given debuffs. Four players will get Force Against Might and four players will get Force Against Magic. The Force Against Might gives heavy resistance to physical attacks, and Force Against Magic gives heavy resistance to magical damage. You’ll know what you have by looking at your own buffs, and if you see the yellow one, you’ve got The Force Against Might, and if the debuff is green, you’ll have Force Against Magic. The tricky part is that you’ll receive more magic damage if you’re resistant to physical damage, and vice versa, and that’s what a lot of mechanics revolve around.
The next mechanic is called the Life Force / Spirit. Sephirot will hold his hands out over the arena with a green orb in one hand and a yellow orb in the other. The boss will slam the ground and the half of the arena that had the green orb over it will be dealt magical damage called Spirit, while the other half with the yellow orb will be dealt physical damage called Life Force. You must stand on the same-colored side as the debuff icon you have if you wish to live.
Also, there will be some points in the fight where Life Force / Spirit will happen while you have no debuff at all. In this case, it doesn’t matter which side you stand on because both will do equal damage. When you have no debuff, it is recommended to stack in the middle to receive AoE heals from your healers – you can’t be hit with both at the same time, so don’t worry about that.
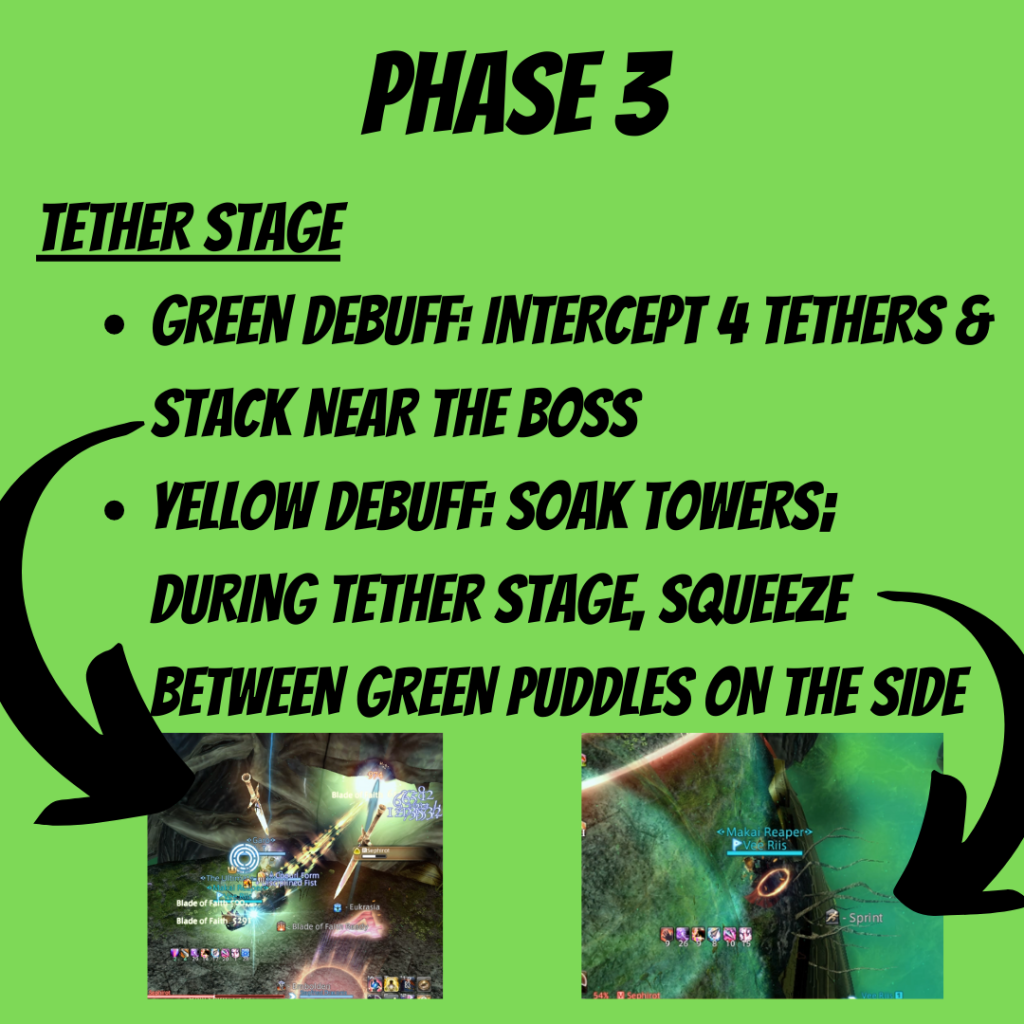
After Life Force / Spirit, four tethers will go out. They will target the four players with yellow debuffs and will deal a ton of magical damage called Da’at if the tethers remain on them. Players with yellow debuff cannot take the magical damage as it’s a one shot, so the green buffed players need to stack close to the boss, pick up the tethers and stay there, while the players with the yellow damage should move to the sides of the room. The reason for that is because four green orbs will appear that will then drop into the slowly-expanding green puddles. You can fit in between ANY two green puddles, but some will be a tight squeeze, so be sure to not fall off the cliff!
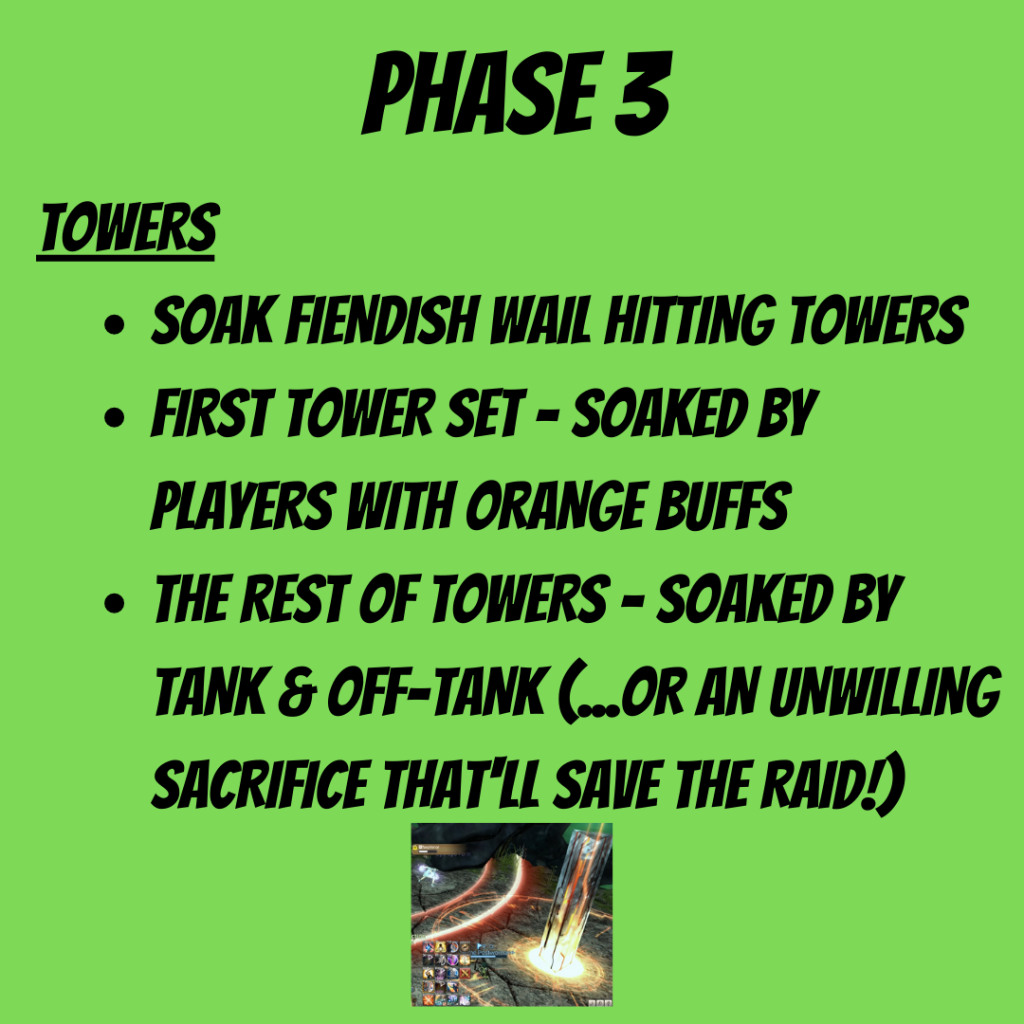
Now, let’s talk towers, which is one of those pre-assigned things I mentioned earlier. Two towers will spawn, one on the top left and one on the top right of the arena. There must be at least one player in each tower that gets hit by Fiendish Wail, which is the damage that drops on them 5 seconds after the tower spawns. If a tower happens to be empty when it is hit by Fiendish Wail, it will explode and do a ton of AoE damage and will essentially wipe your group. The first set of towers that spawns is during the tether stuff, so during this time, some players will still have the yellow debuff that makes them invulnerable to Fiendish Wail damage. For this set of towers, players with yellow debuffs should get in these towers and soak their damage. During all other points of the fight when towers go up while there are no debuffs, the main tank and the off tank will need to get in the towers to soak them. If one of them is dead, someone will need to jump in the tower to sacrifice themselves. If your tank is dead and you don’t want to sacrifice anyone else, I suggest resurrecting them as soon as possible so that they can run straight into the soak.

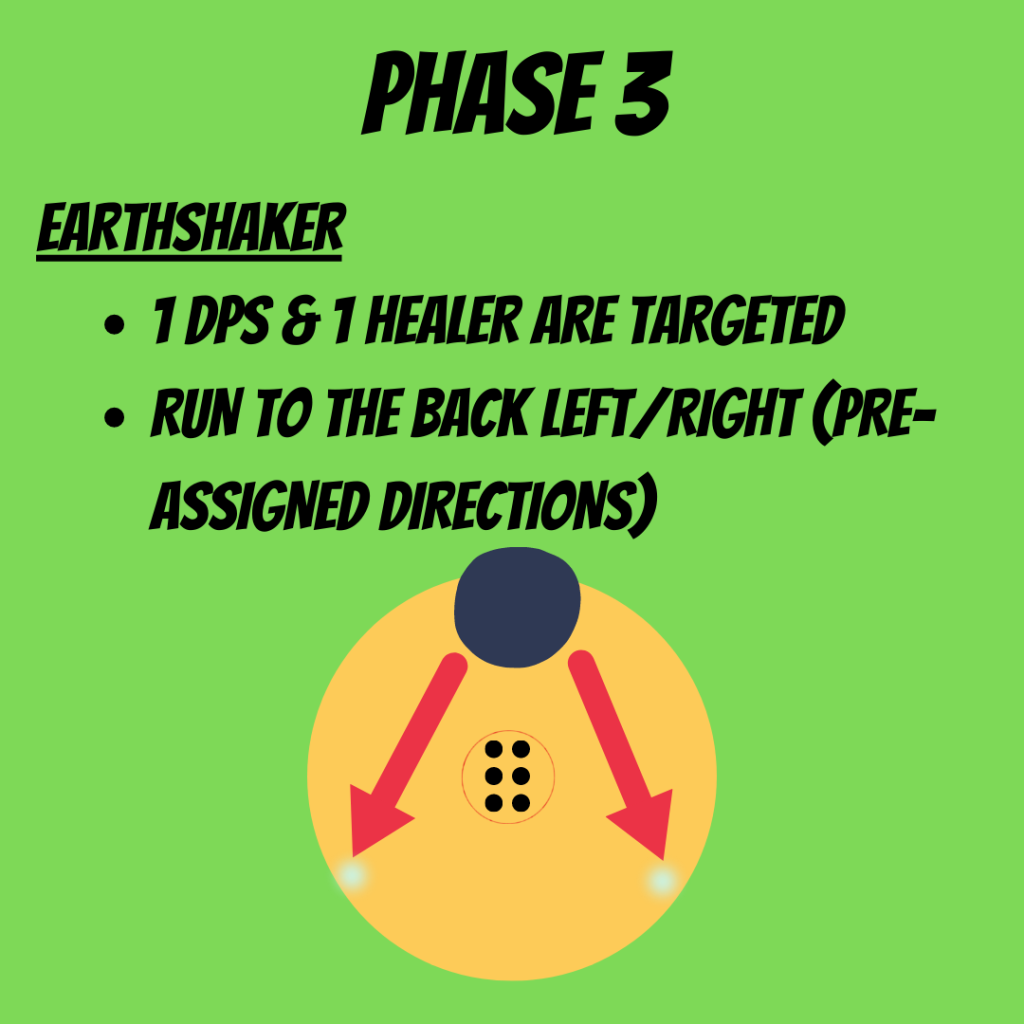
Then, we’ve got the First Earthshaker. The damage done is proportional to the distance from Sephirot, so the further you are, the less damage you’ll take. There will be two players targeted by Earthshaker – one will be a DPS and the other will be a healer. Before the fight, DPS and Healers should already be assigned sides, so the player targeted by Earthshaker will know which way to run – either southwest or southeast. The rest of the party should stack in the middle. Right before Earthshaker damage goes off, a yellow snapshot will happen, so you need to wait about 1 second and then move and hopefully survive.
At this point, some mechanics will repeat. Here we’ll see another round of Da’at, so make sure everyone is spread out. This one is a bit different than the one that happens along with the tethers, as the damage from this one will be significantly increased on anyone holding the aggro, hopefully the main tank. Make sure the main tank is healed and shielded for this. This will be followed by Fiendish Wail, Da’at, Life Force / Spirit, and the next Yesod bait, so be sure to have those down, and have the main tank shielded for the Fiendish Wail as that one will hit them hard.
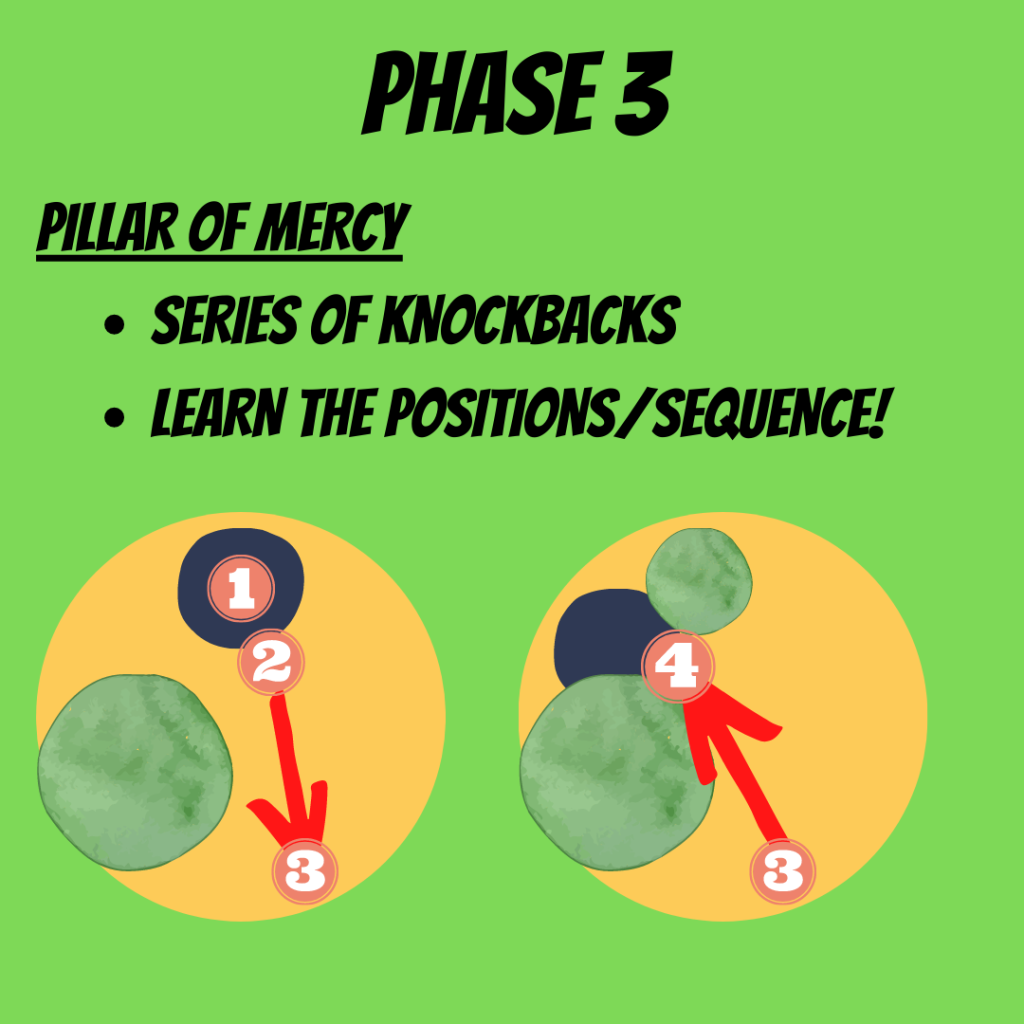
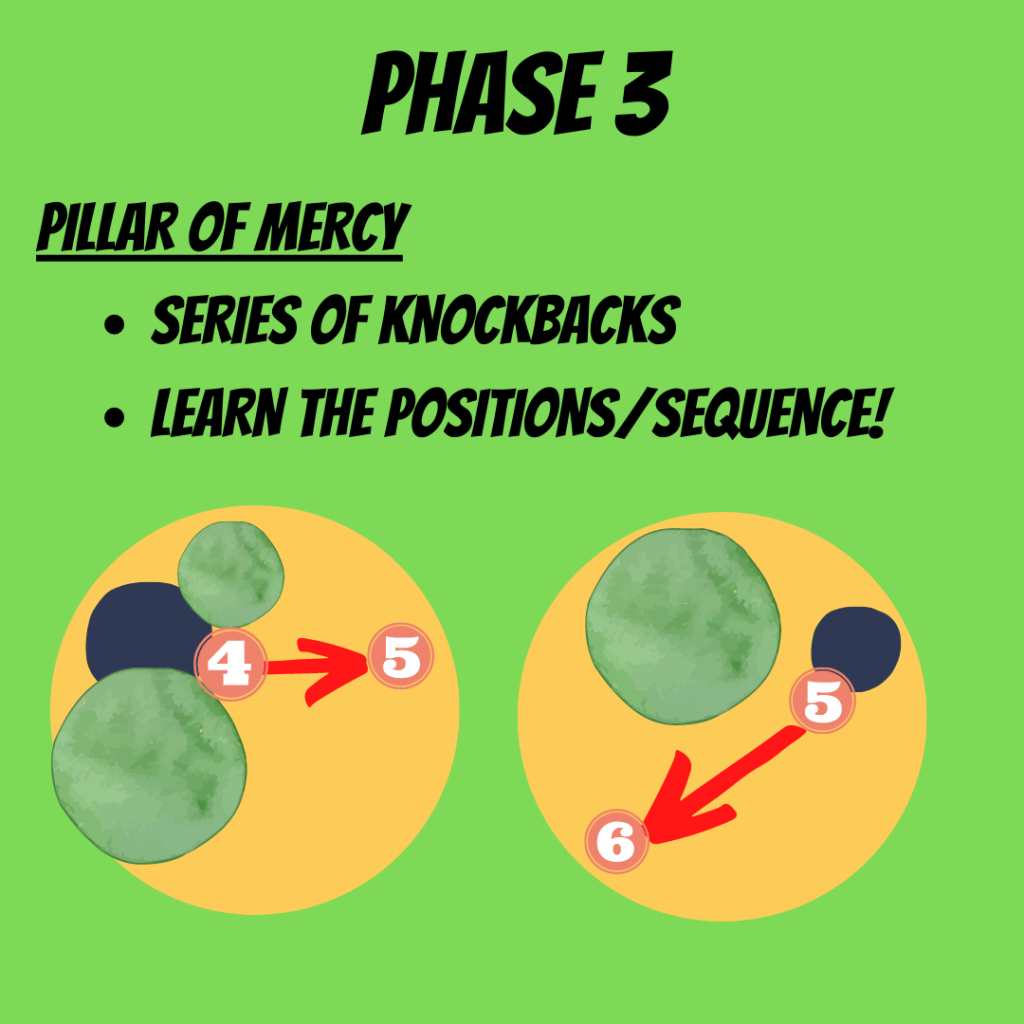
The next one is Pillar of Mercy, and do expect some wipes here until you practice and see it for yourself. The mechanic looks complicated, but it’s quite simple once you get the hang of it. Pillar of Mercy will need the party to run and stack in a few different locations in order to not get yeeted off the platform as there will be knockbacks. Once you know the locations, it’s very simple and there’s no guessing or RNG involved. So what happens is a blue puddle appears on the ground, and Sephirot will smash that puddle which causes a knockback relative to that location. Along with the first blue puddle, there will also be spikes to bait, and you should do that within the puddle. Also, there will also be expanding green puddles that you should avoid stepping or being knocked back into. This will happen three times with three different blue puddles, but the order and location of the knockbacks are the same every time so it’s very predictable. It’s a good idea to set up stack markers at the beginning of the fight and learn the sequence of movements ahead of time, but if you need a bit of time to get it down, that’s also fine.
After this, the Second Earthshaker will happen, but there will be no spikes to bait this time. This is followed by a combo of Da’at and Yesod, so spread out in advance. This is the only time during the fight that you can’t stack to bait the spikes, and it can get messy, but for as long as you don’t run into anyone’s snapshotted position, it’s all good. This will be followed by another Towers and Fiendish Wail, so the tanks should be prepared to take them alone. Everyone else needs to stack in front of the boss to get ready for knockback, and tanks should join them right after the Fiendish Wail resolves.
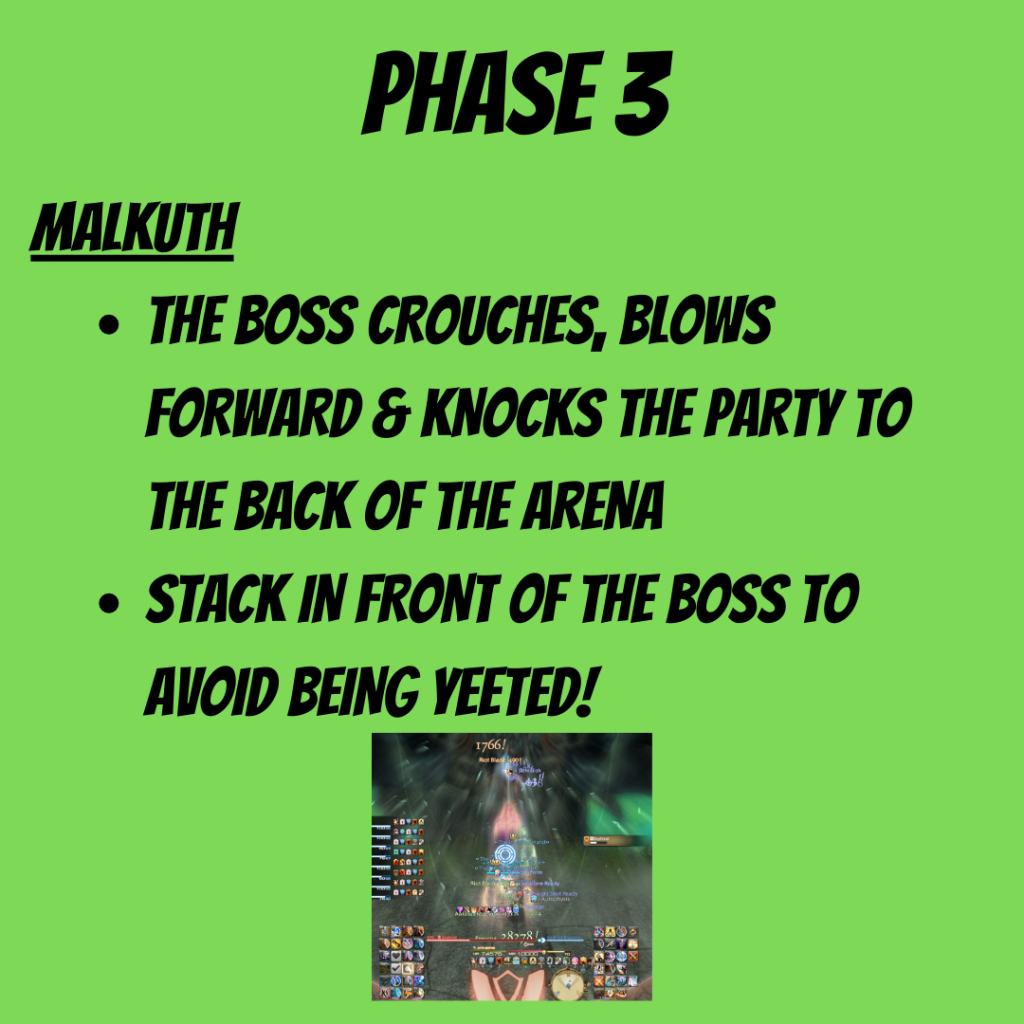
Another new mechanic that happens right after this is Malkuth. The boss knocks the whole party backwards, and the DPS should all stay stacked after the knockback to bait the spikes. You’ll know the knockback is coming as the boss will crouch a bit and will look like he’s blowing at the whole party, and that’s what you’ll feel like, too.
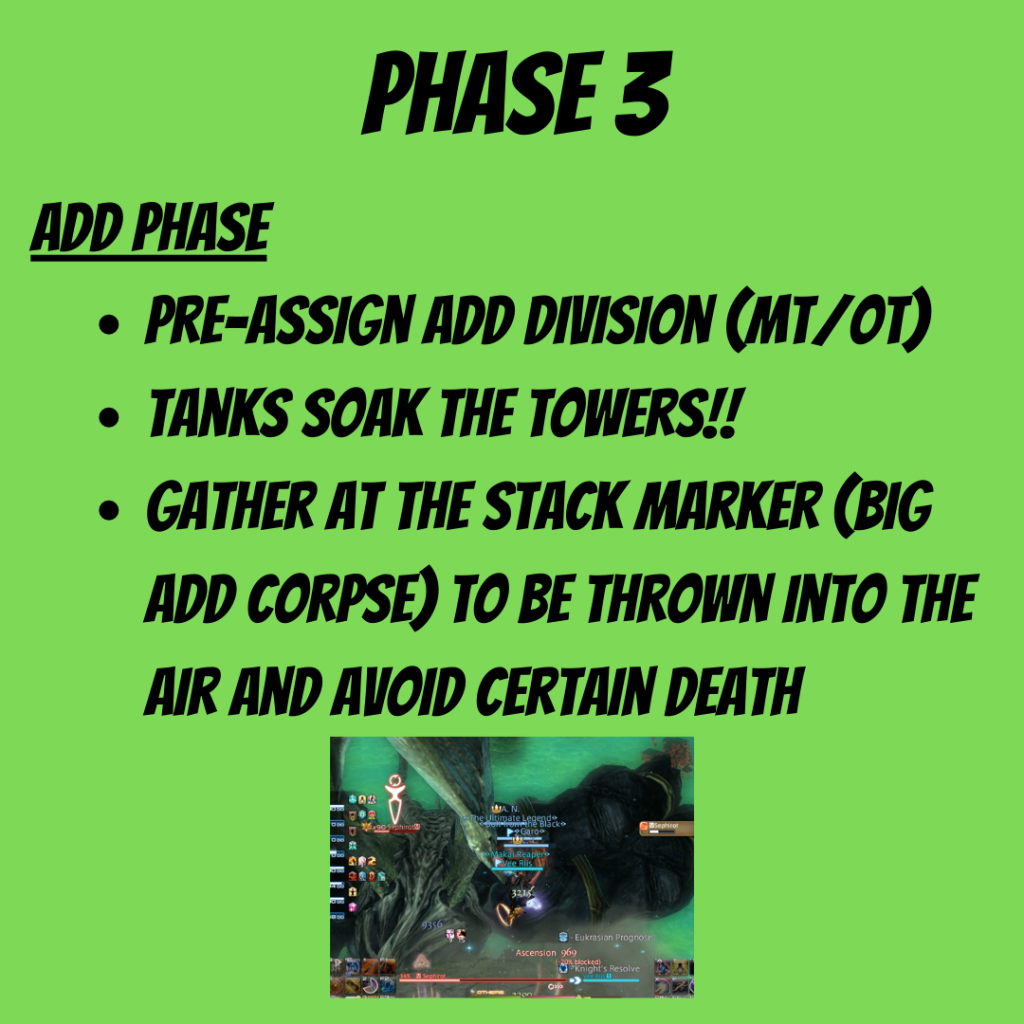
Phase 3 also comes with its own set of adds. Four Binah and one Storm of Words will spawn, and this is where the chaos starts. The Storm of Words spawns right where the players were knocked back from Malkuth. Two Binah spawn on the east, and two on the west. There are different ways to play this – some tanks handle it by having a main tank pick up the big add, while the off-tank aggroes the Binah, and in some groups, both tanks handle two Binah each and the DPS kills the Storm of Words quickly with a Limit Break. If you’re gonna do that, you need to use LB quickly, as Yesod will come again shortly after this and needs to be baited properly. As soon as all the adds are dead, you get a short period of time to pour pure damage into the boss, but there is one more Yesod so just stay stacked while at it.
Finally, there’s the Impact of Hod and Ascension. Sephirot will put his arm down on the arena which does a bit of damage and a small knockback. At the same time, a stacking indicator will appear over the corpse of the Storm of Words, so you’ve got to make sure you’re all gathering there. The reason you need to be there is to avoid the Pillar of Severity, which is instant death, as you’ll be thrown into the air if you were in the right place at the right time. Following that, once you land, bait Yesod again, and you’re entering into the final mechanic loop before the enrage, which is pretty much Pillar or Severity being cast without you being thrown in the air, it’s kind of sad, really. But if you manage to melt the boss, you won’t have to worry about it, which is what will hopefully happen after reading this guide!
And that’s it when it comes to this fight. If I missed out on mentioning anything, let me know in the comments. If you’re more of a visual person, and you don’t mind getting easy wins in-game, you can check out all of this in my video – and subscribe for more awesome FFXIV stuff!


Leave a comment