Is FFXVI DLC “The Rising Tide” Worth It? (SPOILER-FREE REVIEW)

After going through the last Final Fantasy XVI DLC, “The Rising Tide”, I wanted to sit down and share some thoughts on it with you. This post won’t have any spoilers – all I’m going to do is discuss some changes that the DLC has brought to the game, and how the new patch makes me feel in general. Huge thanks to Square Enix for gifting me both the base game and the DLC on launch day!

Overall, playing through the new update has reaffirmed what I’ve been feeling for a long time – Final Fantasy XVI is one of my most favorite and beloved Final Fantasy games, along with FFXIV and Crisis Core:FFVII Reunion. This particular world makes me feel like home – through the art, design, music, voice acting, and masterful storytelling. I’ve never been as invested into the side content as I have been in FFXVI, and the DLC has continued to create a perfect balance between the main storyline and the side quests. All of them are engaging, well written, emotional, with meaningful plot twists, and there are many times when I couldn’t tell the difference in quality between the mandatory and optional content.

When it comes to the combat, the new boss fights have brought in a lot of different mechanics, challenges and epic moments. There were times I was very grateful that there was a checkpoint mid-fight, as some of them are very long. Even though spawning in the middle of the boss encounter does break the immersion, I still think that’s better than doing the fight from the very beginning, as it would be a huge time sink that would eventually suck the joy out of the fight itself. I have not attempted the fights on the hard modes yet, so don’t take my word for it when it comes to these checkpoints being a thing, but I had a pretty good experience knowing I don’t have to go all the way from the beginning.

The fact that we get to discover a whole new part of the world through the DLC was honestly a good choice. It was a fresh break from the gloomy skies, the apocalyptic mood, and it provided both cultural and visual diversity that many players felt were lacking. The side quests were not numerous, but I felt like they were meaningful enough to help me understand exactly who these new people are, and by the time I finished, I craved the endings to their little stories, so I actively searched for them and I was not disappointed!

The main story itself fits perfectly into the existing FFXVI timeline. I feel like it’s given us an explanation for some of the decisions Clive has made throughout the base game, that we were previously unaware of. In my opinion, this alone makes it worth going through the game again, not just for the fresh perspective, but also to check out the additional cutscenes added to many of the side quests throughout the base game with the new patch. I haven’t gotten around to doing this just yet, but knowing what I know from the DLC, I think I just might need to replay it and fall in love with the world even more!

There’s not much else I could say about the DLC itself without any spoilers, but I did want to gush about it a little bit. While playing through it, I was asked a really interesting question: “Is there any DLC that you feel is better or at least has the same quality as the base game?” At the time, I didn’t know if “The Rising Tide” would be the answer, but now I can say that it definitely is. From my POV, there was no difference in the quality between the base game and this DLC, except that it brought some quality of life changes which made the experience better in many ways. I’d say that the DLC is very much worth it, and if you haven’t played through the first update yet, it’s definitely a good deal to get them both at the same time. 

What did you think of the DLC? If you’ve already played it, do share your thoughts on it in the comments, as more opinions will help the potential FFXVI players make their decisions. Also, make sure to subscribe to my YouTube channel for more awesome guides! If you would like to join my supporters via YouTube memberships or Patreon, it would go a great deal towards continuing to make great content! Until next time!

Vee’s Honest Final Fantasy VII Rebirth (SPOILER-FREE)

It’s been a few days since I’ve finished Final Fantasy VII Rebirth, and there is quite a bit to unpack. I’ve spent some time thinking about how I’m going to formulate all my thoughts without any spoilers, so I do feel like I should give you a gentle warning in case you want to know nothing about the game at all. However, I will steer clear of any story bits, and at most, you’ll see some in-game footage and a spoiler-free discussion.

Story

I’d like to start this off by talking about the story – just my impressions, of course, without diving into any intricate details. After finishing the main questline, I can say that, without a shadow of a doubt, the main plot is the absolute highlight of Final Fantasy VII Rebirth. Everything from the character growth, down to the plot twists, is as magnificent as I expected it to be after finishing the original FFVII, and then Remake. If there is one thing Square Enix knows how to do, it’s tugging the heartstrings by making sure that some of the crucial story moments are as emotional as possible. I enjoyed every bit of the main story, even when I had to get a little lost in a maze of caves and almost invisible grappling spots in order to progress with it. 

If you’ve finished Final Fantasy VII Remake with high hopes for a development that will bring something fresh to the table, while keeping some of the old bits of the story relevant, I don’t think you’ll be disappointed by what Rebirth has to offer. The best thing about the story being told in such a modern way is the fact that some things that slipped past me in the original were much harder to ignore now. I’m not saying that the storytelling in the original game is bad by any means, but as gamers in the modern day and age, we are inevitably spoiled by graphics, and some things are easier to see when they’re… well, made pretty. This is how I feel about FFVII Rebirth, and why I’m very grateful for it – as I feel like I’ve been able to understand even some of the side characters, like the Turks, Rufus, and Bugenhagen, much more so than when I first met them in the FFVII OG. 

The main story has left me with some questions, but I also think that’s understandable, given that it’s very hard to create an ending out of something that was never meant to be an ending of the game at all. When you think about it, crafting three games out of one singular masterpiece and providing meaningful payoff at the end of each installment is very difficult, as the sense of urgency is simply not present throughout the entire experience – at least not to the point where you feel like it is in most RPG final moments. Therefore, I have massive respect for what they’ve been able to come up with for both endings of the Remake and Rebirth, and I have no doubt that the next game will be even more spectacular, as it’ll hopefully wrap things up and give us the true ending of the story.

Combat

The combat is another 10/10 aspect of Final Fantasy VII Rebirth. Even early into the game, you can tell how much love and care has been put into it, and while it may feel overwhelming at the beginning, experimenting with all the aspects of it is so much fun. There are plenty of ways to play the game, and while you can breeze through it on easy mode by just pressing a few buttons, the real fun comes when you begin to utilize all the tools at your disposal – the synergies, summons, weapon skills, limit breaks, spells, abilities and so much more. FFVII Rebirth has brought so many new things for you to do in combat, it’s impossible to choose the correct way to go about it – and more often than not, you’ll catch yourself forgetting that there is this or that, that you could be using to make it even more fun. 

Art Style

When it comes to the art style, as per usual, the Final Fantasy VII team both overpromises and overdelivers. Even for someone not as interested in combat or other game systems, the design itself is what can carry them through the game with a smile on their face. The zones are majestic, and every recreation of a city or an important landmark from the original way was crafted with a lot of love and care. This can especially be seen in areas like Cosmo Canyon and Junon, where the art and design teams have done everything in their power to make you feel like you’re exactly where you were in 1997, but it’s just somehow a hundred times better!

Music

The music of Final Fantasy VII Rebirth is – surprise, surprise – one of the best soundtracks you’ll ever hear in a game. It’s a small wonder that they’ve decided to go on a whole orchestra world tour, as the OST is an absolute joy. Nostalgia adds a lot of effect to it, as you’ll hear some rather familiar tunes, performed with the help of modern technology, and you will not be disappointed!

Performance

When it comes to the performance of the game, I didn’t experience any loading issues, stuttering, freezing, or anything that would indicate the game is running poorly. As per bugs, I believe I only found one where Tifa was pacing uncontrollably through her room after I finished playing the piano, but it also could be due to how poorly I’ve played. Overall, the game runs flawlessly, and pushes the very limits of what PlayStation 5 can offer – which is probably one of the reasons it’s not available on PC yet, although I hope it will be soon enough.

Open World Content

Now, let’s talk about the open world – and boy, are there a few things to unpack here. Final Fantasy VII Rebirth starts off as a promise of a grand adventure across the continent, with an immersive open world experience that you’ll have fun exploring for a very long time. In theory, this sounds incredible, as it gives the fans something to work through for weeks, and even months, if you’re chasing that Platinum trophy and have a limited playtime. In theory, this was supposed to be the highlight of the game – something that glues everything together, making you feel like there is more to the game than just the story. But for me at least, it was the singular thing that broke that immersion apart. 

Unfortunately, I was one of the people who had a massively underwhelming experience with the open world, for multiple reasons. The first one is Intel. Now, I’ve played enough RPGs in my life to know that each game will have a discovery system that will look largely the same throughout different maps and chapters. However, I saw no reason whatsoever to feel continuously lost while trying to reach every single one of the towers, wellsprings and caves, all while needlessly overutilizing the Chocobo system, which was different for every region. It was an incredibly frustrating and solitary experience, forcing me to choose to play these bits of the game off-stream, and that didn’t feel as much fun either. 

The minigames were fun at the beginning, but I saw no need for them to come in sets of magical numbers like 3, 5 or 7 per every zone. There was no practical reason to make these landmarks as unreachable, as dense, and as repetitive as they were, while getting progressively more difficult and annoying – I’m talking specifically about the Moogles and the Materia rhythm game, amongst other things. If you’re decent at most of the mini games, and really bad at some of them, there is great potential for you to be stuck doing open world activities in order to progress through systems like crafting, summoning materia, or even main questing – if you’re unlocking transportation, for example – and that can completely alienate you from the main story. I went too hard with the side content, hoping I can satisfy my OCD and clear every map as I go, but I got so burnt out by the time I reached Gold Saucer, that at this point, I decided to progress through the main story at all costs, or to drop the game altogether. Final Fantasy VII Remake was and still is one of my most favorite games of all time, and I’m personally a great fan of how much more linear it was. 

I see the remakes of Final Fantasy VII Original as a giant fan service, and a way to experience the story all over again – not necessarily a way to trap the players in it for the sake of prolonging the playtime. 40 hours of playtime in Remake on my first playthrough in comparison to almost 90 in Rebirth was unreasonably long. It exhausted me, and made me drop the side content altogether. Hopefully, I will one day return to it with a fresh perspective, but for now, I don’t think I can find a reason to go and do the open world activities – not even for the sake of clearing the map. There is very little that brings joy to me when it comes to the repetitive types of exploration that Final Fantasy VII Rebirth offers, and it pains me greatly to even say so, as I wanted this game to be my game of the year, more than anything else. 

Side Questing

Side quests are closely related to the open world content, so I’d like to talk about this next. When it comes to the green ones, I can say they are the highlight of optional content, but there are some things I would like to mention that stopped me from feeling the same way about them than I did back in Remake. I was a true fan of the experience where you get to do a few green quests, and acquire payoff in the form of an additional cutscene. 

While Rebirth green quests are great, some of them will have you stuck raging as there is yet another minigame system tied into it, turning your green quest into a progression that can take hours – like Chocobo racing, luring chickens back home at a painfully slow pace, and going on a goose chase to craft legendary baits just to be able to kill a creature on the beach. As a creator, I found it disrespectful to my audience to dedicate my entire playthrough session to a single green quest, just because it requires you to either win 30 Chocobo races, or to explore Gongaga and Cosmo Canyon fully, kill all the creatures in it, and craft some silly bait for a silly creature. I felt exhausted from trying to find ways to make it more meaningful and entertaining, as most people who join livestreams are there for the story, and that bit was just so difficult to get to if you cared for the side progression at all. 

Another aspect of the side quests I disliked greatly is the amount of pressure it put on me throughout the entire playthrough to get the right date. Even though there is a New Game+ experience where you get to go with whoever you want, this isn’t immediately obvious, and the fact that I felt forced to be deliberately rude to people who weren’t my date choice, avoiding their side quests, or outright failing them on purpose to get the lower score, felt artificial, disrespectful to the game design, and definitely immersion breaking. I feel like the choice should at least be a factor when it comes to who you take on a date, as you don’t really know what you’re getting yourself into when you’re making crucial decisions like choosing the right beach outfit, for example. 

As I really wanted to be on that date with Tifa, it was quite discouraging to see the bond with Aerith increase with every one of my organic choices. Eventually, it made me kick her out of the party during combat too, as some synergies deepen the relationship with the person involved, and I just couldn’t risk it. I honestly don’t know what’s worse – knowing that the Gold Saucer date is coming and being ready for it, or not knowing at all, and missing out on what’s potentially a really cool experience for you and your favorite party member. 

Lastly, the date progression itself was nonsensical when it comes to side quests – as a Tifa fan, I was quite bummed and offended that I had to go on mini dates with Aerith where she hits on me, just to unlock a green side quest that will boost Tifa’s relationship. It felt like a giant rat race, where you inevitably had to display feelings for both, just to end up on a date with one of them. 

Is Final Fantasy VII Rebirth worth it?

Finally, it’s time to answer the million dollar question: is Final Fantasy VII Rebirth worth it? In my honest opinion, it is, but it’s a good idea to know what you’re getting yourself into. If you’re there for the story, you may want to temper your expectations when it comes to clearing the side content, as it can take up to 250 hours to get a Platinum for the game – according to Twitter, at least.

If minigames are your thing, and you want to be playing all aspects of this game for as long as possible, there’s no reason for you not to enjoy it for a very long time. However, if you’re in no rush, or you’re waiting until you can experience Remake, Rebirth and the next game together, it’s worth the wait – but keep in mind that Remake and Rebirth are two different worlds. Even though there are aspects of this game I didn’t enjoy as much, I would still recommend it to any FFVII fan hungry for a gorgeous-looking fan service. 

When it comes to my FFVII Rebirth review, that’s pretty much all I had to say about it. What did you think about the game? If you’ve already played it, do share your thoughts on it in the comments, as more opinions will help the potential FFVII Rebirth players make their decisions. Also, make sure to subscribe to my YouTube channel for more awesome guides! If you would like to join my supporters via YouTube memberships or Patreon, it would go a great deal towards continuing to make great content! Until next time!

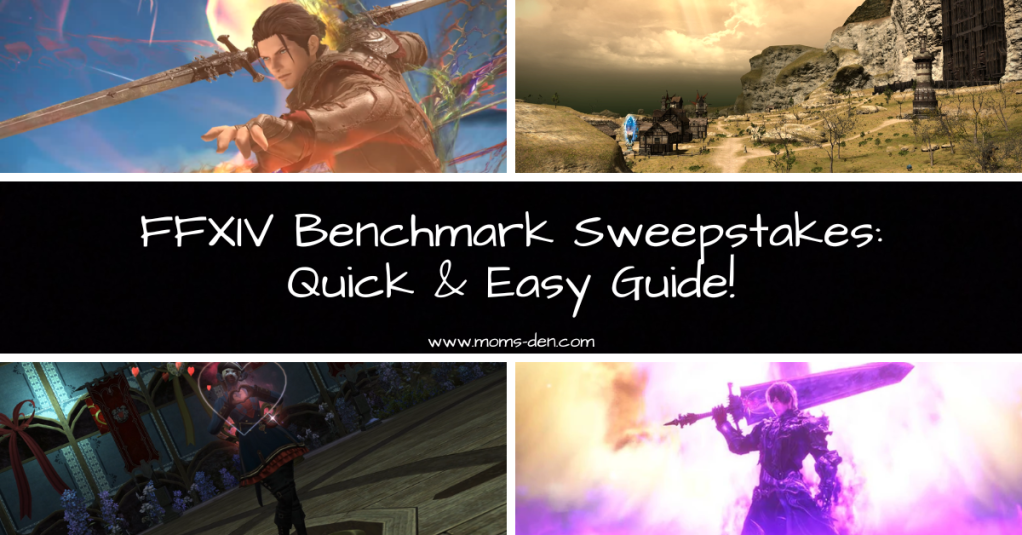
FFXIV Dawntrail Benchmark and Sweepstakes – Quick & Easy Guide!

FFXIV has been too quiet for too long, but we’re finally getting some super exciting updates, the most important one this week being the Benchmark server. Along with that, the FFXIV Twitter is hosting the Benchmark Sweepstakes, and in this guide, I’ll walk you through what you need to do in order to participate! This giveaway is live until April 22nd, so you may want to check it out now to not miss out!

Accessing the Benchmark Website

Before we even get to the sweepstakes, you need to go to the Benchmark website and download the Benchmark file to your PC. Once the download is finished, you need to extract the ZIP file you downloaded, and then execute – as in, open – the EXE file called ffxiv-dawntrail-bench.exe. Once you’ve done it, simply select the language you want, read through the terms, and start using it.

Source: Square Enix

Starting the Benchmark

Once you’ve launched the Benchmark, you’ll see the trailer that will start playing, and essentially testing your PC for being able to run Dawntrail. Obviously, the higher score, the better the game will look, but PC upgrades are not why we’re here – at least not right now. In order to participate in the Benchmark Sweepstakes, you simply need to printscreen your Benchmark test and save it for later

How to participate in the FFXIV Dawntrail Benchmark Sweepstakes

In order to qualify for the sweepstakes, you need to submit one screenshot of either the character creation screen with the character you created, or your benchmark score with the character you created, using the Benchmark. You can access the Character Creation menu from the launcher itself, at the bottom of the launcher.

Source: Square Enix

Once you have the screenshot, go over to FFXIV Twitter account (English, German or French), follow the page you’re on, and find the Sweepstakes announcement. Along with the screenshot, you need to submit the full character name, home world, as well as the prize you’d like to get. This time around, you can choose to get the Gaelicap, Bluebird Earrings, Modern Aesthetics – Strife, as well as Noble Barding. 1,500 winners will be randomly selected from the comments pool, and the items will be distributed in or around June 2024.

Source: Square Enix

There are some other rules and regulations that you can check out, and they mostly cover the location, age, format of the posting and other stuff, which is largely the same with any other Square Enix sweepstake.

When it comes to the Benchmark and the sweepstakes, that’s mostly it. Which loot will you be going for, and what’s your Benchmark score? Let me know in the comments, and make sure to subscribe to my YouTube channel for more awesome guides! If you would like to join my supporters via YouTube memberships or Patreon, it would go a great deal towards continuing to make great content! Until next time!

How To Romance Tifa In Final Fantasy VII Rebirth (SPOILER-FREE)

Final Fantasy VII Rebirth is a game with a fantastic story, great combat, and a legacy setting so many of us have been waiting for years to experience. However, it is no secret that romancing characters plays a massive role in players’ experience, so any when it comes to hooking up with your preferred choice is welcome. If you’re team Tifa, or would like to be, you’re in the right place – as I’ll guide you through everything you need to know in order to romance her (without any story spoilers, of course).

Best dialogue choices for romancing Tifa

The first thing you should be aware of is the dialogue choices, and if you’re not super late in the game, you have a chance to make all the right decisions when it comes to romancing Tifa. If you see the dialogue options like “The place I made that promise to you”, “Only person from the village I remember is you”, “Lot’s happened since then”, “Gonna go with the pot roast”, “You did good”, and “Have I helped you get through it at all?”, it’ll hopefully ring a bell and you’ll select the right answer before the timer runs out.

Align Tifa’s and Cloud’s swimwear choices

If you don’t want any plot spoilers whatsoever, this is a tip you may want to skip over, but I think we all know that Costa del Sol is one of the locations you’ll be visiting. When you first find your way there, you’ll need to get to the beach, and in order to do that, you’ll need your swimwear. The best way to boost Tifa’s relationship with Cloud is for you to make sure that their swimsuit choices match. Additionally, you want to ensure that Aerith’s swimsuit style doesn’t match Cloud’s, just to avoid boosting their relationship!

Complete Tifa’s side quests

Lastly, there are seven different side quests you can do in order to improve your relationship with Tifa. There are a few things I’d like to mention, as some of them have their separate prerequisites, that will have you do other people’s side quests first. This shouldn’t worry you, for as long as you’re not actively trying to boost the relationships with them as well through dialogue choices and whatnot. For example, “Dreaming of Blue Skies” is a side quest you’ll find in Chapter 4, in the Junon area – but in order to have it available at all, you first have to complete the “When Words Won’t Do” side quest first. However, to have that one available, you’ll need to do “Friends Together Again”, which is the main quest in Under Junon during Chapter 4. There are also two Gold Saucer side quests that have prerequisites – “Sand and Circuses”, which will have you do “Trouble in Paradise” first, as well as “Gold Cup or Bust”, for which you need to complete “Esoteric Secrets of the Elders”.

When it comes to romancing Tifa, that’s mostly it. With a bit of luck, you’ll see that Turquoise emoji above her head in no time, and you’ll get the best version of the date that will not disappoint you! If you have any questions or additional tips, let me know in the comments. Also, make sure to subscribe to my YouTube channel for more awesome guides! If you would like to join my supporters via YouTube memberships or Patreon, it would go a great deal towards continuing to make great content! Until next time!

Vee’s Persona 3 Reload Review After 110+ Hours!

If someone had told me that 2024 would be the year I discover one of my favorite games of all time, and that this particular one would be from a franchise previously unknown to me, I don’t know if I would have believed them. Yet here we are, more than two weeks after I’ve finished Persona 3 Reload for the first time, and nothing I’m currently up to seems to even creep up to its level. On that note, I present to you my trying-not-to-be-biased-but-failing-miserably review, with no story spoilers, to try and tempt you into playing this game. Huge thanks to Atlus for gifting me a review copy at launch, and congratulations, as they’ve successfully thrown me down a massive rabbit hole!

Story

First, I’d like to talk about the things about this game that I enjoyed the most, and one of them is the story. I’m a big fan of dark, gritty games with a gloomy plot, and Persona 3 is the very definition of it. I’m not going to offer any story spoilers, but what I can say is that this game doesn’t take your precious 10, 20 or 30 hours to start getting good. Its spectacular writing has an immediate effect on you, and if you’re like me, you’ll be left wanting more even after your first session. 

It’s not just about the main plot, either – each one of the Social Links will hurt you, make you laugh or cry in its own way. The stories are raw, representing the real-life issues we’re all trying to escape from when we play games, yet in this game, we’re left wanting more after each Social Link rank-up. The payoff for doing these Social Links is massive, as not only you get to fuse the high-end Personas when you max them out, the final resolution of each and every one of them is bound to tug at the heart strings in some way. Some will completely annihilate you, and you’ll somehow still love it! Oh and, if you’d like to see a spoiler-free guide on all the Social Links that will help you maximize your progress on your first playthrough!

Character development is another story-related aspect of the game I was absolutely astounded by. There are some characters that I couldn’t imagine liking, finding sympathy for, or being excited about the story, but the impressive writing made me find joy in every moment of their growth. Sadly, my preferences did affect what I ended up doing when it comes to my main party composition, so I admit I could’ve done better with that, but I don’t regret any of my choices and I know there was a purpose behind everything that everyone has done, which is more than I can say for some of the longer games I’ve played with far less payoff.

Music

I’m on the fast track of learning that music is one of the best things about Persona games in general, and I am not disappointed with Persona 3 Reload in any way. The songs are addicting, they set the mood for each situation perfectly, and will have you dance away while questing. Even when it comes to combat music, it’s kept me going through Tartarus without once feeling annoyed, overwhelmed by battles, or impatient in general. If great soundtrack is what you’re looking for in your super long JRPGs to keep you going, then this is the game for you!

Art Style

Art style is one of the first things you’ll notice when you look at Persona 3 Reload, and if you’ve played the original Persona 3, you will be able to appreciate the improvements much more than I did at the start. To me, it was just a beautiful game in the art style I immediately have taken a liking to. However, after looking at some of the Persona 3 original footage, as I’ve never played it, I understood just how much love has been put into this remake. The game is gorgeous, and it’s a perfect representation of a remake created in a modern way, that’s kept everything good from the previous installment. (Except having a playable female character, but who’s keeping tabs, right?)

Combat & Systems

A game would not be a game without its actual systems and combat – which have kept me engaged more than any other JRPG I’ve played in a very long time. Fusing Personas, completing the Compendium, grinding Tartarus, crafting the best gear, and doing the things I normally wouldn’t do if I was just trying to finish the game – they’ve all kept me playing longer than I ever thought I would. With over 110 hours in the game, I finished it on Normal with more than 90% of the compendium, all of the end-game fusions, some really sweet gear pieces and a party I knew inside and out. In other words, I was obsessed. The game creates a perfect balance between the social aspect, which directly rewards you for completing it, through combat, as well as great storytelling. 

However…

I’ve given this game a lot of well deserved praise, but there is something I’d like to comment on. Persona 3 Reload is a very long game, and in this day and age, it is very difficult to commit to multiple playthroughs just to see all aspects of it. The fact that it takes mad organizational skills to complete all Social Links on the first playthrough is something that had me miss out on a little bit of it, but I also did far more than I could have thanks to my chat, which is why I decided to make the Social Links guide in the first place. I wish the game would give us a little bit more time to complete the Social Links, as they are a crucial part of the experience. However, if you do have these skills, or you don’t mind playing the game more than once, there’s nothing that can stop you from enjoying it to the fullest.

Is Persona 3 Reload worth it?

As a general conclusion, this game is very much worth playing. If you’re wondering whether or not it’s worth paying the full price for it, I definitely think so. However, if you’re watching this video, I’m going to assume you already have a backlog to work through, and there’s nothing wrong with waiting for a seasonal or publisher sale. You can also play the game through Xbox game pass without buying it if that’s your thing!

When it comes to my trying-not-to-be-too-biased review, that’s pretty much it. If you’ve already played it, do share your thoughts on it in the comments, as more opinions will help the potential Persona 3 Reload players make their decisions. Also, make sure to subscribe to my YouTube channel for more awesome guides! If you would like to join my supporters via YouTube memberships or Patreon, it would go a great deal towards continuing to make great content! Until next time!

Persona 3 Reload: The Ultimate Social Link Guide (SPOILER-FREE)

Persona 3 Reload is one of the most exciting releases of 2024 so far, and for a good reason – the remake of this already fantastic game has brought many new fans into the franchise, while pleasing the OGs. In this non-spoilery guide, I’ll be helping you through unlocking all of Persona 3 Reload’s Social Links, which Persona fusions they lead to, when you can work on them, and hopefully it’ll help you prioritize your activities within the game.

Fool

The first Social Link is the Fool, and it’s not something you need to worry about as it unlocks fully throughout the story, with the beginning on the 18th of April. Maxing it out, which you undoubtedly will if you finish the game, will enable you to fuse Susano-o.

Magician

The Magician, which is represented by Kenji Tomochika – the Classmate, unlocks on April 22nd, and it’ll allow you to fuse Futsunushi upon maxing out. Tomochika will be available inside of the classroom on Tuesdays, Thursdays and Fridays.

Priestess

The Priestess, Fuuka Yamagishi, will unlock itself throughout the story, awarding you with Scathach once maxed out. Fuuka is available after school on Mondays, Fridays and Saturdays. In order to reach requirements for Fuuka’s relationship though, you need to have Fortune Social Link at Rank 1, and Courage stat at Rank 2 – you’ll see why that’s necessary once you start.

Empress

The Empress, Mitsuru Kirijo, unlocks its Social Link on the 21st of November. Maxing it out will enable you to fuse Aliat. She’s available after school on Tuesdays, Thursdays and Saturdays in the 1F hallway of the school, but for her to even give you the time of the day, you’ll need to reach Rank 6 Academy and do well on your school tests – so study up!

Emperor

The Emperor, Hidetoshi Odagiri, or the Student Council, will have his Social Link available on 27th of April, and will allow you to fuse Odin. He’ll be available for you on Mondays, Wednesdays and Fridays at school.

Hierophant

Hierophant, which is the Old Couple’s Social Link, will be available on the 25th of April. Mitsuko and Bunkichi’s relationship being maxed out will allow you to fuse Kohryu, and they’ll be available to you every day of the week except on Mondays at Iwatodai Mall.

Lovers

Lovers, which is Yukari Takeba, unlocks her social link on the 25th of July, and the Persona you’ll fuse upon completing it is Cybele. Yukari will be available to you on Mondays, Wednesdays, Thursdays and Saturdays inside the classroom, but only if you’ve maxed out the Charm stat in the first place!

Chariot

Chariot, or Kazushi Miyamoto – the Track Team, Social Link will be unlocked on the 23rd of April. Completing the questline will help you unlock Thor, and in order for you to do so, you need to find him on Mondays, Tuesdays, Thursdays or Fridays in your classroom after school.

Justice

Justice, which is Chihiro Fushimi – the Treasurer, will be unlocked after you’ve started the Emperor Social Link and attempted to talk to Chihiro on four different occasions. Completing the Social Link will help you fuse Melchizedek, and she’ll be available to you in the 2F hallway on Tuesdays, Thursdays and Saturdays.

Hermit

Hermit, which is Maya from the Online Game, will get unlocked on the 29th of April, once you choose to play an online computer game. Completing this questline will help you fuse Arahabaki, and it’s important to note that Maya’s Social Link will be available on Sundays and days off, not on school days.

Fortune

Fortune, which is Keisuke Hiraga from the Art Club, will become available on the 17th of June. Completing the Social Link will help you fuse Lakshmi, and Hiraga will be happy to talk to you on Tuesdays, Wednesdays and Thursdays.

Strength

Strength, which is Yuko Nishiwaki – the Team Manager, will get unlocked after you talk to her a couple of times. To have it available in the first place, you need to advance the Chariot Social Link first, and competing Strength will help you fuse Atavaka. Yuko will be available to you on Wednesdays and Saturdays!

Hanged

Hanged, as in Maiko, the Girl at the Shrine, will get unlocked on the 6th of May, and completing the Social Link will help you fuse Attis. Maiko is available on Mondays, Wednesdays and Saturdays at Naganaki Shrine, but for this relationship to get unlocked in the first place, you have to play your cards right. When you talk to Maiko, you need to choose to buy her the Weird Takoyaki and the Mad Bull drink, and say “of course” when offered the chance to hang out with her.

Death

Death, or Pharos – the Mysterious Boy, will become available throughout the story on the 12th of June with no additional requirements. Completing this Social Link, which you will if you complete the story, will help you fuse Thanatos.

Temperance

Temperance, which is Bebe – the Transfer Student, will become available after you’ve reached Rank 3 with Elderly Couple, and Rank 2 or higher in Academics. He’ll be available on Tuesdays, Wednesdays and Fridays in the Home Economics room, and completing the questline will help you fuse Yurlungur.

Devil

Devil, or Tanaka – the Businessman, is one of the evening links available to you on Tuesday and Saturday nights. Completing the Social Link will help you fuse Beelzebub, but to unlock the Link in the first place, you need to meet some requirements first. Rank 4 Hermit is a necessity, and you need to always choose to give him the money when he asks for it. If you select “Tell me more” in the dialogue, he’ll ask you for 20k Yen, followed by two additional 10k Yen payments.

Tower

Tower, or Mutatsu – the Unusual Monk, will be a bit more challenging to unlock. You need to reach Rank 6 Strength to hear about him in the first place, Rank 2 Courage to enter the club he hangs out in, Rank 4 courage to actually talk to him, and you need to be able to deliver all of the bartender’s drink orders. Completing this Social Link will allow you to fuse Chi You, and in order to max out, you can find Mutatsu at the Night Club on Thursday, Friday, Saturday and Sunday evenings.

Star

Star, or Mamoru Hayase – the Rival Athlete, will become available on the 2nd of August, and maxing out the relationship will help you fuse Helel. Hayase will be up on Wednesdays, Fridays and Saturdays at Iwatodai Mall, but to even speak to him, you’ll need a Rank 4 Courage first.

Moon

Moon, or Nozomi Suemitsu – the Gourmet King, is available to you every day in Paulwonia Mall. He’ll be unlocked as you progress through the Magician Social Link, and completing the relationship will help you fuse Sandalphon. In order to start this relationship, you’ll also need Charm at Rank 2, and to give answers: “Pheromone”, “Coffee”, “Red” and “Hakagure Bowl”. You’ll also need to deliver him the Odd Morsel, which you’ll find in Tartarus.

Sun

Sun, or Akinari Kamiki, the Dying Young Man, will help you fuse Asura after completing the Social Link. He’ll be available to you only on Sundays though, so keep that in mind. Also, in order to begin the Social Link in the first place, you’ll need a Rank 6 Hanged, Rank 4 Academics, and once Koromaru has joined the team, you’ll look for the Fountain Pen under his paw!

Judgment

Judgment, which is the Annihilation Team of the final boss (like I said, no spoilers!), will become available to you on December 31st, should you choose mercy. It will be available for maxing out in Tartarus after that, so no need to worry about anything further!

Aeon

And last but not least, Aeon, which is Aigis, will become available to you on the 8th of January. Maxing out this relationship will help you fuse Metatron. Aigis will want to talk to you every day except Sunday and you can find her in the classroom, but you also won’t have a ton of time to max out this one, so hurry up!

When it comes to Persona 3 Reload and its Social Links, that’s pretty much it. Which one are you looking forward to the most? Let me know in the comments, and make sure to subscribe to my YouTube channel for more awesome guides! If you would like to join my supporters via YouTube memberships or Patreon, it would go a great deal towards continuing to make great content! Until next time!

FFXIV x FFXVI Event: The Path Infernal (QUICK & EASY GUIDE)

If you’re looking for something super fun to do in FFXIV, or a reason to resub this month, the crossover between FFXIV and FFXVI called The Path Infernal is now live. The event will last until the 8th of May, 2024, so there’s plenty of time to experience it and get all rewards. If you’d like to find out how to begin, what you need to do, and all about the rewards, you’re in the right place!

Starting The Path Infernal Event

If you’d like to start the event, your character needs to be at least level 50 Disciple of War or Disciple of Magic. Also, you need to have completed the main scenario quest “The Ultimate Weapon”. If you’re an FFXVI fan and you haven’t gotten around to doing it yet though, there’s still plenty of time to level up and get yourself the rewards that I’ll talk about in a bit!

If you’ve completed all these steps, find the Neophyte Adventurer in Ul’dah, Steps of Nald, at the coordinates you can see on screen. He’ll offer you the quest called “A Land On Fire”. I don’t want to spoil this super fun event for you, so I won’t talk about the specifics – all you need to know is that this quest is followed by “Pain To Recall”, and finally “The Path Infernal”.

The Path Infernal Rewards

Completing the last quest will award you with most of this event’s items – Torgal Pup minion, Torgal Mount Whistle, as well as a fully-dyeable Clive outfit – Metian Attire (and yes, it goes into the Armoire, in case your Glamour Dresser is full). It’s worth mentioning that you can absolutely pet Torgal while mounted, and he offers kickass mount music that you’re bound to vibe to. The other items are purchasable from the vendors in Gold Saucer – Clive card for 200,000 MGP, as well as a bunch of Orchestrion Rolls, which are 20,000 MGP a piece. You’ll need an overall 400,000 MGP to get it all, so if you haven’t been spending a lot of time grinding, now’s a good time.

When it comes to this particular event, this is all you need to know to not get yourself spoiled. Which piece of loot are you looking forward to the most? Let me know in the comments, and make sure to subscribe to my YouTube channel for more awesome guides! If you would like to join my supporters via YouTube memberships or Patreon, it would go a great deal towards continuing to make great content! Until next time!

FFXIV Valentione’s Day 2024 – Quick & Easy Guide!

It’s the month of love, and there’s no better way to celebrate it in Final Fantasy XIV than by participating in Valentione’s Day. The event is now live, and it’ll be going on until February 21st, 2024 at 6:59AM PST. If you’d like to find out more about how to start the event, what the rewards are and how to get all of them, you’re in the right place!

How to participate in Valentione’s Day 2024

In order to participate in the event, you need to be at least level 15 Disciple of War or Magic. Once you’re done with that, make your way to Old Gridania and find Astrid with the quest “The Symbol of Love” in Mih Khetto’s Amphitheatre.

This is the quest that’ll immediately reward you with the “Love Heart” Emote, which you’ll need for the follow-up quest called “It’s All About The Heart”. I don’t want to spoil the story, but this one is actually kind of sweet, if you’re a fan of FFXIV-style love drama with a sweet message that accompanies it!

Valentione’s Day 2024 Rewards

Once you’re done, you should go ahead and check out the House Valentione Maid in front of the amphitheatre – she’ll offer you a few seasonal items, like Valentione’s Heart Chair for 2000 Gil, White Chocolate and Heart Chocolate food items, as well as the Prismatic Heart (Left) and (Right), which are really cool for making gposes with your friends (and maybe a loved one)!

When it comes to this short but sweet seasonal event, that’s pretty much it. What are you up to these days in FFXIV? Let me know in the comments, and make sure to subscribe to my YouTube channel for more awesome guides! If you would like to join my supporters via YouTube memberships or Patreon, it would go a great deal towards continuing to make great content! Until next time!

Moogle Treasure Trove: the First Hunt for Genesis – Quick & Easy Guide!

If you’re a Final Fantasy XIV player with not a lot to do in-game right now, you’re in the right place, as the Moogle Treasure Trove: The First Hunt for Genesis is now live. This event started on Tuesday, 30th of January, and it’ll end on Monday, 11th of March, 2024 at 2:59PM GMT. If you’d like to participate in this new and improved way of collecting Tomestones, here’s a quick preview of the entire event, what you need to do, and how to get all the rewards!

Unlocking Mogpendium

The first thing you need to do is unlock your Mogpendium, and you’ll do that by talking to the Itinerant Moogle in Gridania, Limsa Lominsa, or Ul’dah at their usual spots.

If you’d like, you can even get through a short tutorial to better understand what the Mogpendium is all about. In essence, it’s a preview of everything you can do during this event to obtain the Irregular Tomestones of Genesis I. You can choose between Standard and Weekly Objectives, Minimog Challenges, as well as the Ultimog Challenge. Each submenu consists of a list of tasks, duties and things you can participate in either daily or weekly, in order to obtain the Tomestones. Each duty and event contains information on how many Tomestones you can obtain for its completion, so make sure to check each thing individually depending on what you’d like to do. 

Mogpendium Challenges

This is a very welcome change in comparison to the previous ways of obtaining Tomestones, as you can do so without going out of your way and personal playstyle. You can choose between Standard, Weekly Minimog and Ultimog Challenges, and they’re all different, so there’s no need to endlessly do certain dungeons or duties if that’s not something you enjoy. Standard Objectives can be completed repeatedly, whereas Weekly – as the name suggests – can be done once a week. Minimog Challenges can also be completed on a weekly basis, but they’re a bit different, as you get to choose one of the two main objectives to earn Tomestones from. For example, this week’s challenges are either FATEs in Lakeland or Kholusia, or playing the Triple Triad against Fufulupa in Western Thanalan, and it’s up to you which one you’d like to do in order to claim rewards. Ultimog Challenges are a bit different, as they can only be completed once per event, and for these tasks, you can get a whole lot of Tomestones. 

Claiming Irregular Tomestones

Once you’re done with your duties, don’t forget to click Claim Rewards in your Mogpendium for the weekly objectives, Minimog challenges and the Ultimog challenges. As per the standard objectives, the Tomestones will automatically be added to your inventory when you’ve completed them, so you don’t have to worry about that at least. Once the patch 7.05 is released though, you won’t be able to claim your rewards via Mogpendium, so make sure to do that as soon as possible. However, you can spend your Tomestones at the Itinerant Moogles up until the patch 7.1, so you can hold onto them if you’re not sure what to exchange them for just yet.

Moogle Treasure Trove Rewards

There are plenty of new items introduced with the new Moogle Treasure Trove system this time. Some of the most prominent ones are Mameshiba Neckerchief, Antelope Doe Horn, Titania Barding, the Modern Legend hairstyle, and plenty of other mounts, glamour pieces, orchestrion rolls and plenty of other stuff.

When it comes to the Moogle Treasure Trove: The First Hunt for Genesis, that’s about it. What loot will you be going for? Let me know in the comments, and make sure to subscribe to my YouTube channel for more awesome guides! If you would like to join my supporters via YouTube memberships or Patreon, it would go a great deal towards continuing to make great content! Until next time!

All new FFXIV 6.55 Emotes, Fashion Accessories, Chocobo Bardings, Triple Triad Cards & Framer’s Kits!

The Final Fantasy 6.55 patch is out and it’s time to go out there and collect all the cool loot. In this guide, I’ll show you what’s new when it comes to all the Emotes, Bardings, Fashion Accessories, Triple Triad Cards and Framer’s Kits added in this patch. If you’re like me and want to snatch all the new goodies while enjoying fresh content, you’re in the right place!

When it comes to the new emotes, first off, we’ve got Lop Hop Emote, which is a reward for obtaining A Dream Worth Chasing achievement. To get this one, you’ll need to finish all of the Endwalker Tribal quests, and that includes the Arkasodara, Omicron, and the Loporrits. After you’re done with all three reputations, you need to finish the final Alliance Tribal Quest and claim this adorable reward! And before you ask, yes – the emote absolutely does loop!

Next up are the Chocobo Bardings, and the newest one is Wayfarer’s Barding. You’ll obtain this one by finishing the final quest of Tataru’s Grand Endeavor, along with the achievement More Precious Than Gil. Along with the barding and the achievement, you’ll also get Tataru’s Bespoke Framer’s Kit for your portraits, should you wish to update them.

If you’re a fan of Fashion Accessories, this one is probably something you’re gonna pick up along the way, as the Knapsack is a reward for completing the final bit of 6.55 Endwalker MSQ. Along with The Coming Down achievement, you’ll get this adorable backpack for your Dawntrail adventures. What’s really special about it is that the little lantern that’s hanging off it is glowing during the night as well, which is a very neat detail and one of the reasons why I love it!

When it comes to the Triple Triad Cards, you can obtain Asura from The Gilded Araya trial, and you can purchase PuPu for 5,454 MGP from the vendor in the Gold Saucer.

When it comes to all the miscellaneous loot of the 6.55 patch, that’s about it. What’s something you’re working towards these days, and what’s your favorite thing? Let me know in the comments, and make sure to subscribe to my YouTube channel for more awesome guides! If you would like to join my supporters via YouTube memberships or Patreon, it would go a great deal towards continuing to make great content! Until next time!

Everything to do in FFXIV 6.55!

After a lot of anticipation, the FFXIV 6.55 patch is now live on the servers, and in this guide, we’re going over everything you need to know about it. This guide contains no story spoilers – all it’ll do is help you navigate through the new content and show you what you can do in the 6.55 patch!

The first, and the most important update, is the Growing Light – Part 2, which is the continuation of the MSQ. The most notable addition to the storyline is the introduction to Wuk Lamat, the first-ever female Hrothgar. The story is very likely to give us an introduction to the Dawntrail storyline, and we can also expect to see the beginnings of Krile’s journey toward becoming our first ever Pictomancer. While female Hrothgars and Pictomancers are not yet available in-game, it’s still pretty exciting to see the direction in which the game is going and what we can expect to be able to play around with in the summer.

The 6.55 patch also gives us a new trial known as ‘The Gilded Araya.’ Here you will face off against Asura, which is super exciting for any and all fellow FF4 fans. I’m personally very excited for this, as she looks gorgeous, and I’m very much looking forward to seeing all the boss mechanics.

Another update is the finale of Tataru’s Grand Endeavor storyline, which ended up taking us way back, while reminding us of some awesome characters we used to know and love. This isn’t such a big addition to the game, but it has so far been very satisfying, and I’m excited to see how the story ends.

One of the most anticipated things about the 6.55 patch is, of course, the Somehow Further Hildibrand Adventures. Hildi’s story in Endwalker has been nothing short of hilarious so far, and despite a huge revelation from the last patch, there is still some unfinished work to be done. If you’re looking forward to finally solving the mystery of PuPu’s missing companion, this is definitely something you want to do!

Along with the final Hildibrand quest, we also get the chance to finish our Manderville Relic Weapons. Even though the very process of obtaining the weapons wasn’t as exciting as I would’ve hoped, they do look beautiful and the item level of the final step will help you clear any content you might’ve been putting off lately.

And last but not least, the Endwalker Alliance Tribal quests are going to unite the stories of all the funny, adorable and weird creatures we’ve encountered along the way. If you haven’t finished your Omicron and Loporrits storylines, now is a good time to catch up on it, so that you can enjoy the culmination of all the questlines.

When it comes to the new FFXIV 6.55 updates, that’s pretty much it. What will you be working on from now until the new expansion? Let me know in the comments, and make sure to subscribe to my YouTube channel for more awesome guides! If you would like to join my supporters via YouTube memberships or Patreon, it would go a great deal towards continuing to make great content! Until next time!

FFXIV Heavensturn 2024: Quick & Easy Guide

It’s time to get festive and start off the new year with a limited-time loot from FFXIV, and there’s currently no better way to do that than to participate in the Heavensturn 2024. The event is now live, and it’ll be up until Monday, January 15, 2024 at 6:59AM PST. In this guide, you’ll learn how to start the event, as well as what you need to do to get all the rewards!

How to start the Heavensturn 2024 event?

In order to begin, you need to be at least Level 15 Disciple of War or Magic. If you are, head over to Limsa Lominsa, Upper Decks and find Ruy Metsuke with the quest “To Be a Mascot”.

After you’re done with this quest, another one called “Unlike a Dragon” will appear. 

Heavensturn 2024 rewards

Once you’re done with both quests, you’ll get an achievement, as well as Ruynosuke, a limited-time minion that’s probably the cutest thing you’ve seen this year. 

The way he jumps is just so cute, too!

Omikuji Fortune Drawing

Upon the event’s completion, you can also participate in the fortune drawing. All you need to do is find Omikujishi on the Upper Decks, pay a 100 Gil, and draw an Omikuji, or fortune. This is a cute, little way for your favorite game to tell you whether you’ll be miserable in the next year or not – if you believe in this kind of stuff, that is.

Here’s my draw – not too bad this year!

When it comes to the Heavensturn 2024 event, that about covers it. What have you been up to in FFXIV lately? Let me know in the comments, and make sure to subscribe to my YouTube channel for more awesome guides! If you would like to join my supporters via YouTube memberships or Patreon, it would go a great deal towards continuing to make great content! Until next time!

Starlight Celebration 2023 – Quick & Easy Guide!

It’s time to get all festive, and when it comes to FFXIV, there’s no better way of doing it than participating in the Starlight Celebration. The event is now live, and will be going until December 31, 2023 at 6:59 AM PST! If you’d like to check it out and learn about all the rewards and things you can do, this is the guide for you!

If you’d like to start the Starlight event, all you need to do is get your WoL to Level 15 as a Disciple of War or Magic. If that’s over and done with, you need to go to Mih Khetto’s Amphitheatre in Old Gridania and talk to Bearded Lady to get the quest called “Blue Starlight”.

Once you’re done with it, you’ll receive a full, dyeable Santa suit, otherwise known as the Unorthodox Saint’s Set!

The next quest will have you wearing the set before you continue, and it’s called “Together At A Distance”. This one doesn’t offer any meaningful additional rewards, but it will give you a conclusion to a very cute and satisfying story. 

The last quest is called “Starlight Surprise” and it’s a repeatable one. I highly recommend you do it – especially if you’d like to see some of your favorite (or least favorite) characters you go way back with.

Apart from all that, you can purchase the Illuminated Topiary Chocobo for 3,000 Gil – which is an outdoor furnishing item for your FC house, should you have one!

When it comes to the new Starlight Celebration event, that about covers it. What have you been up to in 6.5? Let me know in the comments, and make sure to subscribe to my YouTube channel for more awesome guides! If you would like to join my supporters via YouTube memberships or Patreon, it would go a great deal towards continuing to make great content! Until next time!

My honest Star Ocean: The Second Story R Review (NO SPOILERS)

It’s been a month since the release of Star Ocean: The Second Story R, and I’ve had quite a bit of time to play through the game, start another playthrough, and think about the game past the initial feelings after finishing it. In this post, I’ll be giving you an honest review of the game and why I think it’s worth playing it! (Also, thanks ever so much to Square Enix for giving me the review copy of the game!)

Pros of Star Ocean: The Second Story R

First, I’d like to talk about some of the game’s strongest points, the most important one being the story. As someone who’s completely new to the Star Ocean franchise, at first I didn’t know what to expect, and this game took me completely by surprise. As it’s a standalone title, I was able to fall in love with the story without feeling like I’ve been missing out on important info, and there were enough mentions of all the other Star Ocean games within it to get me interested in the franchise. The story itself was, in my opinion, nothing short of incredible. The hooks, overall plot and the final moments of the game were all very satisfying, and I can happily say that I don’t think the ending of the game was the only highlight. Instead, the entire story was a big, massive rollercoaster from the beginning until the very end, and if you like JRPGs that can provide you with this kind of experience, you’ll love this game. It’s worth mentioning that the relationships between party members are well developed – the writing is great, their interactions feel meaningful, and it feels like you’re right there with them for the journey.

Another obvious selling point of Star Ocean: The Second Story R is the graphics, which are stunning. Even though I haven’t played the original game, from what I can tell based on the OG footage, the remake has been done justice, and the game looks absolutely breathtaking. The character models are detailed, the environments are vibrant and immersive. Every zone carries its own kind of mood, sets a different atmosphere, and is definitely worth scouring through. The only thing I wish I was able to do more is explore certain cities, where I felt like the environment could’ve been expanded a little more than just the central city square. Overall, though, I’m very happy with the amount of content and the general feel of the game, mostly thanks to the art style!

If you like to play your JRPGs for the soundtrack, Star Ocean: The Second Story R is one of the games you’ll adore. Each zone comes with its own soundtrack, the music does a terrific job at setting the mood, and even the battle track is something you can vibe to while farming XP and doing dungeons.

One of the most important things about Star Ocean: The Second Story R is, of course, the combat system, and everything that goes along with it. Someone new to the franchise like myself might expect a turn-based system, but this is not the case. This game is action-RPG, which took me some time to get used to, but once I was able to get myself out of the Final Fantasy VII Original mindset and remember how Final Fantasy VII Remake felt, it was much easier to understand what the game was even asking me to do. The system itself is just enormous, with so many different skills you can develop for each party member, in order to explore your favorite playstyles – or simply develop your party members the way you’ve envisioned it. Crafting your own gear, food, potions, battle items, accessories and so much more expands the game beyond anything you can imagine if you’ve never picked this game up before. As a streamer, I can say that this playthrough has been one of my most engaging journeys of 2023, as crafting and customizing decisions really get people talking about it! I enjoyed spending hours and hours optimizing my combat system outside the battle itself, but upgrading the spells and abilities was just as fun as everything else. By the end of the playthrough, I witnessed some gorgeous final-skill animations, a smooth transition from mid- to end-game, making me feel like my progression throughout the game has actually mattered. If you’re new to the genre, I’m sure all of it will feel a bit overwhelming, but if you start exploring your options early on and learn more about them as you play, I promise you, you’ll have a great time throughout your playthrough!

As I’m starting my second playthrough of the game, I can’t stress how incredibly valuable this game is when it comes to replayability. It has a total of 99 endings, and when I finished it for the first time, I only unlocked 6. You’ll start the playthrough as one of the two protagonists, and the final story will only make complete sense once you’ve seen both of their perspectives. The first playthrough will keep you busy for 40-50 hours, but as you’re exploring other endings, switching up party members and learning more about the story, you could easily pour hundreds of hours into this title alone!

This super-biased review would not have been complete without a very loud praise for the voice acting. The vast majority of Star Ocean: The Second Story R is fully voiced, and it’s absolutely top-notch. Of course, some of the side quests are text-only, but all of the major plotlines of the game are accompanied by actual voice lines. The English voice acting is excellent, but if you prefer Japanese voice acting, there’s an option for that as well. 

Cons of Star Ocean: The Second Story R

Now that we’ve covered all of the pros, let’s talk about something mildly annoying that I did come across while playing this game. One of the main sources of frustration for me was that some stuff in the game is a bit unintuitive. I had a great experience thanks to knowing what Call Bunny is, or being familiar with the fact that endgame weapons can be crafted – but all of this knowledge came from my chat, and I probably wouldn’t have been looking it all up in advance. For someone who doesn’t share their playthrough with the public eye, there’s a chance that some of these awesome bits will be missed out on. Therefore, if you care about having a fully optimized playthrough, I suggest looking at some non-spoilery guides that’ll give you all the info you need to know before starting with the game. Overall, that’s the only thing that I found frustrating, and I can’t think of any other reasons to not play this game as it really is a stellar experience. 

Is Star Ocean: The Second Story R worth it at the full price?

When I take everything into consideration, if you’re wondering whether Star Ocean: The Second Story R is worth it at the full price, my answer is a resounding yes. For $49.99, you’re getting a ton of replayability and hours of great content, but you can always tackle some of the other games in your backlog that I know you have and wait for a sweet sale to grab this game at a discount.

When it comes to my overall opinion on Star Ocean: The Second Story R, that’s pretty much it. What are your thoughts on it so far, and if you have played it, would you recommend it to others? Let me know in the comments, and make sure to subscribe to my YouTube channel for more awesome guides! If you would like to join my supporters via YouTube memberships or Patreon, it would go a great deal towards continuing to make great content! Until next time!

FFXIV 6.51 Loot: Quick & Easy Guide!

There are plenty of new things in FFXIV to work towards these days, and if you’re a fellow collector of in-game oddities who’s wondering what 6.51 has to offer, this guide is for you. Strap in, as we’re going over the new Hairstyles, Emotes, Fashion Accessories, as well as the Framer’s Kits you can obtain in the new patch!

First off, we’ve got a new hairstyle, The Bold And The Braid. This one will either cost you 6 Aloalo Potsherds from the Trisassant, the Variant Dungeon vendor in Old Sharlayan – or you can buy it from the Market Board for about 175k Gil if you don’t feel like running at least a few of them.

Then, we’ve got the Humble Triumph emote, which you can get if you spend some more time doing Aloalo dungeons. You can either buy it from Trisassant in Old Sharlayan for 9 Aloalo Potsherds, or go to the Market Board and get it for about 200k Gil, depending on the World.

Another emote made available in 6.51 is the Victory Reveal, which you can get for 410 MGF – the currency for the Fall Guys vs. FFXIV collaboration event.

If you’re into fashion accessories, you’ll be pleased to know that the Giant Leaf Parasol is now available as well. You can either get it as a random drop from the Aloalo Variant or Criterion dungeons, or buy it from the Market Board for close to 400k Gil. Not cheap, but not the worst thing to do with your Gil either – I mean, look at it!

We’ve got another new fashion accessory, which is Statice’s Wings. You can get it either from Trisassant in Old Sharlayan for only 3 Aloalo Potsherds, or from the Market Board for less than 100k Gil. If you’re looking to make some quick Gil, this may not be the worst way to do it, as they’re super affordable, easy to get, and they sell well, too!

Finally, there are four new Framer’s Kits, three of which come from the FFXIV & Fall Guys collaboration and can be bought for 200 MGF. The last one is from the Aloalo Island (Variant), and you’ll pay 8 Aloalo Coins in order to obtain it!

When it comes to the new FFXIV miscellaneous items, that’s mostly it. What are you going for in the new patch? Let me know in the comments, and make sure to subscribe to my YouTube channel for more awesome guides! If you would like to join my supporters via YouTube memberships or Patreon, it would go a great deal towards continuing to make great content! Until next time!

FFXIV Callback Campaign – Quick & Easy Guide!

The new patch has been out for quite some time, and it’s teeming with new content, so it’s a good time to invite some of your friends back into the game. The FFXIV Callback Campaign started less than a day ago, and it will be live until December 14, 2023 at 12AM PST. In this guide, I’ll walk you through how to participate, what the rewards for the campaign are, and how to claim them!

How to participate in the Callback Campaign?

In order to participate in the campaign, you’ll need to open your in-game or Free Company member list, then select an offline friend and select Invite Friend to Return from the menu. If your friend meets the requirements, they’ll get an email saying you’d like to see them back in Eorzea. 

What are the requirements for participation?

As per some more detailed requirements, your friend needs to have been inactive for at least 90 days including the free play period, and they need to have bought and registered FFXIV to their account. Each character can also be used to invite friends up to five times, and once you invite someone, the name of your character will show up in the e-mail, along with the World you’re on. Invitation e-mails will only be sent once per day no matter how many times you send the emails out, and you will not receive a reply on whether or not your friend meets the requirements – you’ll just have to rely on your memory, or nudge them out of the game to ask about their time off from Eorzea, if you can. Once your friend is back, you’ll receive some cool rewards via the Moogle delivery system when the invited friend buys a subscription within 90 days of their return.

The reward that pretty much everyone is after is the Gold Chocobo feathers, and you’ll receive 5 of them per friend. You can trade them for various items, like Twintania Neurolink Key mount – which costs 15 of them, Amber Draught Chocobo Whistle and Managarm Horn – which cost 8 Gold Chocobo feathers, as well as 5x Rare Dyes and 10x Aetheryte Tickets, which cost one Gold Chocobo feather per bundle. 

There are some things to keep in mind when it comes to the distribution of these awards. Even if you happen to invite two or more friends back into the game, these rewards will only be distributed once, and the rewards received for participating in a previous campaign will not be given to you again. You can find out how many friends you’ve invited on the Service Account Status page of the Mog Station. Also, regardless of which account your friend logs themselves into the game with, the invitation sent out will apply to all of their characters, so there’s no need to worry about that.

As per your friends who get back into the game, they will receive 14 days of Free Play, 99 Aetheryte Tickets, as well as 10 Silver Chocobo Feathers, which can be exchanged for Weapons for level 20 characters, as well as equipment for level 50, 60, 70 and 80 characters. 

You can exchange all of your feathers at the Calamity Salvagers in Limsa Lominsa, Old Gridania, or Ul’dah.

When it comes to the Callback Campaign, that’s pretty much it. Do you have any of these rewards already, and if not, which one would you like to go for? Let me know in the comments, and make sure to subscribe to my YouTube channel for more awesome guides! If you would like to join my supporters via YouTube memberships or Patreon, it would go a great deal towards continuing to make great content! Until next time!

FFXIV 6.51 Minions – Quick & Easy Guide!

FFXIV 6.51 is bursting with new content, so I decided to make a separate guide for all the Minions you can obtain in this patch – as there are quite a few. Therefore, if you’re looking to grow your Minion collection with the latest loot, you’re in the right place!

The first minion you can obtain is Pegwin, and you’ll do so by playing the new FFXIV vs. Fall Guys Collaboration event. For 350 MGF, which is the currency of the event, you can get this one-legged, penguin-like construct, which is really not a lot considering you get 50 MGF just for queuing the show and losing in the first round!

Similarly to Pegwin, you can also get the Pink Bean for 350 MGF from the event vendor in the exact same way. Apart from being adorable, it has some secretly disturbing Fall Guys lore that you’ll find out upon reading its description – which I won’t spoil for you, but it’s definitely worth learning about it!

Another minion you can obtain from this patch is the Uolosapa, which comes from Aloalo Island. This is a random drop from the dungeon chests, so if you’re not feeling lucky, or you don’t even want to try, you can snatch it at the Market Board for about 400k Gil or more.

There’s also Repulu, coming from Aloalo Island as well, and it is also a random dungeon chest drop. If your RNG continues to fail you, or you don’t feel like doing your Variant and Criterion dungeons, you can buy it at the Market Board for about 150k Gil or more, depending on the server.

When it comes to the 6.51 minions, that’s about it. What’s your favorite one out of all? Let me know in the comments, and make sure to subscribe to my YouTube channel for more awesome guides! If you would like to join my supporters via YouTube memberships or Patreon, it would go a great deal towards continuing to make great content! Until next time!

Should you play Digimon Survive? [NO SPOILER REVIEW] 

It’s been a while since I played this game, and even though it only came out last year, I keep wondering why people don’t seem to talk about it anymore. It was one of my personal favorites in 2022, and I feel like I owe it a video, as this game got me into variety lets plays in the first place. If you haven’t gotten around to playing Digimon Survive yet, and you wonder if it’s the right fit for you, you’re in the right place!

What is Digimon Survive?

Digimon Survive is a tactical, turn-based RPG visual novel developed by Bandai Namco Entertainment. The game follows a group of teenagers who become trapped in a mysterious world filled with dangerous creatures – Digimon. As they explore this new world, they work together with their Digimon partners to uncover the secrets of their surroundings and find a way back home.

Why should you play Digimon Survive?

Here are some reasons why you should play this game. One of the main pros of Digimon Survive is its unique blend of tactical RPG gameplay and visual novel elements. The game features turn-based battles that require you to strategically command your Digimon partners to defeat your opponents. At the same time, the game also features branching storylines that are affected by your choices and actions throughout the game. However, it wouldn’t be fair to not mention that this game is probably around 75% a visual novel, and the rest could be classified as Digimon collecting and battling. If you’re hoping for a full-blown TRPG like Tactics Ogre or Final Fantasy Tactics, this game might just have too much text for you – but if you enjoy visual novels with a twist of scary, weird and creepy, this is a good one for you.

Another pro of the game is its stunning art style and visuals. The game features hand-drawn 2D graphics that give it a unique and charming look. The Digimon themselves are also beautifully designed, with each one having its own unique personality, strengths, and weaknesses. Also, Digimon Survive has a large roster of Digimon for you to collect and train, each with their own unique abilities and skills. This provides you with a lot of room for customization and experimentation, allowing you to create their own unique team of Digimon partners. Even after you’re done with the game, you get to keep your collection throughout the New Game+ and ultimately work towards becoming a Digilord.

Are there reasons to pass on Digimon Survive (for now)?

There are also some cons to playing this game, but then again, it depends on what you’re looking for. If you’re simply not a fan of the Digimon franchise, this game might feel a bit distant to you. While the game does provide an enjoyable and engaging experience, it is heavily rooted in the Digimon universe, which may make it difficult for you to fully appreciate it if you’ve never been a part of this universe in any way. However, if you like Digimon, but you don’t really know their story, this game will be just fine for you, as the crew is fresh and you don’t need to know anything about them in order to get to know them.

I already mentioned that Digimon Survive contains lots and lots of text for you to read. What I didn’t mention is that the game is subbed in English, but not dubbed, so you’ll be hearing Japanese through and through while it’s up to you to take a look at the subtitles. For me, this was fine, but I streamed this game for about 40 hours and let me tell you – it was not always easy to go through all the text without feeling exhausted by the end of the playing session. If this doesn’t bother you, however, I think you’ll enjoy it just fine.

Is Digimon Survive worth it?

Overall, I think Digimon Survive is a great game and definitely worth playing – if you enjoy visual novels, don’t mind the ones that aren’t dubbed in English, and if you don’t expect the game to be all about Digimon turn-based battles. For me, all aspects of it were enjoyable, and if you’re anything like me, I’m sure you’ll enjoy the story, along with multiple satisfying endings. If the things I mentioned are going to bother you, but you’re still curious, I’d suggest waiting for a sale – the game has already had multiple ones, and some people were really happy with the amount of fun they’ve squeezed out of it.

That’s pretty much it when it comes to my thoughts on whether or not you should play this game. What are your thoughts on it, and if you’ve already played it, would you recommend it to others? Leave your two cents in the comments! You can also find my playthrough here, should you want to check it out. However, for your own sake, beware of the spoilers and go through the lore bits carefully if you haven’t played yet. Should you want to support my content and keep me going, consider becoming a Patron and enjoying some awesome perks! Alright now – enjoy the game, take care and I’ll see you next time!

Should you play Paranormasight: The Seven Mysteries Of Honjo? [NO SPOILER REVIEW] 

I never thought I’d start my review with saying I played a horror graphic novel by Square Enix, but here we are! Since it’s a relatively new game, I’d like to share my non-spoilery thoughts on whether you should play it or not. Huge thanks to Square Enix for giving me the free copy of Paranormasight: Seven Mysteries of Honjo for me to practice not getting heart attacks whenever I jump out of my chair. If you’ve been wondering about this game, you’re in the right place, as we’re gonna dive into what it is, and what it isn’t!

First of all, what is this strange, new game?

Paranormasight: The Seven Mysteries of Honjo is a thrilling graphic novel developed by Square Enix. The game takes place in a small village named Honjo, where strange events have been happening and it’s your job to uncover the truth behind creepy and unsettling things. You essentially take on the role of a detective, who has been called to investigate these events and uncover the truth behind the paranormal occurrences.

Why should you play Paranormasight?

One of the main reasons to play Paranormasight: The Seven Mysteries of Honjo is its incredibly captivating storyline. The game is filled with mystery and suspense, and the storyline will keep you engaged and eager to uncover the truth. The game also features stunning graphics and sound effects, which adds to the overall immersive experience. Even though it is a horror game, it’s not actually terrifying all the time – it’s more unsettling, with occasional mild jumpscares, that admittedly freaked me out more than they should have.

Another pro of the game is the variety of tasks and challenges that you have to complete throughout the game. From investigating crime scenes to solving puzzles, each task is unique and requires different skills and strategies, mostly determining what to say in order to extract information, or avoid dying, which is sometimes very hard!

Here’s why you might want to pass on it…

However, there are also some cons to playing Paranormasight: The Seven Mysteries of Honjo. One of the main cons is that the game can be quite challenging at times, which may lead to some frustration, as you don’t always know what you’re supposed to do or say. However, all the puzzles are solvable, and feel very satisfying when you figure out what it is that the game wants you to do. Some of the puzzles and tasks require a lot of patience and critical thinking, which may not be your thing, but the good news is that there’s no perma death and you’re always welcome to reload and try again. The game also has a secret ending which is quite tricky to figure out how to get to, but if you spend enough time exploring, I’m sure you’ll get around to it!

Also, the game may not be suitable for you if you prefer more action-packed games. Paranormasight: The Seven Mysteries of Honjo is a slow-paced game that requires players to think carefully and pay attention to detail. It has tons of reading, and you don’t really control your character’s movement around the city, so if this is a deal-breaker for you, just be aware of it. 

Should you buy Paranormasight at full price?

Overall, Paranormasight: The Seven Mysteries of Honjo is a highly engaging and thrilling experience that is sure to keep you hooked until the very end. Its captivating storyline, stunning graphics, and variety of challenges make it a must-play for anyone enjoying unsettling horror games, graphic novels, retro style, and murder mysteries. The game is definitely worth its full price, but if you’d like to get it right now, hurry up – as there’s currently a 20% discount that lasts until tomorrow, May the 8th!

That’s pretty much it when it comes to my thoughts on whether or not you should play this game. What are your thoughts on it, and if you’ve already played it, would you recommend it to others? Leave your two cents in the comments! You can also find my playthrough here, should you want to check it out. However, for your own sake, beware of the spoilers and go through the lore bits carefully if you haven’t played yet. Should you want to support my content and keep me going, consider becoming a Patron and enjoying some awesome perks! Alright now – enjoy the game, take care and I’ll see you next time!

Moogle Treasure Trove: Hunt For Mendacity QUICK & EASY Guide!

If you keep promising to yourself that you’ll work on getting something in FFXIV but you never quite commit, Moogle Treasure Trove is the kind of catch-up event for you. The Hunt for Mendacity is ongoing right now, and it’ll last until the launch of the 6.4 Patch, giving you plenty of time to collect all the items you’ve been wanting to have, as well as some new ones! In this guide, I’ll quickly walk you through what you need to do, how to get the currency to purchase this event’s rewards, and where to turn them in!

What is the Moogle Treasure Trove event?

Moogle Treasure Trove is a recurring event where you can earn some very special items simply by completing any duties or quests that earn Allagan tomestones of Mendacity. These items are tradeable for cool items, such as mounts, minions, and glamour stuff!

How to participate in Moogle Treasure Trove: Hunt For Mendacity?

In order to access this treasure trove, you need to earn Allagan Tomestones of Mendacity, which are acquired by completing duties such as the daily roulettes, raid content, or by running dungeons content that have a little Moogle icon next to their name in the Duty Finder.

After participating in those dungeons, you’ll receive Irregular Tomestones of Mendacity in your bag, and you want to turn those in to the cute little Moogles in exchange for some awesome rewards. The exchange itself will be possible until the release of the patch 6.5, so you don’t have to rush into spending them in case you want to make that decision later. You can find the Itinerant Moogles Limsa Lominsa Lower Decks, New Gridania, and in the Steps of Nald in Ul’dah. 

Source: The Lodestone

What are this event’s rewards?

This event’s most expensive items are the adorable Porxie Earrings (which’ll get even all of us who don’t glam accessories to start doing it) for only 100 of these bad boys. There are also some mounts from other side content, orchestrion rolls, cards, minions, housing items, and of course the MGP card for all of you who don’t need anything from this event anymore. 

Source: The Lodestone

Which Duties are available in Moogle Treasure Trove: Hunt For Mendacity?

  • The Praetorium and The Tower at Paradigm’s Breach will give you seven tomes per run
  • The Puppets’ Bunker will give you six tomes upon completion
  • The Copied Factory will give you five tomes upon completion
  • Frontlines as those will drop three or five of those tomes upon completion, depending on whether you win or lose
  • Hidden Gorge will drop three or five of those tomes upon completion, depending on whether you win or lose
  • The Tam-Tara Deepcroft (Hard), Hullbreaker Isle and Castrum Meridianum will drop four tomes per run
  • The Porta Decumana, Dzemael Darkhold, Cutter’s Cry, or The Sunken Temple Of Qarn will award you with three tomes
  • You’ll receive two tomes for completing any of the Alexander raids, The Cloud Deck, Castrum Marinum, or Cinder Drift

The event may seem daunting but don’t worry. If you join as a party, you can coordinate with others to farm specific instances and achieve common goals. Plus, in addition to the rewards you earn from exchanging your coins, you may encounter some unexpected drops from clearing these events anyway. Be sure to complete your daily roulettes, raids, and run dungeon content with your friends, as joining forces with other players can make things much easier and more enjoyable!

That’s pretty much it when it comes to this particular Moogle Treasure Trove. Massive thanks to everyone supporting the content – if you’d like to join them and keep it going, you can do that here on Patreon. Enjoy 6.35, have fun and I’ll see you in my next guide. Bye bye!

Hatching-Tide 2023: Quick & Easy GUIDE!

If you’ve been on the fence about coming back to FFXIV, and you needed a cute, little event with limited time rewards to pull you back in, Hatching Tide might just be it. This event is back, and will be up from March 27, until April 10, 2023. In this article, you’ll find out everything there is to do during Hatching Tide, as well as how to pick up all of the limited time rewards!

In order to start the event, you’ll need to be at least level 15 Disciple of War or Magic. Then, you need to teleport to Gridania, and right in the middle of Mih Khetto’s Amphitheatre, you’ll find Jihli Aliapoh. She’ll offer you a quest called “Get Along and Play Knife”, which will have you dress up and do some pretty funny things!

The quest is short and sweet, and it’ll lead you into another one called “Chaos, Carnage, Eggs”. For this quest, you’ll need to complete the seasonal FATE “Don’t Be Sylphish”. Once you turn it in, you’ll become a proud owner of the Frighten emote, which indeed is kind of scary and that’s why you need to have it.

Apart from the quest reward, you can find Dreamer in the Amphitheatre and purchase various items in exchange for the Special Midnight Archon Eggs you’ve received from completing the FATE. You can buy yourself a full Tonberry suit, a poster for your home – should you have one, as well as an Orchestrion roll. The entire outfit will require you to collect 10 eggs, each item being 2 a piece, whereas the roll and the poster will cost you additional 5 – the roll being 3, and the poster 2 eggs. You can earn more of these eggs by completing the FATE “Don’t Be Sylphish” again, which has a respawn time of about 10 minutes or so.

That’s pretty much it when it comes to the Hatching Tide event in 2023. It’s short and sweet, and although it can be completed in 20 minutes or so, it offers some cool rewards you might want to pick up before they’re gone. Let me know your thoughts on the event down below! Massive thanks to everyone supporting the content – if you’d like to join them and keep it going, you can do that here on Patreon. Enjoy 6.35, have fun and I’ll see you in my next guide. Bye bye!

Is Endwalker 6.35 Worth Coming Back For?

Endwalker 6.35 has been out for quite some time now, and if you’re wondering what there is to come back to and whether it’s truly worth it, you’re in the right place!

Eureka Orthos – the new deep dungeon mode

The biggest feature of 6.35 is Eureka Orthos, the new deep dungeon for you to either queue with a group, or challenge yourself solo. For better or for worse, most of the new collectibles and achievements are directly tied to this particular piece of content, so if you’re not a fan of Palace of The Dead-like stuff, this sub-patch might not be your cup of tea afterall. If you do like this kind of thing, though, there are plenty of hours to spend in this place if you wish to get all the new loot!

Somehow Further Hildibrand Adventures and Manderville Relic Weapons

Another novelty is the continuation of Somehow Further Hildibrand Adventures. If you enjoy Hildibrand, you’ll be happy to know that this particular update is one of the best they’ve ever put into the game, and is definitely worth finishing.

However, if you’re in it only for the Manderville Relic weapons, I’m afraid this is not something you’ll necessarily want to come back into the game for. The requirements for Step 2 of Manderville Weapon Relics are trivial, and if you were hoping for something to grind, you might be left… underwhelmed when you realize you can get the new relic in no time even if you come back later on. On the other hand, the relics do look nice, and the weapons are currently sitting at ilvl 630, which isn’t bad for all the casual and semi-casual players who didn’t get their weapons from Savage raids.

Splendorous Tools

Splendorous Tools, which are essentially the Crafting and Gathering Relics, are another thing to work towards in 6.35, as the new step is now available. If you have a Crafter or a Gatherer at level 90 and are at least somewhat interested in this, it might be a cool thing to do, but if you’re not into it, it’s definitely something you can catch up with easily later on.

Loporrit Tribal Quests

If you’re a fan of Loporrits, this patch might be something you want to come back for, as they are back in the form of Crafting Tribal quests. These are dailies, so if you’d like to start working towards the rewards straight away, and potentially level your lvl 80 Crafters, I’d say they’re worth exploring. The quests are funky and adorable, so if you’ve got any love for the bunnies, crafting, or both, I don’t think you’ll be disappointed with them.

That’s pretty much it when it comes to 6.35. Overall, if you’re a fan of these things, I’d say it’s worth exploring, but apart from the daily tribe quests, there’s nothing to immediately start on that you can’t just catch up with in no time whenever you choose to come back. It’s a fun little patch for what it is, but if you’re currently spending time doing something else, playing other games, or anticipating the 6.4 live letter on the 31st, that’s completely fine as well. Let me know your thoughts on the patch down below! Massive thanks to everyone supporting the content – if you’d like to join them and keep it going, you can do that here on Patreon. Enjoy 6.35, have fun and I’ll see you in my next guide. Bye bye!

Should You Play Octopath Traveler 2? [NO SPOILER REVIEW] 

As Octopath Traveler 2 recently came out, and I’ve had plenty of time to check out the game, it’s time to be honest and talk about it – so that you can have an easier time deciding whether it’s worth your time and money or not. (Of course, big thanks to Square Enix who were kind enough to provide me with the review copy of the game at launch!) This article contains no story spoilers, as I would never do that to you!, so feel free to dive in!

The story of Octopath Traveler 2

If you’re a JRPG fan, which I guess you are if you’re watching this video, you want to know if a game you’re about to start is worth your 60 dollars and most likely 60 hours, and a big part of that is the quality of its story. When it comes to Octopath Traveler 2, I can honestly say the story is amazing, but definitely different from your classic linear JRPGs. In OT2, we have 8 different storylines, each with its separate twists and turns, and I loved all of them.

Unfortunately, if you’re expecting a ton of intertwining and meaningful connections between the separate characters’ stories, this might not be your cup of tea, but if you’re happy to simply go through all of them and enjoy each character separately – with a ton of travel banter and interactions should you choose to engage with them – you’ll love Octopath Traveler 2 for what it is.

There is, however, another form of story intertwining – which is the connected chapters, allowing you to experience the story of two particular characters through a tiny lore snippet, which I’ve personally found very satisfying. I so far haven’t played through a single storyline chapter that didn’t keep me engaged and invested, and that says a lot, considering I’ve decided to finish all of the characters’ stories. Some of them are cheerful and full of hope, the others are dark and a bit tragic, the others are quirky and charming, but each one of them has its own special flair that I think you’ll enjoy if you’re a fan of the genre.

Combat & game systems

Even if you’re not a big fan of the storyline and are here for the combat, you will definitely not be disappointed. Octopath Traveler 2 is a love letter to turn-based strategies that makes even the random encounters feel engaging, meaningful and just stupid fun to be in. The bosses, from their design and appearance to their abilities, feel unique, challenging and very satisfying to beat, with each chapter having one final foe to encounter just before the finish line.

The fact that you can change from day to night in the open world and deliberately farm stronger enemies in random encounters for greater payoff is a great system in itself, but what makes all the fights super fun are the bonus points and Latent Power systems. The combat is deceptively simple, but when you take into consideration the things like resistance and vulnerability, proper management of spells, Latent Power, bonus points, potions, buffs, spells, secondary jobs, spending your job points and party composition, the game is so much fun to play and experiment with. I love what Octopath Traveler 2 has done for the genre, as it’s expanded upon the easy-to-learn, turn-based system and turned it into addictive gameplay that makes the time fly past you. 

Performance

When it comes to Octopath Traveler 2 performance, I don’t have a single complaint. There were no bugs for me whatsoever, and this could be due to the nature of the game, but everything just runs very smoothly. The loading times, scarce as they are, last only a couple of seconds, the audio is crisp, the combat is responsive, and overall, the game runs very well even on the highest settings. 

Graphics & art

The graphics and art style is obviously the first thing you come across when looking at the game, and even though I love this kind of art, for every person out there, it’s definitely a hit or miss. I think it’s pretty safe to say that, if you enjoy HD-2D graphics, this will be one of your most beloved games ever, as the design is amazing, but if you don’t like this kind of thing, you might not be able to appreciate the beauty of it. I personally find the mix between HD and 2D incredible, especially when I’m going around with a pixel-y character expecting a similarly crafted environment, yet I’m discovering lakes and waterfalls where the water looks better than any water I’ve ever seen in real life!

Music

Music is not something that people initially get drawn by when it comes to strategy games, but Octopath Traveler 2 is so special because of the incredible diversity of the zones the characters start in. Each zone has a different mood, which is heavily enhanced by the background music, and it goes so well with each of the stories. Even the sound effects, like the crackling of fire nearby you, the gushing of wind, the rain, and all the combat sounds are charming and very fun to listen to, so unmuting your game is highly recommended, in case you ever do a silly little thing like that!

Voice acting

With so many characters in Octopath Traveler 2, you’d expect that voice acting wouldn’t be something they’ve actually tried to perfect, but playing the game has made me feel the opposite. Each and every one of the characters I’ve encountered had their own flair largely due to the tone of their voice, and that includes the side or optional NPC’s I only had a chance to interact with for a little bit. In short, the voice acting has just been incredible, and especially due to all the accent variety they’ve doubled down on in order to show the diversity of the characters and their origins!

Keyboard vs. controller

This is something that I didn’t used to cover in all my reviews, but I feel like it’s important to mention it for Octopath Traveler 2, as the difference in keyboard and controller experience is so big, it can’t be ignored. When I first started playing this game’s demo, I admittedly hadn’t had a controller just yet, but some of my recent circumstances made me feel like it would be a good idea to have one, and I am yet to regret it. The keyboard gameplay of Octopath Traveler 2 is fine, I suppose, but in comparison to playing on a controller, it feels awkward and unintuitive – especially when it comes to walking around the map and boosting the attacks. Even for someone new to controllers like me, the game is simple enough to experience on it, and I would definitely recommend giving it a try even if you’re playing it on PC.

Should you play Octopath Traveler 2?

Overall, I am in love with this game so far, and – as biased as I may be – I definitely think you should give Octopath Traveler 2 a go if you haven’t yet. Even if you haven’t played the first game yet, I believe it presents no obstacles for enjoying the sequel. I personally never got to play the first Octopath Traveler, and even though I don’t know its story, I don’t feel like I’m missing out on anything, as there’s a whole different cast and the game is apparently better in all aspects. Even though I wanted to play it before starting with Octopath Traveler 2, unfortunately, time didn’t permit me to, but I’ve been having the best time with the sequel, and I believe you will, too! When it comes to whether or not this game is worth the full price, I definitely think yes, if this is something you’d like to experience sooner rather than later. In my reviews, I’m always honest about whether I think you should wait for a sale or not, and when it comes to Octopath Traveler 2, it has so much to offer that you might not even get to finish the game fully before it goes on sale… but that depends on the amount of time you have. If you can squeeze in a full-on JRPG within a week or two, do let me know your secret in the comments, as I’m struggling to find time to play all my favorite games!

That’s pretty much all I can think of when it comes to Octopath Traveler 2. What are your thoughts on it, and if you’ve already played it, would you recommend it to others? Leave your two cents down below, and you can also find my playthrough here, should you want to check it out. However, for your own sake, beware of the spoilers and go through the lore bits carefully if you haven’t played yet. Should you want to support my content and keep me going, consider becoming a Patron and enjoying some awesome perks! Alright now – enjoy the game, take care and I’ll see you next time!

How To Get Manderville Relic Weapon: Second Step [Quick & Easy Guide]

Some of you may wonder why the Step 2 for Hildibrand Relics guide is even a thing, but for the sake of this hopefully turning into a viable and satisfying activity in FFXIV, please go through this guide just to provide me some validation for existing as a content creator and let’s all pretend this is the information we need right now.

So – if you really are new to all this and don’t know why I speak in a horribly cynical manner, welcome to the guide for Hildibrand relic step 2, I suppose!

The first and most obvious step you need to complete is to finish with the new installment of Hildibrand adventures questline. Fortunately, this one is probably the most satisfying quest chain I’ve lately had the pleasure of going through, like many others, so at least there’s that. These quests are called  “The Spectacle of Inspection,” and “Generational Bonding” and you’ll find the starting quest next to Radz-at-Han Aetheryte.

Then, you’ll want to go to Gerolt in The High Crucible of Al-kimiya in Radz-at-Han to start the quest “Well-oiled” as the job you want the weapon for. After you’ve done this admittedly satisfying quest, head to Jubrunnah in the main Aetheryte plaza of Radz-at-Han and – surprise, surprise – exchange Allagan Tomestones of Astronomy for 3 Complementary Chondrites, which you’ll turn over to Gerolt in exchange for your shiny new ilvl 630 weapon. One Chondrite costs 500 tomes, so treat this as a Tomestone ATM and get yourself a relic in less than 2 days’ time even if you currently have none. 

And that’s all for this step! If you want another relic weapon for a different job, you will just need to talk to the “House Manderville Artisan” next to Gerolt and give him three more Complementary Chondrites. I will make sure to update this guide series with a hopefully more comprehensive guide on a more comprehensive quest! Massive thanks to everyone supporting the channel already and if you’d like to join them and keep the content going, you can do that here on Patreon. Enjoy 6.35, have fun and I’ll see you in my next guide. Bye bye! 

Vee’s Honest Hogwarts Legacy Review [NO SPOILERS]

After about 60 hours of Hogwarts Legacy gameplay and so much more to come, it’s time for me as well to sit down and talk about my experience, without any story spoilers of course. I never thought I’d have to say this when working on a game review, but I’m honestly just going to sit down and talk about the game itself, with no hidden controversy drama. I will, however, touch on my experience as a Hogwarts Legacy streamer on YouTube and Twitch for a bit, but that’s as far as it goes.

The first and the most obvious thing I want to talk about is the story, and don’t worry, I’m keeping all the details for myself. The overall impression is that the development team has completely moved on from and abandoned the idea of Harry Potter world, and has created an entirely new, equally magical environment that can stand on its own two feet, while still feeling relevant to every single Harry Potter fan out there with all the lore crumbs and Easter eggs spread throughout the game. Even if you’re not a Harry Potter fan, your experience will be complete and seamless, as there is nothing you’re required to know before starting to play the game. However, if you are a Potterhead, you will notice just how much of a love letter Hogwarts Legacy is to the original world, created by fans, for fans – and as you’re exploring it, you’re bound to fall in love with it once more. When it comes to the story itself, it’s a wonderfully written, easy to digest, emotional journey that tackles one of the most important aspects of human personality, throwing you deep into thoughts as you’re unraveling the main storyline, ultimately leading you towards creating your own legacy in this world. The main questline can be completed in anywhere between 20 and 30 hours if that’s the only thing you’re after, but considering only about 6% of people have beaten the final boss – at least on Steam, it’s clear that there is so much to this game than simply following the main questline, as it simply sucks you in and isn’t even sorry about it.

The second most important thing to most people, or maybe the first if you’re not a huge lore geek, is the combat. The magic in Hogwarts Legacy is unlike any other Harry Potter or magic-related game I’ve experienced before. The dev team has absolutely nailed it with the unique combat system that is deceptively easy, as you can immediately learn how to cast your spells and call it bland, but boy, does it start being fun when you figure out which spells go well together! Of course, if you’re not a fan of experimenting, you can simply roll your way through the game on an easier mode, while simply casting the more powerful combat spells with lower cooldowns, but engaging with this system is highly recommended, as the game offers so much when it comes to it. When I stream, combat is normally when I talk to the chat the most, but while playing Hogwarts Legacy, I’ve caught myself going eerily quiet multiple times as I was just out there enjoying my spells with a stupid grin on my face!

The combat isn’t the only thing that amazed me about Hogwarts Legacy. Along with it, there are plenty of systems that tie in together quite nicely, making it optional to explore side content, but extremely satisfying and rewarding if you do. From throwing combat plants at your opponents, to capturing beasts whose materials serve as gear upgrades and enhancements, gardening and brewing your own potions, and opening random chests to find special traits to improve your combat abilities, everything gets tied in together so nicely that you simply want to go out of your way and use all these systems even if you don’t feel like your have to. I mean, come on – throwing cabbages that can bite people’s ankles off? If that doesn’t sound like the pinnacle of fun to you, then I don’t know what else they have to offer here!

Let’s talk about the graphics and art style a bit. The game is visually the most stunning piece of modern entertainment I’ve ever experienced, and even if I had no prior emotional connection to the places recreated in this game, I still would’ve been in awe when it comes to their appearance. The art of the game is just stunning, but for me as a streamer with a more… erm, humble PC setup, I unfortunately didn’t quite manage to bring it to life during my live coverage of the game. While I was exploring off-stream, I was able to really crank it up and enjoy everything the game had to offer, visually and graphically, but while on stream, which was most of my playthrough, I had to sacrifice some of the quality for the sake of smooth gameplay, as it was almost impossible for me to do both at the same time at no detriment to the viewers’ experience. In the end, I chose performance over full graphical immersion, and while I don’t regret my choice, I wish the game was a little more accessible on PC. I talked to quite a few content creators who were covering the game on PC as well, and I don’t know a lot of people who were able to run their settings on High, and even turn on Ray Tracing without crumbling their hardware to dust. All in all, the game is a joy to play even when on the lower end of settings, but if you can, then by all means, enjoy and you know. Good for you and all that! 

When it comes to voice acting, I was pleasantly surprised about the fact that the entire game has been voice acted – including you as the main character – and there wasn’t a single thing I had to read out loud while streaming, except for some random letters and field guide pages I found while exploring. The fact that our own character is voiced has helped me connect with her, feel what she feels, laugh when she laughs, and choose replies according to what I’d like to hear her say. The rest of the characters have done a wonderful job. I’m personally a great fan of British voice acting and the diversity of accents has made it incredibly easy for me to feel immersed, but the fact that some other distinct accents have been included has given this game a diverse vibe that I’ve never felt before in any other game. The inclusion within the game, for better or for worse, has gone so far that it ignores any and all historical facts about humans during the 1800s, and simply has everyone participating. Finally, I don’t think I can in good conscience talk about voice acting without giving a massive shoutout to Rachel Rath, the voice actress of Niamh Fitzgerald, whose performance has blown me away and made an initially cool part of the game extra special with just how incredible she is at portraying emotions through her vocal performance.

I previously mentioned side content as one of the most interesting aspects of the game when it comes to improving your combat experience, but that’s not all there is to it. Hogwarts Legacy might just be the only game ever I’m tempted to fully 100% at the cost of all the other things I’m backlogged with, as the side stories are just too good to miss out on. Apart from the usual side quests, which are all unique in their story and gameplay, there are three separate relationship questlines that you’ll recognize as important, and I got so drawn into their stories that I did them as soon as they opened out. They went all in on the character progression during these quest chains, and while I don’t mean to spoil anything to you, these are the exact quests that made me look at certain characters and realize I’d probably lay down my life for a friend like that in real life. (But I don’t have any friends like that, so I’m hoping to be around for a long time.) If you happen to choose Hogwarts Legacy as your next game, or you’ve already started exploring it, I highly recommend checking out the side content as well.

The music of the game is gorgeous, and if you have any wishes to experience the Harry Potter nostalgia through some familiar tunes and atmosphere, you are in for a treat. It’s not just the battle and the zone soundtracks that are amazing, it’s also the little sound effects every time you cast a spell, discover something, unlock a new flight path, or level up. It’s a cozy experience that I think you’ll enjoy no matter what!

This might be a bit of a personal issue for me, but I’d like to talk about my experience of using a controller versus the keyboard during my playthrough. I’ve historically been a PC gamer, and my keyboard is somewhat of an extension of my nervous system, but as I started playing Hogwarts Legacy, I became ready to put all of that aside, as the gameplay on keyboard was unintuitive at best. There were plenty of buttons and commands I struggled to memorize, and they were simply more intuitive on a controller – especially when it came to switching between the spell layouts. At the beginning of my playthrough, I had very little idea what I was doing and it was very challenging to even move around, but by the time I finished, I felt very comfortable and confident in my newly acquired skills, which speaks volume of the game’s accessibility for all the players already used to controllers as their weapon of choice.

Finally, I’d like to mention a couple of things regarding my streaming experience, and I left it for the very end, as that might not be something that’s relevant for most people who stumble upon this review. As much as I wanted to simply play the game and enjoy it without having to deal with the backlash, harassment or the community drama, I eventually spoke about it on stream, and scary as it was, it made a lot of difference – for both me and my viewers. I took a strong anti-harassment stance that I firmly believe in, and honestly, it improved my experience as a streamer. The community I’ve gotten to know while streaming Hogwarts Legacy has, for the most part, been a super pleasant, interactive crowd and anything bad that happened during me streaming it didn’t quite outweigh the good. 

Overall, Hogwarts Legacy has been a joyful experience for me, that I haven’t had in a very long time. It took me back to some happier, more cheerful and definitely less complicated times, back to the magical Hogwarts from the books and movies, and even to the imperfect but endearing pixely versions of Hogwarts from the older Harry Potter games. The game didn’t feel like a game – it felt like a world right out of a fairytale, and I don’t see myself not playing the game anymore. I am yet to fully complete my collection, start multiple playthroughs to experience the house-specific side quests, and visit the other houses’ common rooms as my own. To me, this is definitely a strong game of the year contestant and, even though I know Hogwarts Legacy winning Game Of The Year Award in today’s day and age is unlikely due to all the controversy around it, I’m just glad it managed to win so many people over because, at the end of the day, it’s a good game, and that’s all there is to it.

I would love to hear your thoughts on Hogwarts Legacy. If you’ve already played it, would you recommend it to others? Leave your two cents in the comments! You can find my full Hogwarts Legacy playthrough HERE, should you want to check it out, but beware of the spoilers and tread through the lore bits carefully if you haven’t played yet. If you’d like to support my content and keep it going, you can do that on my Patreon, and subscribe to my YouTube channel for more great stuff!

All FFXIV 6.3 Mounts & How To Get Them!

There are plenty of collectables to obtain in Endwalker 6.3, but one of the juiciest rewards are always the mounts. In this guide, you’ll find out all about the mounts from the new patch and how to get them!

The first mount you’ll be wanting to get from Endwalker 6.3 is arguably the easiest one to obtain, and that’s the Logistics Node. You can get it as a reward from the Crystalline Conflict Level 15, in the Series 3, and as it looks pretty cool, you should definitely try to get it before the Series reset.

Then, there’s Anden III, which is a mount you’ll receive as a reward for Level 5 in Anden’s Custom Deliveries introduced in 6.3, which is the maximum level. In order to obtain this leafy, little guy, you’ll need to do your custom deliveries weeklies for three to four weeks, depending on the quality of your turn-ins. You can do his particular quests 6 times per week max, as he will ask you for six things to turn in every week.

Another mount that might be a bit tricky to obtain if you’re not a fan of Gold Saucer is the Blackjack, which is a new MGP sinkhole worth 4 million MGP, and can only be purchased from the prize vendor in the Gold Saucer. I’ve got a guide for Gold Saucer activity farming from a couple years ago that’s still viable should you want to check it out, and I’ll leave the link down in the description of this video.

Then, there are Pinky and Phaethon, both coming from the Treasure Map activities. You’ll get Phatheon from Nesvaaz in Radz-at-Han for 3 Burning Horns that come from the Gold Chests in The Shifting Gymnasion Agonon. If you’re not into Treasure Maps, you can get Phatheon from the Market Board for about 8 to 9 million Gil, should you so choose. Pinky, however, can be acquired at the same vendor for 3 Bottles of Exciting Tonic, obtained in the Final Chamber from The Excitatron 6000. If Pinky seems to be out of your reach, and you’ve got the Gil, you can get this beauty for about 20 million from the Market Board, or maybe less on your World if someone who’s selling doesn’t value it as much.

Next, there’s the Lynx of Righteous Fire, which you can obtain from the Mount Ordeals Extreme Trial. These aren’t available for purchase yet and have quite a low drop, but you can start collecting your tokens and get it when it becomes available for purchase if you don’t luck out on it.

Next up, we have the two new Gil sinkholes, both costing the staggering 50 million Gil, and both being purchasable from Edelina in Mor Dhona. For this uncanny amount of money, you could be doing a lot more than riding a golden sheep or a glorified Magitek Armor, but hey, if you’ve got money to spare, you do you! Should you ever wish for them, they are the Chrysomallos, a.k.a. The Golden Sheep, and Magitek Avenger G1, which is admittedly gorgeous and has a different sitting position than the original Magiteks, but I’m still not sure if it’s fully worth this crazy amount of Gil.

Finally, we’ve got the Island Alligator, purchasable for 35k Seafarer’s Cowries on your Island Sanctuary, but only after you’ve acquired rank 12, which is the maximum rank in this patch. It seems rather pricey, but he’s definitely worth it, as it’s completely unique and majestic, even without the effects and glitter.

That’s pretty much all I could think of when it comes to the new mounts of Endwalker 6.3. If I’ve left something out or you have any questions, let me know in the comments, and stick around for more good stuff! If you’d like to support my content and keep it going, you can do that on my Patreon, and subscribe to my YouTube channel for more easy wins in FFXIV!

All FFXIV 6.3 Minions & How To Get Them!

The Endwalker 6.3 patch has been out for quite a bit now, and it’s time to go over all of the new minions made available in it. If you’ve been wanting to collect some cool loot, you’re in the right place!

We’ll start off with Mama Automation, which you can purchase from the Gold Saucer Attendant in Gold Saucer, in the Prize Claim III menu, and it’ll cost you 30 000 MGP.

Next, there’s the Bantam Train, which is crafted by Armorer, or bought at the Market Board for almost 2 million Gil. If you’re a train fan, you’ll simply have to level up an Armorer, cash out, or wait for the prices to drop.

Then, there are Wind-up Philos and Wind-up Aidoneus, both coming from The Shifting Gymnasion Agonon, which is the new Treasure Map area. If you’re not into Treasure maps, these can be terribly expensive, currently sitting at around 10 million Gil or more. If you’re into maps though, it’s a nice way to make some extra money off people who can’t resist them!

Then, there’s Suzusaurus, which comes from the Subaquatic Voyages – Bloodbreak. If you don’t have an FC house to perform these activities in, you can find it at the market board for close to 3 million Gil at the moment, which isn’t that bad considering how few people actually do the submarine missions.

Next up is Corgi, which you can get for 400 Faux Leaves from Faux Commander in Idyllshire. If you’re not a fan of Unreal Trial, you can get it at the Market Board for about 5 million Gil currently, which is a totally justifiable guilty pleasure if you ask me.

We also have the Wind-up Halone, which is arguably the cheapest one, as it drops from the Euphrosyne Alliance Raid. You can farm this one repeatedly and have a 1 in 8 chance to loot it at the end of the raid every time, so good luck!

Next up is Sky Blue Back, which you can get from your Island Sanctuary Vendor for the price of 4000 Seafarer’s Cowries, and it has no rank requirement, so if you’ve been working on your fields at all these days, you should be able to afford it. 

Finally, there’s the Wind-up Cagnazzo, with a low chance of dropping from the Lapis Manalis Dungeon, should you be so lucky. If you’re not, you can still get it from the Market Board, for about 200k Gil, which is really not that bad – especially if you don’t tend to do your Expert roulettes.

That’s pretty much all I could think of when it comes to the new minions of Endwalker 6.3. If I’ve left something out or you have any questions, let me know in the comments, and stick around for more good stuff! If you’d like to support my content and keep it going, you can do that on my Patreon, and subscribe to my YouTube channel for more easy wins in FFXIV!

FFXIV Valentione’s Day 2023: Quick & Easy Guide!

Valentione’s Day is up and available in FFXIV, and it will last until February 15th, 2023. In this quick and easy guide, I’m going over everything you need to know for this event, what the rewards are, what you can do during it, and how not to miss out on anything!

In order to start the event, you need to be level 15 Disciple of War or Magic, and need to have completed the quest “It’s Probably Pirates”, which is a level 15 MSQ. If you’ve got it covered, make your way to Mih Ketto’s Amphitheatre and find Lisette de Valentione with a blue quest called “Suited for Affection”.

Source: FFXIV Lodestone

Finishing this endearing story will award you with a gender-appropriate gear chest with a head, body, legs and feet, that are absolutely stunning, dyeable, and you can fit all of them into the Armoury Chest without worrying about whether or not you’ve overflown your Glam Dresser!

Once you’re done with a quest, you find the House Valentione Servant next to the stage and queue with a party member or with a random person into the cutest instance you’ve ever seen, where you get to work together to perform tasks, kind of like in FFXIV’s own version of It Takes Two. Going with your actual Valentine or someone who you want to hint your affection towards is probably the way to do it, but if you queue with a random party member, you still have the potential to make a friend… or an enemy, depending on how well you work together towards completing the puzzle. 

Right outside Mih Ketto’s Amphitheatre, you’ll find a House Valentione Maid, who is the vendor of the event, and there are plenty of cool things to purchase here, including the copies of the glam items you’ve received in your chest. You can get the other gender’s items too, but it’s unfortunately gender-locked, so you can only realistically wear one set – unless you’re purchasing it for one of your retainers, of course. This year’s loot is Ballroom Etiquette – Valentione’s Dangers, which is an Eat Chocolate Emote. There’s also Valentione’s Heart Desk for your house or apartment interior, as well as the Prismatic Heart prisms to fool around with.

That’s pretty much all I could think of when it comes to this year’s Valentione festivities. If I’ve left something out or you have any questions, let me know in the comments, and stick around for more good stuff! If you’re more of a visual person, and you don’t mind getting easy wins in-game, you can check out all of this in my video – and subscribe for more awesome FFXIV stuff!

Should You Play Valkyrie Elysium in 2023?

A few days ago, I had the chance to finish Valkyrie Elysium, the newest title in the Valkyrie Profile series, so I’m going to share my experiences that will hopefully help you figure out whether or not you should be playing Valkyrie Elysium in 2023. The review copy was kindly provided by Square Enix – so massive thanks for that, and without further ado, let’s talk about the game!

When it comes to the story of Valkyrie Elysium, I wish I could say I was completely into it from the beginning until the very end, but for me personally, it took quite a bit of time to connect to the characters. It’s only natural to perceive a Valkyrie as someone cold, uninterested in human endeavors and focused on her goal, but at the same time, I’d lie if I said that kind of approach didn’t hurt my overall experience a bit. I only started being really invested in the story around chapter 6, and since there’s only 9 of them, you could say the game had kind of a slow burn. The payoff for the true ending was decent, but the rest were… Well, let’s say that the slow burn didn’t exactly climax into what I would call a satisfying experience afterall. It was okay, and for as long as you don’t expect the game to suddenly have a completely different feel to it, you might find some joy in exploring all of the endings.

Lorewise, the absolute carries and champions of the story were the Einherjar. Their back stories, interactions with the Valkyrie and with each other, even their battle abilities, made the game worth playing through and exploring, just for the sake of unlocking their full lore. I was able to connect with them a lot more than with Valkyrie, I felt for them and was excited to be able to interact with them, and that made all the difference.

When it comes to combat, I can say that – without a doubt – this is one of the strongest points of Valkyrie Elysium. If you want to feel good about running around, hacking, slashing, breaking, exploring and pulling off some cool battle combos, this might be something you’ll find worth investing your time in. The game systems that are tied to combat like weapon advancement, talent tree, acquiring new skills for your einherjar, as well as the spells and knowledge you pick up along the way, tie up very nicely to the core of Valkyrie Elysium combat. Exploration is rewarded, as there are chests and loot all over the place that can help you upgrade your skills and weapons faster, which make the combat super interesting in my opinion. 

The art style and design of Valkyrie Elysium was primarily one of the things that got me interested in the game, and I can say that the game has delivered a unique experience from the start until the very end. I enjoyed the cutscenes, the camera angles were on point, and the boss design kept getting better and better. If a game being pretty is something that’s important to you, I’d say Valkyrie Elysium is definitely worth it, as I believe it’s a step in the right direction – at least when it comes to artistic value.

When it comes to voice acting, I’m actually pretty impressed with the delivery. I immediately recognized the soothing, familiar voice of the Valkyrie as Tremina from the DioField Chronicle, and although DioField reviews have been quite mixed at its core, I enjoyed the voice acting immensely. Even though I didn’t quite manage to connect to Valkyrie until the last few chapters, the personality given to her through Holli Dempsey’s voice is very well crafted. The other characters are very well delivered in my opinion, at least when it comes to the English cast, as that’s how I chose to play the game. I normally like to experiment and hear the game in different languages, but I had a very hard time imagining the settings of Norse mythology while listening to the voices in Japanese. You could argue that English doesn’t have much more to do with it either, but I did watch a lot of Vikings and The Last Kingdom, so in my defense, I’m very much used to it.

Let’s talk about the game’s performance. Overall, I didn’t run into any problems worth mentioning, and the Steam version of the game runs quite smoothly. However, I did stream my Valkyrie Elysium playthrough, and it’s the only game that made it hard for me to do other things while streaming, like opening other tabs, tweeting about it and whatnot. I also turned down quite a few effects and graphics improvement options in order to solve this, and overall I had a good experience. If you’re not a streamer (and even if you are, with more than just modest equipment), you’ll probably be able to run it at a much higher quality, but this is just what my experience was like.

Now, let’s discuss world building, this is unfortunately where my review gets less than positive. The game looks gorgeous as it is, but it allows very little non-linear exploration. Even if you choose to go back to a certain area, from time to time, your Valkyrie will stop you in your tracks and tell you that you should be heading elsewhere. This makes it very difficult to collect all the Hollow and Verdant Blossoms throughout the map in one go, and that has been my greatest concern, as collecting them actually unlocks the option to see the real ending of the game.

The fact that you can’t just spawn yourself in a zone you’ve previously completed to collect stuff, but instead you have to reload and redo an entire chapter again to make sure you’ve got it all, was the most defeating feeling ever, as I am not a big fan of artificial prolonging of playtime. This led me to a total lack of immersion, as I had a guide open on my second screen even while streaming, to make sure I know where I need to go in order to collect all of them in one go. I feel like this entire endeavor has been manufactured to keep players engaged without trusting that they will come back to play the game, which can build a lot of resentment in return.

Unlocking free exploration of the zones upon their completion without having to restart a chapter and do it all again is, in my opinion, the best way to go about it, and if anything, it serves as a valuable lesson for the future, as there are plenty of players who simply gave up on completing the game because of this – for reference, only about 12% of the current Steam players have completed the game on Normal difficulty. However, collecting the Blossoms did prove to be a worthwhile endeavor, as those cute, little stories made the game so interesting, and the final lore payoff after collecting all Verdant Blossoms was very, very good.

Even when it comes to side quests, I failed to feel engaged enough to go through them, as they were mostly all the same – you encounter a spirit, they ask you for help, you kill some minions, open a chest and that’s that. Rewarding as they are, they’ve failed to demonstrate the vastness of the world that I so desperately wanted to experience fully, and that made me kind of sad.

Overall, I think Valkyrie Elysium is a solid game that you should definitely try out, especially if you’re a fan of the Valkyrie Profile series, or Norse mythology in general. However, the base game can be completed in about 12 to 15 hours, and considering some of the questionable things about it, I don’t believe you should be investing into it at its full price as of now. In my opinion, you should wait for some of the bigger sales that include Valkyrie Elysium and get it for less.

What is your opinion on Valkyrie Elysium and do you think it’s worth playing in 2023? Let me know in the comments! I’m sure anyone would appreciate your two cents on whether Valkyrie Elysium is worth it. You can find my full Valkyrie Elysium playthrough HERE, should you want to check it out, but beware of the spoilers and tread through the lore bits carefully if you haven’t played yet!

Gearing in Endwalker 6.3: ULTIMATE GUIDE! | ilvl 605-635

Gearing in FFXIV is a journey of its own, and with the new patch activities being familiar to you, you might be wondering how to gear up and what’s worth doing. In this guide, I’m going over the gearing roadmap made super simple for Endwalker 6.3!

When it comes to ilvl 605, you can get a fresh set of gear from the new MSQ dungeon, Lapis Manalis. If your character is a fresh level 90, this is a good way to start gearing up as it’s easy to do and the dungeon offers a full set.

If you’re looking for ilvl 610, you can acquire Rinascita crafted gear, which can also be pentamelded, so it adds additional value to your stats. This one might still be a little pricey if you’re not a crafter, but there is a potential to upgrade it, which I’ll talk about in a bit.

If you’re not into crafted gear, the Normal Abyssos still offers gear at ilvl 610, that you can now freely farm, should you so choose, as the weekly restriction for the rewards has now been removed.

When it comes to the weapons, Storm’s Crown Extreme can get you an ilvl 615 weapon if you want it, but there are other ways to acquire the same or better weapon that are more viable, so I won’t spend too much time talking about this one, as it pretty much has glam value at this point.

Manderville weapons, which are the Endwalker version of a Relic weapon, are a much more viable way of getting an ilvl 615, as the continuation of this questline and the next step of the weapon with an increased ilvl will be coming in 6.35.

Euphrosyne, which is the new Alliance Raid wing, can yield you an ilvl 620 piece of left side gear, which is actually quite amazing – but there is a weekly loot restriction so you can’t really farm it. What you should be doing is collecting the Euphrosyne Coins, which you can also only get one per week of, and I’ll explain why in the next few minutes.

So, remember how I mentioned the crafted gear being able to get an upgrade? Well, if you happen to purchase Dharmic Rain for 100 of your Tomestones of Astronomy from Rashti in Radz-at-Han, along with the Hannish Certificate of Grade 2 Import which you’ll get in exchange for your old crafted gear, you can very easily do so. You can turn in both of those items over to Rashti if you click on “Purchase Augmented Rinascita Equipment” and get yourself whatever Augmented crafted piece of gear you want, as they’re sitting at ilvl 620.

You can get your ilvl 620 Lunar Envoy gear set from Cihanti in Radz-at-han for the Tomestones of Casuality, and what’s cool about it is that the set can also be upgraded. In order to get an ilvl 630 instead of 620, you need to talk to Nesvaaz in Radz-at-Han, open the Out-of-this-world Oddities menu and purchase Moonshine Twine if you’re upgrading the left side, and Moonshine Shine if you’re upgrading your accessories. You’ll get the Moonshine stuff by exchanging your Aglaia coins or Euphrosyne coins, so it’s important to do those weekly as that’s your best bet at getting your gear upgraded.

You can also acquire Moonshine Twine or Shine if you do your Hunts, so just exchange the Sacks of Nuts in Old Sharlayan at the Hunt vendor.

If you’d like to get the weapon from the new Extreme Trial, which is sitting at ilvl 625, you can either loot it from Mount Ordeals or exchange your tokens over at Nesvaaz, Totem Gear (Rubicante) and get yourself a Flamecloaked Weapon.

The Savage gear from Abyssos is still the best thing around, where the gear is sitting at 630, and the weapon is ilvl 635. I won’t go into details of the Savage loot system, as you probably already know this if you’re into Savage content, and it’s easy to look it up. 

That’s all I could think of when it comes to all the ways to get the gear in this patch. If I’ve left something out or you have any questions, let me know in the comments, and stick around for more good stuff! If you’re more of a visual person, and you don’t mind getting easy wins in-game, you can check out all of this in my video – and subscribe for more awesome FFXIV stuff!

Everything You Should Do In FFXIV Before 6.3!

The FFXIV 6.3 patch is fast approaching, and there are plenty of things to do before that, if you haven’t gotten around to it. In this guide, we’re going over everything you should be doing right now, as it’s either going away, or it’ll hinder your 6.3 progress when you log in on January the 10th. 

 The first up is obviously MSQ. If you haven’t finished your 6.2 adventures and you’d like to jump into the main story as soon as the patch drops, now is the time to do that.

Apart from the MSQ, there’s a cool quest that gives a lot of backstory on some of the important characters in the main storyline. If you haven’t done this cute, little questline, make sure to visit Radiant Scout in Radz-at-Han to pick up the Shadowed Pasts quest. 

If you haven’t gotten your Island Sanctuary to rank 10, now is the perfect time to commit to that activity, as the new patch will be coming with a whole lot of Island Sanctuary updates, and if you’d like to experience them without feeling backlogged, there’s still time to fix that. 

The current Moogle Treasure Trove event is up and running, and will be ongoing until the start of the 6.3 patch. There are some unique and otherwise impossible items to obtain this time, like the Namazu Hankerchief, or the Falcon Ignition Key, so if you’d like to pick up these limited time items, there’s no time like the present.

The current PvP series offers a gorgeous dragon-like mount as a reward, and if you haven’t finished ranking up this season’s malmstones, you can do so now. Unfortunately, the queues for Ranked Crystalline Conflict are getting long as most people are done ranking up, but you can jump into Casual and get your dragon mount in a few days’ time. 

If you’re a little bit of a hardcore player and would like to commit to the new Omega Ultimate raid, you should clear the P8S first, as that’s the requirement to enter the raid at all, so have fun with that!

Finishing the story of the Four Lords in Stormblood, which is the optional trial questline, is a good idea, as that is the requirement for continuing Tataru’s Grand Endeavor quest, which is continuing in 6.3, so go do that if you haven’t yet and enjoy some terrific storytelling.

The second wing of Endwalker’s Alliance Raid is coming with 6.3 as well, so if you haven’t been through Aglaia yet, which is the first wing, make sure you have it fully unlocked so that you can get into the second wing right away.

The new Unreal Trial is also coming, which is Sophia within Containment Bay P1T6. Now, I’m not sure why you would want to go through such a thing, but should you desire to beat Sephirot in Containment Bay S1T7, I guess now is the time to experience that before it’s gone.

There’s also a new Deep Dungeon mode coming in 6.3, and in order to enter Eureka Orthos, you need to unlock Palace of The Dead level 50, in case you haven’t done that yet.

Emptying your Retainers’ inventories is a good idea if you’ve been struggling with having nowhere to put your newly obtained glamour pieces, as you’ll be able to glam your items directly from your Retainer inventory when the new patch drops, so make sure you have enough space for all the new 6.3 glam items.

When it comes to 6.35, which is a little while away, there are two additional things you should do. The first one is obtaining your Endwalker Relic Weapon from the Hildibrand relic weapon, as the quest will be continuing, and the second is leveling a crafter to 80 in order to partake in the new Tribal Quests and enjoy the company of Loporrits once more.

That’s about all I could think of when it comes to the pre-6.3 to-do list. What are some of your burning tasks? Let me know in the comments! If you’re more of a visual person, and you don’t mind getting easy wins in-game, you can check out all of this in my video – and subscribe for more awesome FFXIV stuff!

Should You Play Final Fantasy VII Original Game in 2023?

The original game of Final Fantasy VII has been one of the most beloved products of the gaming industry to this day. If you, like myself earlier this year, have heard of this game, but aren’t quite sure if you should commit to this old-school, 50-hour project, I might be able to offer some insight. I only got to play FFVII OG for the first time in 2022, and my only regret is that I haven’t done so sooner. In this post, I’m going over some reasons why you may want to – or not want to – play the original FFVII.

Aesthetics

The first and most obvious thing you’ll look at when it comes to this game is its graphics, and there’s no way to sugarcoat it or beat around the bush – the game simply is what it is. I, like many others, have been able to enjoy its ‘90s charm even today, but if this is simply something you can’t move past, even if the game in question is legendary and well-known for its story, then that’s up to you to take into consideration and ultimately decide. I’m personally a big fan of old-school-looking games, pixel art and retro vibes, especially if the game is proving to be good, but before we get into why it’s good, I think it’s important to give this some thought.

Random combat/encounters

Apart from the looks that are admittedly fantastic for the year of 1997, when the game came out, you might find the game off-putting if you despise random combat encounters. This is something I wasn’t fully ready for when I started with FFVII, as it was only my second Final Fantasy game and I didn’t quite understand the benefits of being in combat all the time – especially because I streamed my playthrough and for some reason was feeling like I was wasting my viewers’ time by not getting to the bosses and lore bits as fast as humanly possible, but that’s just me and my silly imperfections. The combat is actually quite fun, rewarding and engaging, with a lot of interesting and unique mini-bosses to fight, counter and loot, and I over time learned how to love the game for what it is.

The story of FFVII

The real reason why you should be playing FFVII is because of its fantastic storytelling. If you’ve been planning to play Final Fantasy VII Remake or Crisis Core: Final Fantasy VII Reunion, I can 100% claim that playing the original FFVII game will be quite important for your experience in those games. You can still enjoy them even without knowing the full story of FFVII, but in order to fully understand and appreciate some of the events and Easter eggs, having FFVII OG under your belt will be very meaningful. And it’s not just for the story – the soundtracks you’ll hear in this game will reappear as glorious, remastered versions in both FFVII Remake and Crisis Core Reunion, and those moments will feel so, so good when you know where the tunes are coming from.

Finally, if you’re the kind of gamer who enjoys playing games in their chronological order, going through FFVII OG is a much better idea if you’re planning on playing FFVII Remake. The story of Remake cuts into only about 8 hours of OG gameplay, so if you’re eager to know the full story first, playing FFVII OG makes more sense. Worst case, you can play FFVII OG up until the bike ride, and then jump into Remake if you feel like it’s ultimately not for you, but I’d highly recommend at least giving it a decent shot before choosing to play the modern version first.

At the end of the day, the decision is up to you, but as I said multiple times – if you appreciate good storytelling, being familiar with the context before jumping into modern recreations of the game, and you’d like to be able to appreciate Remake and Crisis Core for what they are as modern versions of the same environment, I’d recommend giving FFVII OG a try. Let me know what you think about this in the comments – if you’ve played through any of these games before, I’m sure anyone would appreciate your two cents on what they should do and whether FFVII OG is worth playing in today’s day and age. You can find my full FFVII OG playthrough HERE, should you want to check it out, but beware of the spoilers and tread through the lore bits carefully if you haven’t played yet!

Crisis Core: Final Fantasy VII Reunion Game Review [Sponsored by Square Enix]

If someone had told me I’d only be discovering my game of the year in the second half of December, I wouldn’t have believed them, but here we are. A couple of days ago, I finished Crisis Core: Final Fantasy VII Reunion for the first time, and it’s time to sit down and talk about it. Huge thanks to Square Enix for providing me with the review copy of the game – I’ve been given plenty of amazing opportunities by this company this year and I’m incredibly grateful for the continuous chances they’ve been taking on me as a content creator. This review does not contain any story spoilers for the game, so feel free to read through it!

Now, onto Crisis Core! The most important thing to talk about is, without a doubt, the game’s story. I’m normally not a fan of completely wholesome, positive characters as I find it a lot more appealing to play as someone a bit dark and dysfunctional, but I’ve gotta say that Zack Fair has completely won me over. The positive energy, hope, love and almost child-like innocence he radiates is contagious, turning every one of the 10 chapters into a pleasant experience I looked forward to, while not wanting the previous one to end. The story of Crisis Core Reunion cuts deep; it’s an emotional roller-coaster that tugs at the heartstrings with no apologies, no matter who you are. If you’re the kind of person who plays for the story, there is plenty of satisfaction (and emotional damage) waiting for you along the way, and honestly, I hope you’ll experience both, as that’s definitely the designed experience!

When it comes to voice acting, things get a little rocky for me, as I may have made the mistake of playing this game in English. For me, some voice actors were either a hit or miss, with Genesis being the absolute highlight of the game. I honestly wish I could say the same for Zack, as I loved most of his voice lines, but some of the iconic moments felt like they were lacking the emotional depth that could’ve been achieved with a voice that didn’t constantly remind you it was.. Well, there – and being kicked out of your own immersion due to the voice being a bit unconvincing is definitely something you want to avoid feeling. On my next playthrough, I’m definitely going to choose Japanese voice acting, as I’m hearing very good things about all of the main characters’ voices, and from the little that I’ve had the chance to hear, I’d highly recommend it to you, too. The fact that IRL Zack and Aerith are actually married makes the whole experience more enjoyable in my opinion, and I’ll be looking forward to experiencing it and letting you know how I felt about the voice acting in my second playthrough. On the bright side, the entirety of the game is voiced, and talking to different NPCs across the game is one of the most satisfying activities as you’re walking around and exploring!

I’m pretty sure that almost everyone who plays Crisis Core Reunion is in it for the story, but apart from just that, there’s an actual good game in the background, too. The game systems like materia fusion and the DMW are a joy to explore and play around with; the combat is responsive and made me feel like I was casting and hitting before even pressing my buttons fully. Having the chance to explore different materia builds is a lot of fun, as you can save presets depending on whether you’re trying to be more tanky, be a better spell-caster, or something completely different. The addition of random combat is somewhat annoyingly nostalgic, but considering how quickly you level up by participating in those mini battles, it’s very satisfying. I didn’t get to toy around with materia fusion and buster sword proficiency grind as much as I would have liked, but those two systems are something I feel like I want to get into more as I explore the game’s higher difficulty. 

The best way to actually explore combat is the side Missions, which is an incredibly addictive game mode that has you do both side quests and missions that give you gear, materia, summons and so much more. By the time I finished the game, I was only at around 30% of all the completed missions, and there’s still so much to do in order to push me past my close to 20-hour playthrough. They’re fast, rewarding, and an overall blast to play through – especially the ones that give you additional lore on some of the characters!

Crisis Core Reunion’s art is something I feel quite at home with, especially after playing through Final Fantasy VII Remake. I love that the visual assets are freely shared between the two games, as I got to relive some incredible moments from Remake by just walking around Midgar, the train station, and some other areas. Both the characters and the monsters look incredible, and there’s so much effort put into everything that makes up the world. The game is a treat for the eyes, especially for the long-time fans who have been waiting for Crisis Core’s remaster for so long. For me, the summon animations are the absolute highlight of the artistic value of this game, as the art team decided to go all out and demonstrate what exactly they can do given time and resources. 

Another form of art I was quite amazed by is the music. A lot of the soundtracks will shower you with nostalgia if you’ve played any of the Final Fantasy VII games before, and even if you haven’t, you’re in for a treat. The mood matches the soundtrack perfectly in all of the cutscenes, dragging you out of action-packed, vivid tunes, straight into gentle melodies that melt your heart, and you won’t even mind. 

When it comes to the game’s overall performance, I have to say that this is one of the most responsive, crisp and smooth games I’ve played in a long time. As I stream most of my playthroughs, I’m normally very cautious about playing on the highest settings as my hardware still has things that could be upgraded considering what I do for a living. I was able to unapologetically crank Crisis Core Reunion up and not experience a single stutter, dropped frame or a lag, as the game is just so very well made. Even if your hardware is pushing and shoving through the struggle of playing some of the newer games, I’m very confident that you’ll be running Crisis Core Reunion quite smoothly. 

That’s pretty much it for now when it comes to my first thoughts on Crisis Core FFVII Reunion. If you have any questions or feedback of your own, I’d love to see them in the comments! You can find my full playthrough here, should you want to check it out, but beware of the spoilers and tread through the lore bits carefully if you haven’t played yet. If you’d like to check out the game, here’s the Steam link. Enjoy, have fun and I’ll see you next time. Bye bye!

Starlight Celebration 2022: Quick & Easy Guide!

It’s time to get all cozy and festive, and there’s currently no better way to do it in FFXIV than to participate in the Starlight Celebration. This cute event started on December 15th and will last until December 31st, so you’ve got plenty of time to pick up the seasonal rewards. In this video, I’ll go over how to start the event, what the rewards are, and what you need to do to get them.

You’ll start off the event by finding Amh Garanjy in Old Gridania, with a seasonal quest called Reindeer Fame. Basically, you need to teleport to Gridania, and use the Aetheryte to get to Mih Khetto’s Amphitheatre. Once you’re there, just get to the stage and pick up the quest called “Reindeer Fame”. The only requirement is for your character to be level 15, so even if you’re new to the game, you’ll be able to reach this point with no problems at all.

Source: FFXIV Lodestone

It takes about 10 minutes to finish the entire event, consisting of two cute and simple quests, the second one being The Ghost Of Starlight Present. Once you do, you’ll get an adorable reindeer mount as a reward. I don’t wanna spoil the story for you, as it’s quite endearing, but I will say that it has one of those beautiful, relatable messages to the player that we all love seeing in FFXIV!

Apart from the mount, you’ll also gain access to a vendor who’s standing right next to the Amphitheatre, and you can buy yourself an Illuminated Tree decoration, as well as some Magicked prisms. The tree is a terrific holiday addition to any house outdoor environment and it makes me very happy to have a plot this year to plant it on!

And that is all there is to this particular Starlight Celebration event. If you’re more of a visual person, and you don’t mind getting easy wins in-game, you can check out all of this in my video – and subscribe for more awesome FFXIV stuff!

Endwalker 6.25: All New Minions & How To Get Them!

The FFXIV 6.25 patch has been out for quite a bit now, and it’s time to go over all the new minions you can obtain in it. In this guide, I’ll be talking about these new cuties, so if you haven’t been doing a lot of collecting yet and you’d like to obtain some new travel or Gpose companions, stay tuned!

The first available minion is the Lumini, which can be bought for 8 Omicron Omnitokens from the Omicron Beast Tribe vendor. This one is reputation exclusive, so if you’d like to have it, you’ll have to do your Omicron daily gathering quests, also available with the coming of Endwalker 6.25.

Source: FFXIV Collect

The next one is Sewer Skink, obtainable from The Subterrane Variant dungeon as a random chest drop, should you be so lucky. If you are not, you can purchase it from the Market Board for about 250k Gil at the moment, but the price will probably be going down at some point too.

Finally, we’ve got the Sponge Silkie, also obtainable from The Subterrane Variant dungeon as a random chest drop. If RNG is not on your side, you can also purchase it from the Market Board for about half a million Gil at the moment. Pricey, but worth it, if you’re a rodent enthusiast like me!

That’s pretty much all there is when it comes to new minions in this patch. I’ll be posting more collectible guides soon, so if you’re into that, make sure to subscribe to my YouTube channel so you don’t miss out!

FFXIV 6.25: All New Emotes, Fashion Accessories & Triple Triad Cards!

The 6.25 patch has been out for quite some time now, and it’s time to go over some cool new things you can obtain. In this guide, I’ll be going over all the new emotes, fashion accessories and Triple Triad cards you can snatch in-game, so if you haven’t been doing a lot of collecting yet and you’d like to, stay you’re in the right place!

6.25 Collectibles

When it comes to emotes, the only new one is Wow, which you can get for 9 Sil’dihn Potsherds, which is the currency you’ll collect in the Variant dungeons. Each Variant Dungeon run will reward you with three Sil’dihn Potsherds, which can be traded in at a vendor in Old Sharlayan.

Right next to Osmon, you’ll find Trisassant, the Guildship Exchange vendor, and all rewards from both Variant and Criterion Dungeons can be traded in there. If you’re not into Variant dungeons, you can also purchase the Ample Appreciation emote at the Market Board for about 250k Gil, at least on my server.

We’ve also got the Sabotender Parasol, which is a new fashion accessory available in this patch. You can get this as a random drop in the Subterrane Variant dungeon, as well as at the Market Board for about 100k Gil as it stands if you’re not into RNG runs. 

There’s also quite a bit of Triple Triad content added, and that includes Shadowcaster Zeless Gah, Thorne Knight and Gladiator of Sil’dih, all of which are obtainable from the The Sil’dihn Subterrane. There’s also Geryon the Steer that you can get from Kilfufu in U’dah, but for this one, you should complete the side quest A Key To The Past first. Finally, there’s N-7000, which you’ll get from the Omicron Tribal vendor for 6 Omicron Omnitokens.

Source: FFXIV Collect

That’s pretty much all there is when it comes to new emotes, fashion accessories and cards in the 6.25. I’ll be posting more collectible guides soon, so if you’re into that, make sure to subscribe to my channel so you don’t miss out!

Triangle Strategy: Game Review [Sponsored by Square Enix]

After finishing the game and letting it settle in my mind for a couple of days, I’m ready to sit down and talk about Triangle Strategy, which has recently had its Steam release – without any spoilers, of course. At first, I was quite jealous of all the Switch owners (as I’m not one), even hoping that the game wasn’t as good as advertised – but I’m thrilled that I’ve been proven wrong, and that my jealousy was unfounded, as I got to play it on PC as well. Thanks ever so much to Square Enix for providing me with the copy of the game that was about 50 hours worth of fun and enjoyment, as I didn’t even feel the time passing by. No game is perfect, of course, and I’ll get to that as well, but Triangle Strategy has easily squeezed its way into my top 3 games of this year!

The good…

First, I want to talk about the things about Triangle Strategy that I enjoyed, so buckle up, ‘cause there’s plenty. One of the most important things about the game is its story, which I fell in love with from the very beginning. The plot has managed to keep me interested throughout the entire game, and I had a blast making story-altering decisions… Even when my team would decide that my decisions were terrible and overthrew them during voting. So far, I’ve only explored one ending, and as satisfying as it was, I want to know more about the story and I’ll definitely go back and check out the rest of them. To my great surprise, all of the side quests in the game are nothing but cool, little lore bits, and I did all of them, so if you’re considering just breezing through MSQ, trust me – they are well worth the time and feel like a crucial part of the story.

There’s no discussing the story without mentioning character progression, which in my opinion has been flawless. The characters are very well crafted, feel like actual people, and have their own imperfections that make the game feel so much more than a JRPG with a predictable plot and cliche tropes, as Triangle Strategy is anything but. I was very surprised with where some of the characters ended up in the story, and even the ending has left me some room to think about what would happen after. The only way you’re going to dislike this game is if you despise story-rich, almost graphic novel-like games with a lot of depth and storytelling, and if you’re reading this, I’m already assuming that’s not the case. 

I don’t think it’s realistic to talk about Triangle Strategy without mentioning just how good of a soundtrack it has. It’s not just about the tunes – it’s also their placement in the game, and a very good understanding of when the game needs to go silent for dramatic effect. I enjoyed these transitions and they’ve helped me immerse myself so much more, so if this is something you appreciate about your games, I highly recommend giving Triangle Strategy a go.

The artstyle of this game might just be its greatest selling point at first glance, and if you’re a fan of HD-2D graphics, this game is most likely something that’s already pretty compelling. The colors, the contrast and the overall charming movement of the characters is all very cozy and charismatic, there are plenty of different zones and gorgeous-looking battlefields, as well as adorable little details like meowing cats and hilarious interactions with villagers. All in all, it is an absolute treat for the eyes, through and through, and this is coming from someone who’s up until recently been reluctant to play anything other than hyper-realistic games. That being said, I am sold, and now love pixels once more.

But I can only assume you don’t just want to know about the art and the story, as the most important aspect of the game is actually getting to play it – although I’m a huge defender of graphic novels in the gaming genre myself, being the cozy, after-kids-bedtime gamer that I am. In comparison to some other similar strategy titles that I’ve gotten to play lately, Triangle Strategy has a significant increase in complexity and demand for strategy in combat as the chapters go on. With weapon upgrades, choices of accessories, the possibility of character upgrades with limited resources, change of terrain, addition of new types of enemies, and overall longer battles, I felt like the game was getting progressively more complicated and fun. Even losing some battles didn’t feel as bad, as the game doesn’t kick you while you’re down – instead, you get to keep your hard-earned kudos and the experience. This is very rewarding, and you shouldn’t feel bad, as these battles are how you level the characters, so from time to time you might feel like you need to do a mock battle or two just to unlock an OP ability or be less squishy. Or, you know, just hit harder. Which always feels good.

For some people, voice acting can make it or break it, and if you’re one of them, I can almost assure you this game is going to make it. The variety of voices and the skill to knit their emotions into the text line is fully on point – I felt like there was an actual conflict unraveling before my eyes thanks to these wonderful, talented people. There’s not a single character I felt was lacking when it comes to voice acting, and some managed to surprise me with just how unique the color of their voice was.

The not-so-good…

There’s not a lot that I dislike about the game itself, but what felt kind of bad throughout my playthrough was the inability to play with some of the characters if I happen to have a single battle without them in my roster. Some of the characters I unlocked felt really fun, but I never got to play them closer to the endgame, as they were forever stuck at level 5 or 10. I simply wasn’t invested enough into losing battles just so that they could see the battlefield and be ready to hop into my main team, as I didn’t even know if I’d want them there. I wished there was some way of them passively gaining at least some amount of experience, similarly to how they do in FF7 Original, so that there’s at least hope of using them when they’re recommended in later battles, and they happened to skip a few of them. Over time, at least during the first playthrough, it becomes clear that the variety in the main roster should be kept to a minimum, as getting enough levels to beat the battles can sometimes feel like a tight squeeze – at least on Normal, and I would imagine Hard mode as well. 

That’s all I have to say for now when it comes to Triangle Strategy. What are your thoughts on the game? Let me know in the comments, and if you’re into RPGs of any kind, make sure to subscribe to my variety YouTube channel so you don’t miss out. If you’d like to check out the game, here’s where you can find it on Steam!

Tactics Ogre: Reborn Sweepstake in FFXIV: How To Enter & Win Cool Rewards!

If you’re a Final Fantasy XIV only player, you may not have known this, but there are plenty of gear pieces in the game that are inspired by the Tactics Ogre game. As a celebration of the Tactics Ogre Reborn release on Friday, November 11th, 2022, FFXIV is having a screenshot sweepstake where you’ll get to submit the picture of your own Warrior of Light wearing Tactics Ogre gear found in FFXIV. The entry period is from November 1st until the 14th at 3:59PM GMT, or 6:59AM PST. In this guide, I’m going over everything you need to know about this contest, so if you’d like to win some cool prizes, you’re in the right place!

In order to participate, you’ll need to submit and Tweet a screenshot of your character wearing either the Valerian or Xenobian body pieces which were recently made dyeable in Patch 6.28. From all the eligible submissions, 11 random winners per region will be selected to receive a Glass Pumpkin (Tactics Ogre Reborn Edition), and 1,111 random winners per region will receive in-game items, such as the Great Paraserpent.

Source: FFXIV Lodestone

Entering the contest is pretty easy. After reading and agreeing to the terms and conditions, all you need to do is log into and complete the online form. Upon submission, you are required to link a Twitter account, so make sure to have that ready. After linking a Twitter account, you can create a Tweet, which automatically includes the required information for you to enter the sweepstake, at the same time as your entry. The entry will be complete when the Tweet is published. Be sure to pay attention to the additional rules as well – you will not be eligible for the sweepstakes if you only post on Twitter without using the online form. Entries from users of suspended Final Fantasy XIV accounts will not be counted, so please don’t get banned in the meantime. Also, Tweets should be set to “public” for the Twitter account linked to the submission. Finally, do not delete the Tweet made at the time of entry before Saturday, 31 December 2022! 

The entry form will require you to fill out some information, including Character name, Home World Name, the URL to your “Character Profile” on Lodestone, and Name of the Desired Prize (Prize A or Prize B), an optional brief comment, and one screenshot of your character wearing one of the “Valerian” or “Xenobian” body equipment

Source: FFXIV Lodestone

Equipment not listed above can also be worn provided that it features the same appearance, should you own it. If you’re taking a screenshot of your Warrior of Light in gpose, make sure to include Character Name and Display Home World stickers in Group Pose mode. 

There are two different prizes you can win. Prize A, which will go to 11 winners each from Japan, North America, and Europe, is a physical prize, and it’s a Glass Pumpkin (Tactics Ogre Reborn Edition). Winners will be notified on or about 8 January 2023 via the email address registered to the Square Enix account. Physical prizes will not be reshipped under any circumstances (such as being lost or damaged), so you’ll need a bit of RNG as well to make sure it goes through smoothly. If your Square Enix account region is Japan, the prize delivery will be restricted to an address in Japan. Physical prizes will be delivered to the address registered to the Square Enix account, so make sure the address registered is current. If the address is invalid, the prize will be voided. You may submit multiple Entries during the Entry Period; however, only one Entry will be accepted per character, and you will only be eligible for one prize per character regardless of how many Entries you submit.

Prize B will be given to 1,111 winners each from Japan, North America, and Europe, and it’ll be an in-game item prize – the Great Paraserpent and Wrapped Present. Winners will be notified on or about 8 January 2023 in-game via the moogle delivery service to the character specified in the entry submission, so make sure the character name and the Home World name are correct, as prizes cannot be delivered if the name or World information are incorrect. Make sure your moogle letter box is not full and is able to receive mail, as the item will not be delivered if your moogle letter box is full, or the number of attachments has reached the maximum allowed. You may submit multiple Entries during the Entry Period; however, only one Entry will be accepted per character. You will only be eligible for one prize per character regardless of how many Entries you submit. By using the in-game item Wrapped Present, you will receive a random consumable item. Random drawing will take place based on the registered region of the Square Enix Account. When it comes to eligible territories, this promotion is open only to players who are legal residents and physically and permanently located in one of the following countries/territories at the date and time of entry:

For Prize A and Prize B, you can apply if you’re in the fifty states of the United States of America, the District of Columbia, and Puerto Rico, Canada (including Quebec), The United Kingdom (excluding the British Overseas Territories), France (excluding Overseas France), Spain, Austria, Norway, Finland and Sweden, as well Australia.

If you’re not on this list, you qualify only for prize B, which is the in-game item, but your country of residence must be one of the countries listed below. Also, you must be 18 or older to participate at all.

Source: FFXIV Lodestone

That’s pretty much all there is to know about this promotion. If you’d like to see my Tactics Ogre: Reborn coverage, drop by Vee Plays channel and subscribe so you don’t miss out. Enjoy the sweepstake, have fun and I’ll see you in my next post. Bye bye!

How To Get Manderville Relic Weapon: First Step [Quick & Easy Guide]

After almost a year since the launch of Endwalker 6.0, we finally have the opportunity to obtain the first step of our Relic Weapon journey. In this guide, you’ll find out what you need to do in order to obtain your first Manderville Relic weapon in Endwalker 6.25!

In order for the Relic Weapon questline to be available to you, first you need to complete all of the previous Hildibrand quests, the last one being “A Soulful Reunion”, and then find Nashu next to the Radz-at-Han Aetheryte. She will offer the “Lunar Conspiracy” quest, followed by “The Imperfect Gentleman”. Apart from the Hildi storyline, you also need to have completed the Endwalker 6.0 questline. Upon completion of the Hildibrand storyline and “The Imperfect Gentleman”, the Manderville Weapons quest line will open up right where you stand, which is a start of your very own journey to the Endwalker Relic weapons.

The first most important quest in this step is called “Make It A Manderville”. This one will require you to obtain and turn in three Manderium Meteorites, which you can purchase at Jubrunnah in Radz-at-Han for 500 Allagan Tomestones of Astronomy each, or 1,500 total. If you’ve had your Astronomies piled up from before, good for you, as you can purchase the 3 Meteorites straight away and get your first level 615 relic weapon. If not, you’ll have to hop on a level 90 job and do some roulettes – Expert, level 90 dungeons, 50/60/70/80 dungeons and MSQ probably being the most profitable. If you don’t have enough of them, the quickest way to earn the Astronomy Tomestones is by doing all of your daily roulettes which will give you 720 altogether. You can also get some from treasure maps, Tribal quests and from completing Khloe Aliapoh’s Wondrous Tails diaries, as you can get 500 with two completed lines. After you’ve completed your first relic, if you want another relic weapon for a different job, you will just need to talk to the House Manderville Manservant next to Gerolt and give him three more Manderium Meteorites through a repeatable quest.

That’s all there is to do when it comes to Manderville Relic Weapons, at least for now. I’ll keep this series updated, so make sure to drop by when the new patch is out and get all the info you need on the newest relic step!

Everything To Do In Endwalker 6.25: Quick & Easy Guide!

The 6.25 patch is finally live in FFXIV, and with it, there’s a whole lot of new activities you can spend your time on. In this guide, I’m going over everything that’s new in this update, without spoiling any story plots of course, so if you’re just hopping into this patch and don’t know where to start, you’re in the right place!

One of the biggest updates of this patch is the continuation of Somehow Further Hildibrand Adventures. For this to be available to you, first you need to complete all of the previous Hildibrand quests, the last one being “A Soulful Reunion”, and then find Nashu next to the Radz-at-Han Aetheryte. She will offer the “Lunar Conspiracy” quest, followed by “The Imperfect Gentleman”. 

Upon completion of the Hildibrand storyline and “The Imperfect Gentleman”, the Manderville Weapons quest line will open up right where you stand, which is a start of your very own exhausting journey to the Endwalker Relic weapons.

The next big update is the addition of Variant and Criterion dungeons. You’ll start off by talking to Shallow Moor in Old Sharlayan, who will offer you the quest “A Key to the Past”. This will only be available to you if you’ve completed the Endwalker 6.0 main quest storyline, and have spoken with Osmon in Old Sharlayan. After you’ve completed at least one run of Variant Dungeons, your Criterion dungeon journey will also unlock within the Variant and Criterion dungeon duty finder.

Another cool feature is the addition of Omicron tribal quests, which will become available to you upon completion of “The Café at the End of the Universe” in Ultima Thule by Jammingway. In order for this to be available, you should complete the quest “Where No Loporrit Has Gone Before” and have at least one Disciple of the Land at level 80. 

That’s pretty much all there is to know about this patch, at least when it comes to the activities. If you’re more of a visual person, and you don’t mind getting easy wins in-game, you can check out all of this in my video – and subscribe for more awesome FFXIV stuff!

All Saints’ Wake 2022: Quick & Easy Guide!

All Saints’ Wake is back in FFXIV starting today, and will last until November the 1st, so if you’re looking for unique glams, emotes and activities that won’t be available after this event is done, you’re in the right place. I just finished doing this event, and I am yet again reminded why I love this game so much, as the team has put an exceptional amount of effort into bringing the Halloween spirit to life, as they usually do with everything!

In order to start this limited time quest, you need to be level 15 Disciple of War, or Disciple of Magic. In Old Gridania, Mih Khetto’s Amphiteatre to be exact, you’ll find an Adventurers’ Guild Investigator with a quest called “A Mad Masquerade”. This short, but super fun quest will award you with an achievement and a terrific “Wake Doctor” glamour set as soon as you complete it, and the best part about it is that all the set pieces can be dyed!

There will be another quest offered by the Wake Doctor right in the middle of the Amphitheatre, and that one is called Be Our Guest. It seemingly doesn’t offer much, but accepting it will take you to the Haunted Manor area, which is a beautifully decorated, massive piece of land where you can hang out with other players and gpose to your heart’s content!

Apart from the vast outdoor area, you can also talk to the NPC at the yard entrance and get inside of the Manor, so for as long as the event is around, you get to spend time inside and take loads of screenshots! Oh, and don’t forget to talk to the Inscrutable Imp and the Unsavory Imp at the Manor yard, as you’ll have an opportunity to disguise yourself as your most or least favorite story character at your leisure! 

There are other rewards that you can obtain from this event. Find the Bespectacled Peddler, which is the All Saints’ Wake Vendor in the Mih Khetto’s Amphitheatre, and purchase the Pumpkin Pleasures emote, the Caged Wisp furniture piece, as well as Magicked Prisms to mess around with. The emote will display you eating a pumpkin cookie, which is just adorable and there’s no reason not to obtain it. The Caged Wisp is an indoor furniture piece, and it’s also fully dyeable, allowing you to create your kind of creepy should you ever want to. 

I do.

That’s all there is to it when it comes to this year’s All Saints’ Wake. What did you like the most about the event? Let me know in the comments! Enjoy the event and I’ll see you soon with more easy win guides! If you’re more of a visual person, and you don’t mind getting easy wins in-game, you can check out all of this in my video – and subscribe for more awesome FFXIV stuff!

The DioField Chronicle: Game Review [Sponsored by Square Enix]

The DioField Chronicle is a new strategy RPG that I recently got to play here on the channel – thanks ever so much to Square Enix for sponsoring the content and providing me with the game key. After some 30 hours that it took me to fully complete the game, I wanted to share some thoughts and insight on my experience, so if you’ve been wondering whether this game might be for you without getting any story spoilers, stick around.

The good…

First, let’s talk about the things I enjoyed about the game. One of the best things about The DioField Chronicle in my opinion is the impeccable voice acting. It’s emotional, very well crafted, and the British accent is doing this game a huge favor, too. Not every line is voice acted, of course, but the important bits, as well the side quests with cutscenes are, so there’s always something to look forward to.

The music is a real treat. I was very fortunate to receive the Digital Deluxe edition along with the gorgeous DioField artbook and the full soundtrack, that I’ve been playing on repeat while working ever since – and yes, even while writing this very article. If you’re into the intense, ominous sounds of war with a strong beat, as well as some gentle tunes, this might be something to look into. 

When it comes to the story, for the most part, I really enjoyed it. The characters are unique and quirky, everyone with their own imperfections, that in my opinion gives this game a special kind of charm. I’d say the character storylines are a lot more exciting and memorable than the plot itself, but I could just be saying that as I was a little bit surprised with how the game ended. I won’t offer any spoilers, but I will say that the game has definitely left some room for a DLC, as the last chapter has left some loose ends that I would’ve liked to see tied. 

The combat itself is quite enjoyable. If you’re an experienced turn-based strategist, you could argue that the game doesn’t offer enough when it comes to combat depth, but for casual players who are looking for a cozy RTS, I’d say you’re getting a pretty good deal. It took me a bit of time to devise a strategy on how to approach the enemies and which spell combos work the best, but once I got that figured out, I felt very comfortable with the game and was looking forward to every mission, challenging myself to get it done within the time limit in order to get the bonus rewards. The fact that everyone can resurrect their fallen comrades by approaching them and clicking on their corpse was pretty useful as you don’t have to rely on a healer for that. The game complexity doesn’t expand much further than what you see in the first few chapters, but if you’ve played through the demo and you like what you see, I’m pretty sure you’ll like the rest of the game as well.

When it comes to the game systems, my most favorite thing about the game is by far the weapon development. With each weapon you learn how to get, you’re getting a special set of active and passive skills. Later on in the game, those become super powerful and you just look for opportunities to use those skills, as they are both OP and look gorgeous in game. This has a downside too, being that you’ll choose the weapons by skills, and not by how powerful they are, so you’ll most likely end up giving your side characters bad weapons with good skills. You won’t be able to upgrade all your weapons to a maximum so some of your characters will end up having the less optimal anyway, but I found planning for who I’m going to upgrade kind of fun.

The not-so-good…

There are some things about the game that I didn’t like as much, and if you’re trying to determine whether you’ll be waiting for the game to go on discount or buy it at all, I guess you’re in the right section. Something I already mentioned when I talked about the story is the way it wraps up, as there is no information on whether or not the game will ever receive a sequel or a DLC. If you know you’ll be dissatisfied with a cliff-hanger or anything remaining unresolved, this might not be the right choice for you, although I didn’t mind it as much as I like theorycrafting the possibilities. 

When it comes to investing the skill points into characters, both through the character’s own talent tree and the overall class tree, I found that there are some limitations when it comes to whether you’re going to do what you really want to do, or what you feel like you have to. Once you know who your main party members are, you’re only going to be researching the skills that they use, and on top of that, you’ll only be picking out the ones that the weapon they have can provide, so there’s not much room for exploration. The individual talent tree leaves you a bit more room to explore, but I wouldn’t say it’s that impactful overall.

Something else I found a bit lacking is the exploration when it comes to researching Magilumic orbs, which are basically summons that can really turn the tide of the battle. Considering how expensive it is to upgrade them, both money and material wise, you are put in a position where you’re either hoarding your resources until you’ve unlocked all of them, which is a bad idea, or you’re developing one of the early ones and missing out on the rest of the orbs that will get unlocked as you progress through the main story. If I had known how awesome some of those other summons would be, I definitely would’ve waited with spending all my money and crystals on Fenrir and Bahamut, which are good, but I never got to play around with the other ones.

You could argue that one can explore the New Game+ with the new weapons and orbs, but as it currently stands, The DioField Chronicle doesn’t offer New Game+ as a feature that’ll keep you engaged since the enemies don’t scale up to your high level, and that’s just a shame, as you end up cheesing through them and not exploring enough of the gameplay that you’d like. You could use the other party members that you haven’t played with before, but if you don’t enjoy them, there’s little point in doing that.

In conclusion…

I hope I was able to provide you with some useful information that’ll help you decide whether or not you want to play the game right now. I definitely encourage you to try out the demo, as it offers a generous first chapter, and you’ll be able to see for yourself if this is something you’ll enjoy or not. If you have any questions or experiences with the game, please drop them in the comments, as it will help others decide if this is the right game for them. If you’d like to check out my The DioField playthrough, you can find the playlist here, and if you’re more of a visual person, here’s the full review of the game:

Easy to get mounts in FFXIV!

There are plenty of easy to get mounts in FFXIV, and as we’re getting more and more gear, some fights that grant loot are actually becoming pretty doable as a solo or in pairs. In this guide, we’re going over some easy to get mounts that you can either get or start working towards today even if you play solo or with a friend or two. This guide does not include mounts from the MogStation, MSQ, limited time events, expensive Market Board or vendor mounts, or any of the reputation grind mounts, only the random side tidbits you may or may not know about.

If you’ve never visited Jonathas in Old Gridania, you may not have the Behemoth, Magitek Death Claw or Ahirman mounts. All you need to do is visit him and purchase those three mounts in exchange for your Achievement Certificate Points, 6 tokens each to be exact, so 18 overall – and if you’ve played the game at all, you probably have them.

Getting to level 30 is easy these days, and if you’re a conjurer, you can get yourself a Unicorn mount. After hitting level 30, you’ll get a mount quest in the Conjurer’s Guild in Old Gridania, but if you come after you’ve equipped the WHM Soul Crystal, you won’t be able to see the quest, so make sure to take it out first before doing it. The quest is called “Unicorn Power” and is issued by Braya within the guild house.

Gilded Armor may take a bit of time, but if you’ve been doing your Duty roulettes and haven’t been AFK-ing, you probably have some Commendations. Once you get to 500, you’ll receive the Gilded Armor mount as the reward from “Everybody’s Darling” achievement, but you have to claim it within the Achievement menu. Make sure to do that if you haven’t claimed it yet and you have 500 comms or more!

Magitek Sky Armor will cost you 20000 Wolf Marks, which is the cap amount, and if you’ve been queuing into any Frontlines or Crystalline Conflict, you’ll be able to easily get it within days… or hours, if you’re persistent. All you need to do is cap the Wolf Marks one time and exchange them in the Wolves’ Den Pier, at the Mark Quartermaster.

When it comes to Gold Saucer, there are two mounts that are cheaper than the other ones in comparison. There is the Pod 602, which is a new addition and costs 300k, and the Adamantoise, which is 200k. You can exchange your MGPs at the Gold Saucer Attendant in the Entrance Square, within the Prize Claim III menu. This can’t be done within a day, but even if you do only Fashion Reports for your 60k a week, these two can be inexpensive additions to your mount roster that’ll take a few weeks of minimal effort if you don’t do any other Gold Saucer activities. If you’d like to, I have an MGP farming guide that you might find useful, so check it out in the pinned comment of this video!

The mounts from A Realm Reborn Extreme trials are probably quite familiar to you so I won’t waste too much of your time on it, but if you don’t have all of them, you can unsync and completely solo them if you’re max or even somewhat close to max level. You may not know that there’s also Nightmare, an additional mount that has a rare chance of dropping at the Bowl of Embers Extreme, the Navel Extreme, or the Howling Eye Extreme, so it’s a good idea to give those additional few spins when you’re farming the higher drop rate ponies, too.

Heavensward Extreme mounts may be a bit tougher to solo, and they’re easier with a friend, but you can definitely solo all of them and get that golden bird yourself. If you’re struggling with it, check out some of the solo strategies and guides. The reason why I’m not listing the Stormblood and Shadowbringers Extreme mounts here is because you definitely need more people for them, and you need to know what the wipe points are, so if you’re after doggos and dragons, study up on them first.

Alexander Savage mounts are soloable, but a lot easier if you’ve got at least one friend at max level helping you out, as there are some wipe mechanics you should be aware of. However, if you know the strat, the mounts are guaranteed drops, and the fights last like 3 minutes each, so there’s no reason not to get them. Oh and by the way, only A4S and A12S drop mounts – the A8S loot is a minion, so don’t bother spamming it like I did!

That’s pretty much all I could think of when it comes to easy-to-do or easy-to-solo mounts. There must be something I’ve left out, so let me know in the comments if you know another mount that’s easy to get. If you’re more of a visual person, and you don’t mind getting easy wins in-game, you can check out all of this in my video – and subscribe for more awesome FFXIV stuff!

Vee’s Super Biased 6.2 Review!

The 6.2 patch has been out for some two weeks now, and as I got to explore the new content, it’s time to sit down and talk about the new content and give my fully biased review as per usual. This post may contain story spoilers for the new patch, so if you haven’t done any of your 6.2 stuff, it’s probably best to read selectively or come back later!

First and foremost, we’re talking about the MSQ, and boy, did they find a way to get the story going again even after as big of an ending as Endwalker 6.0 was! The introduction of new and unexpectedly fresh characters has been more than enough to turn this chapter of the story into another masterpiece. I always admired the writer’s ability to get me attached to the characters that I’ve only just met, and I feel pretty much the same when it comes to Zero and her role in this story. The mood is gloomy, but full of dark humor as well, making this patch sit very well with me in terms of atmosphere and storytelling. Overall, I am very happy, and even though there’s a little bit of that feeling of missing out as I’ve never played FF4, FF14 is doing a very good job at creating a full, comprehensible narrative out of something that already exists in some way, shape or form!

An important part of the MSQ experience is of course the new dungeon, The Fell Court of Troia. I don’t normally do my daily experts and I know everyone’s gonna have an opinion about that, but this particular dungeon has me not minding them at all. The boss mechanics are fresh and interesting, which is becoming one of Endwalker’s best features as the expansion unfolds, as we’ve gotten a super unique experience in every Endwalker dungeon so far. The gear set from The Fell Court is gorgeous and worth getting at least as a glam piece for almost all jobs, and the story around the dungeon is just so good.

However, there is something that takes the cake and all the candles when it comes to story, boss mechanics, and especially the soundtrack, and I’m of course talking about the Abyssos. I expected a lot from this raid tier, but never have I ever imagined I’d be sucked into a supernatural family drama worthy of the prime afternoon slot on a TV soap channel. Apart from some aspects of the story being uncomfortably relatable (except for the part where my parents are ancient creatures capable of protecting and destroying our very star), this was a treat for all senses. The dev team has obviously smelled a lot of gold in introducing irresistible eye candy within the story that we all secretly, or not so secretly, fantasize about, and I want nothing more than to see them continue doing so. The fights of Abyssos are basically a music album with a side activity where you get to fight cool bosses should you so choose, and even though the combat is fun, engaging and feels fresh, the music and the glam… err, I mean gear pieces, are what keeps me going back there every week to endlessly queue into the same fights until I get the armor piece I want – and I don’t even mind.

The new Trial, being a crucial part of MSQ on Normal mode, and one of the self-inducing painful activities on Extreme you can optionally throw yourself into, is a story of its own. Hectic, fast-paced and chaotic as it is, it will have you queuing without a clue of what you’re doing, but that’s kind of the beauty of it. Until you grow sick and tired of being hair-pulled and decide to watch a guide, which will leave you slightly more confused than before watching, until you accept just how hairy it gets and get good. Overall, I’m loving the experience, even though I still haven’t gotten that damn mount and the weapons don’t look nearly as impressive as the previous trials’ ones in my opinion – but to each their own, I suppose. 

Oh, but if you thought I was complaining about a trial I love but it chews on my soul and spits it up every time I queue for it, we are yet to get to that. Sephirot Unreal has been the bane of my existence, my obsession, and one of my favorite activities of this patch. After I’ve cleared it, of course, as I cursed it to bits and pieces while progging for days. Seeing as I haven’t done this fight on Extreme when it was current, I was desperately new to its intricate strategies, but after one missed weekly lockout and a few days of crippling anxiety, I can now comfortably say I… love this fight? And who knows, you might end up loving it too, as there’s a simple guide in the video description that I made for myself as I couldn’t find one like this anywhere else, so check it out!

PvP has been one of my regular activities since the introduction of Crystalline Conflict, and this patch isn’t failing to disappoint. Even though things are largely the same with some notable meta exceptions, I’m quite happy and comfortable queuing with Pally to try and get this season’s mount from the Series Level 25. I’m not quite there yet, but I did finish the GARO event, so you’ll be happy to know I’m going to stop wearing the Makai Reaper title in all my videos as I’m too lazy to change it, so back to Gambler it is!

Tataru’s Grand Endeavor is back, and honestly, I’m starting to get more and more interested in where this is gonna lead. I don’t know, maybe it’s the Sky Pirate and an absolute eye candy you wish you never had to say goodbye to back in Heavensward, or the fact that you can now have all your favorite characters hanging on your walls.. Or maybe a room full of Y’Shtolas or G’rahas, if you’re one of those. I might be. You’ll never know because I never hang out in my apartment on stream and you’re not welcome.

I’m apparently saving the best for last, as the Island Sanctuary is the absolute king and queen of the 6.2 features according to just about everyone and their mother. Whether it’s the soothing clicking of shinies to cure your anxiety, building an empire on the coast you’re so far away from in real life like myself, or the ability to name your sheep after all your exes, this singular piece of content is having me log into FFXIV just to be there, making me both play more and stream more, as I have a place to click my progging frustrations away in and actually decide to do something else other than logging out. Which was kind of the point of this place, so congratulations dev team, you’ve got me on the hook and I’m not getting off until I get that motorcycle – and by the time I do, I’ll most likely be too addicted to quit. But I can quit anytime. I can quit today if I want to. You know I can. Ahem.

Oh but that’s not the best feature of the patch now, is it? No, it’s the one and only reason why I’m no-life-ing 6.2 so much more than other patches, and that’s my glam dresser still being able to accept new pieces of gear. It won’t be too long until I have to decide which swords and shoes will get turned into company seals, but for now, I am quite happy to be visiting old content, hoarding, and even doing relics for the first time, as I’m kind of holding on to hope I’ll have somewhere to shove them, but we’ll see about that.

That’s all I’ve got to say when it comes to this patch. How have you been spending your time since the release? Is there something you’re particularly enjoying, dreading or hating? Let me know in the comments! If you’re more of a visual person, and you don’t mind getting easy wins in-game, you can check out all of this in my video – and subscribe for more awesome FFXIV stuff!

Island Sanctuary Rank 6 to Rank 10: useful tips & tricks!

It’s been a little over two weeks since the 6.2 release, and Island Sanctuary is a lot less of a secret than it used to be. As promised in my Island Sanctuary rank 1 to 6 guide, I’m back with another one, this time covering a few tips and tricks to help you along the way to rank 10. This is not a super comprehensive guide, as I didn’t train as hard for the flower smelling competition, but a few casual-friendly reminders definitely can’t hurt!

CutiestNerd215 did a great job when it comes to describing our Island Sanctuary gameplay!

This might be something you’re aware of already, but facing the pain of a rare animal despawning as you realize you don’t have enough nets and have to quickly circle the Island and collect mats for the restraints is just devastating. If you know you’re going to be hunting for animals, have at least 10 of them sitting in your inventory, and try not to run out of mats needed to create them in case your RNG is bad.

Also, when you’re catching new animals, never have 20 of them filling out all your Pasture slots while being cared for by your Mammet caretaker. If you catch another animal, you will not be able to release any of the ones you have in your Pasture, and this will force you to release the one you just caught – yes, regardless of its rarity, as the game doesn’t care if you’ve got yourself a Twinklefleece or an Alligator! 

When you’re feeding your animals, make sure you’re not doing it within the first hour after the daily reset when the leavings are gathered. Even if you do it within that first hour, it will count as though you did it the moment the reset happened, and the mood of your animals will automatically deplete by the time the next reset comes around and you’ll get less leavings than you were hoping for!

I’d say one of the most important tips on this journey is to send targeted Granary expeditions to Wild Woods and Fatal Falls, as they’ll award you with the rare materials necessary to unlock rank 3 Workshop and Granaries. You’ll need 3 Garnets for all 3 Workshops, so 9 overall, and 3 Spruce Logs for each of your Granary upgrades – so 6 overall. As soon as you unlock Granaries, do those missions as this is the only way to not be timegated with building upgrades and raising your Island Sanctuary rank.

There is a neat trick for gathering in all those notes that are clustered and far away from the rest of the nodes that you can use to trigger the respawn. All you need to do is queue for a duty, something like an unsynced trial, enter the instance and abandon it. This will spawn you back into your Island Sanctuary, with refreshed nodes for you to gather on, without having to circle around and proc their respawn mechanically.

When it comes to the crops, even though growing two kinds will enable you to craft premium feed for your animals, you want to actually purchase the seeds from your Mammet crop caretaker guy and have a variety. This will enable you to expand your crafting repertoire in the Workshop as there are valuable recipes that can only be crafted with those particular plants, so don’t worry about spending a few extra cowries on getting different seeds!

If you’re scheduling your tasks in the Workshop, it’s a good idea to not start your cycle with an item that is more rare, harder to make, and that will get you more Cowries in general. As you can see, the efficiency bonus is applied for the second item of the cycle, and every item after that, so make sure you start the cycle with something of less importance, but from within the same category!

I don’t have that much more to share when it comes to the Island, but I hope these two guides have been useful. If you’re more of a visual person, and you don’t mind getting easy wins in-game, you can check out all of this in my video – and subscribe for more awesome FFXIV stuff!

FFXIV Callback Campaign: quick & easy guide!

If you’ve got some friends who have stepped out of FFXIV for a while, and you could still benefit from collecting those Gold and Silver Chocobo feathers for the mounts, you’re in for a treat. The Callback Campaign is now active, lasting until September the 30th. In this guide, you’ll find out how to participate, what the requirements are, as well as what you and your friends can get as a reward!

Requirements

In order for someone to be invited for the return to FFXIV, they must have an account that’s been inactive for at least 90 days, and that also includes the free to play period. If you invite a friend who has been active during that time, they won’t receive an email, and you’ll lose one of your invitations that you could’ve sent to someone else. Each character that’s registered to an account can invite up to five friends, and this number will reset after 30 days, so that you can invite another group of friends next time the campaign is up I suppose.

How to invite a friend back into FFXIV?

All you need to do is open your friend list or FC members list and right click if you’re on PC, and do whatever it is that’s equivalent to that on the controller, as I have no clue. You’ll see the option to send an invitation to a friend, and after you do, there will be a chat message letting you know how many invitations you have left on your character.

Once a person is invited, they’ll receive an email with the name of the character who sent the invitation, so your character’s name, as well as the World on which their character is. You can’t actually spam someone as only one email will be sent per day. If a person is invited by multiple people desperate to see them back in Eorzea, the email will list all the names of all the people who invited them. Be sure to actually know if someone meets the requirements for Callback or not, as the game won’t tell you this, and if they’re not, they just won’t get invited. 

Keep in mind…

There are some other things to keep in mind. Even if two or more of your friends are invited back into the game, you’ll only receive the rewards once, and rewards that you’ve received for participating in a previous campaign will not be given to you again. If you don’t know how many people you’ve invited to come back, you can find this info when you log into your Mog Station account. 

Callback Campaign rewards

Don’t miss out on the Twintania mount!

If your friend accepts your invitation and gets hooked back into the game strongly enough to make them purchase a subscription 90 days within their comeback to Eorzea, you are in for some good loot. You’ll get 5 Gold Chocobo Feathers for those exclusive Recruit-a-Friend rewards like mounts, rare dyes and Aetheryte Tickets. If you’re the one being invited to return, you’ll get 14 days of free play straight away, starting from the day you log back in, as well as 99 Aetheryte Tickets and 10 Silver Chocobo Feathers to be exchanged for gear sets – specifically, for level 20, 50, 60, 70 and 80 characters. You can exchange your feathers with the Calamity Salvagers in the Upper Decks of Limsa Lominsa, in Old Gridania, or in Ul’dah, Steps of Thal. 

That’s all there is to this cool opportunity. If I missed out on mentioning anything, let me know in the comments! If you’re more of a visual person, and you don’t mind getting easy wins in-game, you can check out all of this in my video – and subscribe for more awesome FFXIV stuff!

Containment Bay S1T7 (Sephirot) Unreal: FULL GUIDE!

Containment Bay S1T7 is the new version of Unreal Trial encounter, introduced with the 6.2 patch. Unreals are not supposed to be a joke anyway, but this particular Trial may prove challenging if this is your first time progging Sephiroth on Extreme difficulty, not to mention being on a minimum item level which makes it a pretty scary fight. In this guide, I’m going over everything you need to know in order to beat the boss in a quick and easy way!

Before we begin discussing Stage 1, I’d like to address some of the pre-pull prep. If any of these terms seem unfamiliar or confusing to you as you’ve never done the fight before, make sure to come back to this section after reading the rest of the guide, as I promise it will be more clear.

It would be super beneficial to use food buffs for this encounter as you need every bit of help and survivability you can muster, and you should definitely repair before pull and mid-prog. If you’re a tank, talk to your co-tank and decide who’s the main tank and who’s off-tanking. This is important because only the main tank should stand in front of the boss in the first stage, and the main tank is the only person not participating during the Fiendish Rage. Talk to your co-tank about who’s taking the left tower and who’s taking the right one in phase 3, as well as who should take the big ads, and who’s left with the smaller ones. The whole group should agree on where the 4 DPS should stack during Fiendish Rage, and 2 Healers + the off-tank should stack on the opposite side. So, if the DPS are taking the left side looking out of the arena, the support group should take the right side looking out. You also need to agree on an add kill order, as the whole group will likely wipe from the excess of damage if you kill all the ads at once. Finally, it’s a good idea to address where the purple puddle will be left, which is either under the boss, or to the edge of the arena, but more on that later as well.

Now, let’s move on to Phase 1. When the encounter starts, the main Tank will pull the boss, turn it away from the party and tank him in the middle of the room. Almost immediately, there will be heavy incoming damage from the frontal cleave attack on the main Tank, which does medium damage, but you should pop your defensive cooldown to make healers’ lives easier. The actual tank buster is Chessed, which does a lot of damage and requires cooldowns and shielding. It doesn’t have a cast bar, but there’s a 5 second animation where the boss is preparing to hit, so you have to pay attention and stay sharp in general. There’s also Tiferet, when the boss stomps the ground and does arena-wide AoE damage. These almost always come two at a time, 5 seconds apart, so healers should be ready for that.

The next ability is Ein Sof. During it, green orbs will spawn on the ground, which turn into slowly-expanding puddles. If you step in one of these puddles, it will do a lot of damage and apply stacks of vulnerability. The first time it happens in phase 1, it will spawn a set of four orbs in a plus or cross pattern with one orb missing. These puddles will grow so the party must move to a safe area where there aren’t any puddles. The main tank needs to pull the boss into the safe area and position themselves between the two stacking groups that I’ll go over next.

This mechanic is called Fiendish Rage. As you’re hopefully in the puddle-free zone, there will be two stacking indicators that go out. One of them will go on a random  DPS, and the other will go on a random healer. After 5 seconds, the boss will use Fiendish Rage (which is his jump) on one of the targets, then jump again to the second target. Damage can be split between players, so you need to stack, and already know where each group is going to stack so that there’s no confusion mid-fight. Getting hit by the Fiendish Rage will give you vulnerability, so a player mustn’t get hit by both AoEs or they will instantly die due to the vulnerability from the first one. To deal with this, you’ll need to divide the party into the two groups I mentioned earlier: all 4 DPS in one group, 2 healers and off-tank in the other one. The main tank should not get hit by either stack because the physical vulnerability will be difficult to heal through, so that’s why it’s important to give them enough space between the stack groups to stand on. As soon as the green puddles fade, the main tank needs to reposition the boss in the center of the room.

Next, we’ve got two mechanics that go out at the same time, Ain & Ratzon. This time, a single green orb will spawn slightly off-center in the arena. The boss will prepare to do Ain, which is a 180 degree cleave attack focused on a random player – but not the main tank – and then around the same time 6 players will get an AoE indicator over their heads. In order to deal with these mechanics, you must start by baiting the cleave to the half of the arena where the green puddle is growing, standing between the boss and the growing puddle. This leaves you with the other half of the arena to deal with Ratzon. The boss will target six random players in the party, so five players will get a small green AoE. and one of the players will get a larger purple AoE. Everyone needs to spread out for Ratzon, and there’s not a lot of time so hurry up. This is the purple puddle I previously mentioned you should talk about before pulling, as some people like to drop it right under the boss’ but, and sometimes, the purple puddle goes all the way to the edge of the arena, so make sure you know where to go or not to go. All of the Phase 1 mechanics will be repeated until the boss reaches 65% HP, which marks the beginning of Phase 2.

Phase 2 is the add phase on the fight. The boss will become untargetable and will walk to the side, leaving a bunch of adds for you to deal with. The small adds, usually picked up by an off-tank, are called Binah, and the large ones are Cochma. Binah spawn 3 at a time, while there’s only one Cochma at a time. Genesis is the damage that’ll happen as soon as an add dies. Binah’s Genesis only does a bit of damage, but Cochma’s Genesis does a lot more. Also, Cochma will do a mini tank buster called Empty Hand every 10 seconds so you have to be careful with timing the add deaths, as your tank has the potential to drop dead. Because of this, you do not want to kill any Binah at the same time as killing a Cochma. To help with handling the damage, there is usually a kill order that everyone will agree upon at the start of the fight. This will vary from group to group depending on preference. Generally, the safest and easiest method on healers is to do a 3 > 1 > 9 > 1 kill order, meaning 3 Binah, 1 Cochma, 9 Binah, and then the last Cochma. Other common preferences are 1 > 6 > 1 > 6 and also 3 > 1 > 6 > 1, but you can experiment and find the one that suits you best if you’re struggling. Phase 2 will end once all the adds are dead, and we’re entering the infamous Phase 3.

Phase 3 starts with Ein Sof Ohr, which is kind of like the boss’ “limit break”. It doesn’t really do much damage if you shield ahead of time, but if you don’t, oh boy. This is the phase that gets tricky, so while progressing through it, focus on executing one mechanic at a time and you’ll eventually get through it. The fight is not that hard once you understand the last stage, but it takes a while to get the hang of it as you only get to practice after a 7 minute intro into it.

The only mechanic you have to be thinking about all the time is Yesod. It has a 3 second advance animation which shows up as a yellow splash on the entire arena floor. As soon as you see it, all player positions are snapshotted, and stony pillars will rise in those positions. You have to move away from your previous position to avoid being hit, and don’t walk into anyone else’s previous position while at it. It’s easy if the whole party stacks up in one spot before Yesod so that all 8 pillars are baited to a single spot, which you need to do as soon as the Phase 3 starts, but later on, it gets chaotic and you’ve got to pay attention. If you get hit, you’ll have a damage reduction debuff and will take some damage yourself, too. This will be happening throughout the fight, so be aware of it at all times.

Right after the first Yesod, players will be given debuffs. Four players will get Force Against Might and four players will get Force Against Magic. The Force Against Might gives heavy resistance to physical attacks, and Force Against Magic gives heavy resistance to magical damage. You’ll know what you have by looking at your own buffs, and if you see the yellow one, you’ve got The Force Against Might, and if the debuff is green, you’ll have Force Against Magic. The tricky part is that you’ll receive more magic damage if you’re resistant to physical damage, and vice versa, and that’s what a lot of mechanics revolve around.

The next mechanic is called the Life Force / Spirit. Sephirot will hold his hands out over the arena with a green orb in one hand and a yellow orb in the other. The boss will slam the ground and the half of the arena that had the green orb over it will be dealt magical damage called Spirit, while the other half with the yellow orb will be dealt physical damage called Life Force. You must stand on the same-colored side as the debuff icon you have if you wish to live.

Also, there will be some points in the fight where Life Force / Spirit will happen while you have no debuff at all. In this case, it doesn’t matter which side you stand on because both will do equal damage. When you have no debuff, it is recommended to stack in the middle to receive AoE heals from your healers – you can’t be hit with both at the same time, so don’t worry about that.

After Life Force / Spirit, four tethers will go out. They will target the four players with yellow debuffs and will deal a ton of magical damage called Da’at if the tethers remain on them. Players with yellow debuff cannot take the magical damage as it’s a one shot, so the green buffed players need to stack close to the boss, pick up the tethers and stay there, while the players with the yellow damage should move to the sides of the room. The reason for that is because four green orbs will appear that will then drop into the slowly-expanding green puddles. You can fit in between ANY two green puddles, but some will be a tight squeeze, so be sure to not fall off the cliff!

Now, let’s talk towers, which is one of those pre-assigned things I mentioned earlier. Two towers will spawn, one on the top left and one on the top right of the arena. There must be at least one player in each tower that gets hit by Fiendish Wail, which is the damage that drops on them 5 seconds after the tower spawns. If a tower happens to be empty when it is hit by Fiendish Wail, it will explode and do a ton of AoE damage and will essentially wipe your group. The first set of towers that spawns is during the tether stuff, so during this time, some players will still have the yellow debuff that makes them invulnerable to Fiendish Wail damage. For this set of towers, players with yellow debuffs should get in these towers and soak their damage. During all other points of the fight when towers go up while there are no debuffs, the main tank and the off tank will need to get in the towers to soak them. If one of them is dead, someone will need to jump in the tower to sacrifice themselves. If your tank is dead and you don’t want to sacrifice anyone else, I suggest resurrecting them as soon as possible so that they can run straight into the soak.

Then, we’ve got the First Earthshaker. The damage done is proportional to the distance from Sephirot, so the further you are, the less damage you’ll take. There will be two players targeted by Earthshaker – one will be a DPS and the other will be a healer. Before the fight, DPS and Healers should already be assigned sides, so the player targeted by Earthshaker will know which way to run – either southwest or southeast. The rest of the party should stack in the middle. Right before Earthshaker damage goes off, a yellow snapshot will happen, so you need to wait about 1 second and then move and hopefully survive. 

At this point, some mechanics will repeat. Here we’ll see another round of Da’at, so make sure everyone is spread out. This one is a bit different than the one that happens along with the tethers, as the damage from this one will be significantly increased on anyone holding the aggro, hopefully the main tank. Make sure the main tank is healed and shielded for this. This will be followed by Fiendish Wail, Da’at, Life Force / Spirit, and the next Yesod bait, so be sure to have those down, and have the main tank shielded for the Fiendish Wail as that one will hit them hard.

The next one is Pillar of Mercy, and do expect some wipes here until you practice and see it for yourself. The mechanic looks complicated, but it’s quite simple once you get the hang of it. Pillar of Mercy will need the party to run and stack in a few different locations in order to not get yeeted off the platform as there will be knockbacks. Once you know the locations, it’s very simple and there’s no guessing or RNG involved. So what happens is a blue puddle appears on the ground, and Sephirot will smash that puddle which causes a knockback relative to that location. Along with the first blue puddle, there will also be spikes to bait, and you should do that within the puddle. Also, there will also be expanding green puddles that you should avoid stepping or being knocked back into. This will happen three times with three different blue puddles, but the order and location of the knockbacks are the same every time so it’s very predictable. It’s a good idea to set up stack markers at the beginning of the fight and learn the sequence of movements ahead of time, but if you need a bit of time to get it down, that’s also fine. 

After this, the Second Earthshaker will happen, but there will be no spikes to bait this time. This is followed by a combo of Da’at and Yesod, so spread out in advance. This is the only time during the fight that you can’t stack to bait the spikes, and it can get messy, but for as long as you don’t run into anyone’s snapshotted position, it’s all good. This will be followed by another Towers and Fiendish Wail, so the tanks should be prepared to take them alone. Everyone else needs to stack in front of the boss to get ready for knockback, and tanks should join them right after the Fiendish Wail resolves. 

Another new mechanic that happens right after this is Malkuth. The boss knocks the whole party backwards, and the DPS should all stay stacked after the knockback to bait the spikes. You’ll know the knockback is coming as the boss will crouch a bit and will look like he’s blowing at the whole party, and that’s what you’ll feel like, too.

Phase 3 also comes with its own set of adds. Four Binah and one Storm of Words will spawn, and this is where the chaos starts. The Storm of Words spawns right where the players were knocked back from Malkuth. Two Binah spawn on the east, and two on the west. There are different ways to play this – some tanks handle it by having a main tank pick up the big add, while the off-tank aggroes the Binah, and in some groups, both tanks handle two Binah each and the DPS kills the Storm of Words quickly with a Limit Break. If you’re gonna do that, you need to use LB quickly, as Yesod will come again shortly after this and needs to be baited properly. As soon as all the adds are dead, you get a short period of time to pour pure damage into the boss, but there is one more Yesod so just stay stacked while at it.

Finally, there’s the Impact of Hod and Ascension. Sephirot will put his arm down on the arena which does a bit of damage and a small knockback. At the same time, a stacking indicator will appear over the corpse of the Storm of Words, so you’ve got to make sure you’re all gathering there. The reason you need to be there is to avoid the Pillar of Severity, which is instant death, as you’ll be thrown into the air if you were in the right place at the right time. Following that, once you land, bait Yesod again, and you’re entering into the final mechanic loop before the enrage, which is pretty much Pillar or Severity being cast without you being thrown in the air, it’s kind of sad, really. But if you manage to melt the boss, you won’t have to worry about it, which is what will hopefully happen after reading this guide!

And that’s it when it comes to this fight. If I missed out on mentioning anything, let me know in the comments. If you’re more of a visual person, and you don’t mind getting easy wins in-game, you can check out all of this in my video – and subscribe for more awesome FFXIV stuff!

All Endwalker 6.2 Hairstyles, Accessories, Emotes, Bardings & Triple Triad cards!

There are so many things to do in the new patch, and collecting different stuff is definitely one of them. In this guide, I’m going over all the new 6.2 miscellaneous goodies, including hairstyles, fashion accessories, emotes, bardings and cards, as well as how to get them.

There are two new hairstyles introduced in 6.2, both suitable for Hrothgar and Viera, and both coming from the Island Sanctuary. One is Tall Tails that’ll cost you 6000 Seafarer’s Cowries, and the other one is Practical Ponytails, also at the price of 6000 of your blue money. 

Tall Tails
Practical Ponytails

When it comes to accessories, we’ve got the Bluepowder Pixie Wings, sitting also at 6000 Seafarer’s Cowries, and only available from the Island Sanctuary and not through the Market Board like most fashion accessories, so you better be working on those building upgrades if you want them.

When it comes to emotes, the only seemingly available one right now is the /spirit emote, obtainable through PvP Series 2, at Level 5. There are also mentions of others like Deride with unknown origin, Eat Chocolate that should be the reward for the Valentione’s Day, as well as Eat Pumpkin Cookie, which should be related to All Saints’ Wake. However, we still don’t have any dates or confirmations for these events, so Spirit is the only new one you can get at the moment.

If you’re a Chocobo enjoyer, there are two new bardings to put on your bird. The first one is the Windswept Barding, which is crafted by Leatherworker, also available at the Market Board for almost a million Gil as I’m writing this. There’s also the Isle Pioneer’s Barding, costing 4000 Seafarer’s Cowries, coming from your Island Sanctuary.

Finally, when it comes to Triple Triad cards, there are a few new ones you can loot or buy. You can get Hephaistos from the Abyssos: Eighth Circle or Eighth Circle (Savage), Chief Keyward Lahabrea for 200 Bicolor Gemstones at Elpis, Barbariccia from Storm’s Crown or Storm’s Crown (Extreme), Scarmiglione for 40k MGP, Byregot for 24,8k MGP, and finally Beatrice from The Fell Court of Troia.

That’s all there is to the new 6.2 collectables, at least to my knowledge. If I missed out on mentioning anything, let me know in the comments! If you’re more of a visual person, and you don’t mind getting easy wins in-game, you can check out all of this in my video – and subscribe for more awesome FFXIV stuff!

ALL Endwalker 6.2 minions & how to obtain them!

The new patch is live, and with it, there’s plenty of new minions to collect. In this post, I’m going over all the 6.2 minions, including the ones from limited time events!

The first one on the list is the Wind-up Scarmiglione, which you can obtain through The Fell Court Of Troia. It’s kind of a rare drop, but if you keep doing your Expert roulettes, at some point you’ll loot it! If you don’t feel like playing the RNG game, you can get this one from the Market Board for about 300k Gil, which is not that bad for a minion from the current patch.

Then, there’s the Wind-up Erichthonios, from either Abyssos: The Eighth Circle, or the Abyssos: The Eighth Circle (Savage).

Another one, which is only available until September 12th from The Rising event, is the Clockwork Solus. Make sure to grab this one until you’re out of time, as we don’t know if he’ll ever return as a purchasable minion on MogStation!

Another new minion is the Pterosquirrel, which you can get for 400 Faux Leaves, or if you don’t do Unreal Trials, you can purchase it at the Market Board for about 6 or 7 million Gil at the moment. Pretty pricey, but overall worth it in my opinion!

Felicitous Fuzzball will cost you 4000 Seafarer’s Cowries – I personally don’t own it as I’m too busy investing in my buildings to purchase it right now, as you should be, too. I guess 4k won’t seem as expensive once we reach the Island Sanctuary endgame, but for now, I’m gonna let it sit there!

Finally, there are two minions from the PvP Series, obtainable at Level 15 and Level 16 – the Clockwork Crimson Chaser and Clockwork Cerulean Chaser. These are time sensitive, meaning you can only get them during PvP Series 2, so if you want to have them, it’s a good idea to start grinding your Crystalline rank once more!

That’s all there is to the new 6.2 minions, at least to my knowledge. I’ll make sure to include the in-between patch minions in my 6.3 minion guide if we happen to get them! If you’re more of a visual person, and you don’t mind getting easy wins in-game, you can check out all of this in my video – and subscribe for more awesome FFXIV stuff!